5
WARNING
Very Sharp Blade
!
PRT-INS-0220Rev.A-7.27.11 ©2011 Bullet Tools
EZ SHEAR
™
SST 20
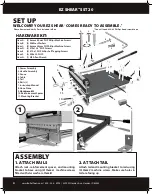
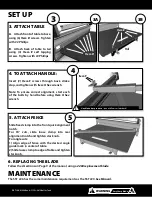
SET UP
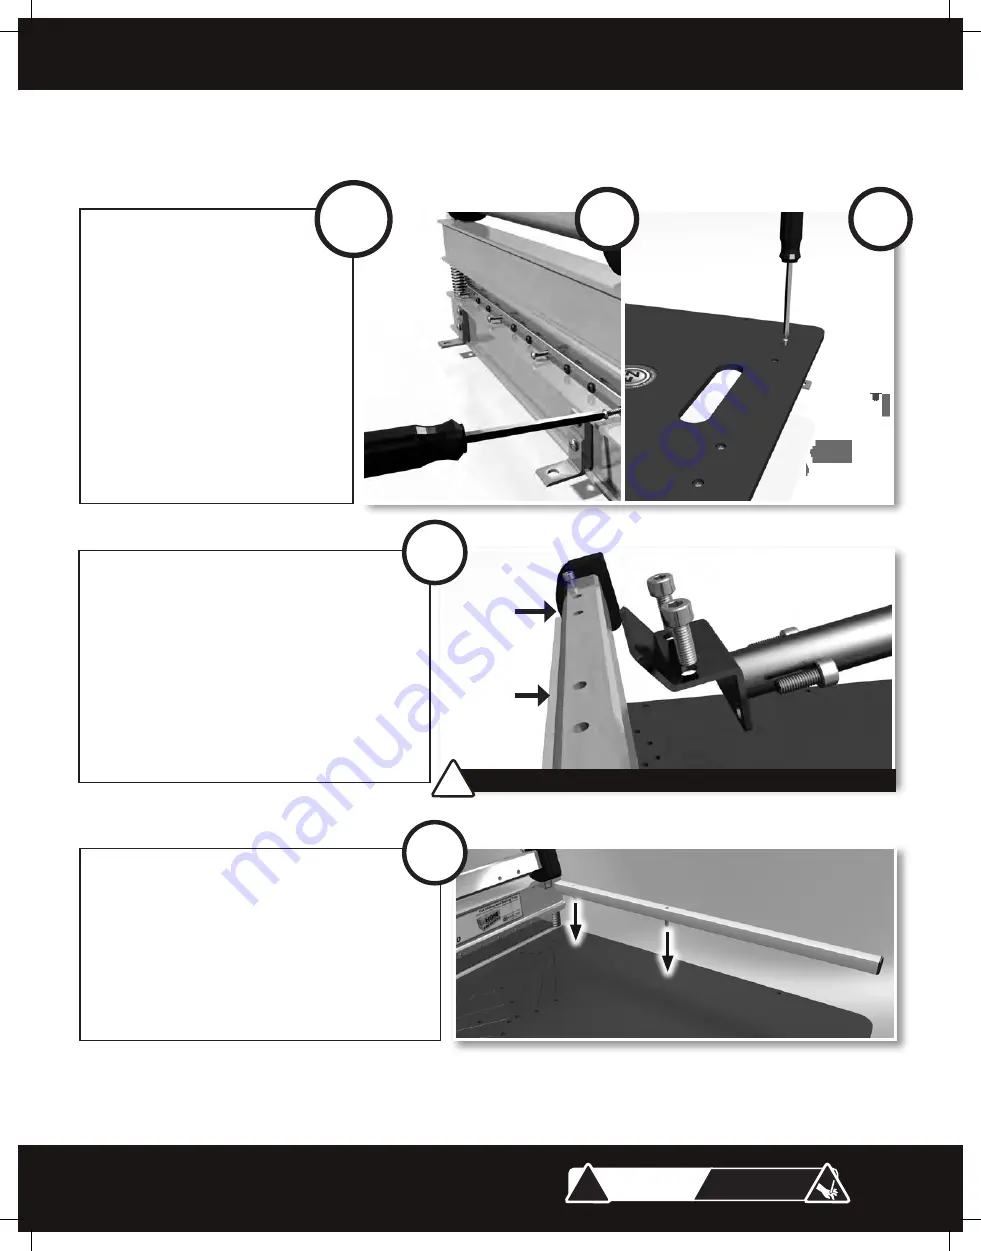
3. ATTACH TABLE
A
. Attach table to base starting
with front, start screws with
hand, use 3
Item D
self tapping
screws.
B
. Attach back of table to tail
using
Item E
self
tapping screws.
4. TO ATTACH HANDLE:
Align handle to preferred position (center
or right) insert screws from handle
assembly, and tighten with hex wrench.
Note: To ensure correct alignment, start
each of the four (4) bolts by hand before
using item G hex wrench
5. PLACE THE FENCE
Your EZ Shear SST 20" is equipped with
an aluminum fence which may be set to
common roof pitches. ( 4/12 6/12 8/12 and
12/12 ) Simply align with desired position and
press pins into place.
Note:
The fence is friction fit (requires effort
to insert or remove).
3
3B
4
5
3A
Handle under pressure
- do not allow to slam back!
!
Optional side
location
Center handle
location


