4
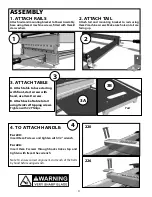
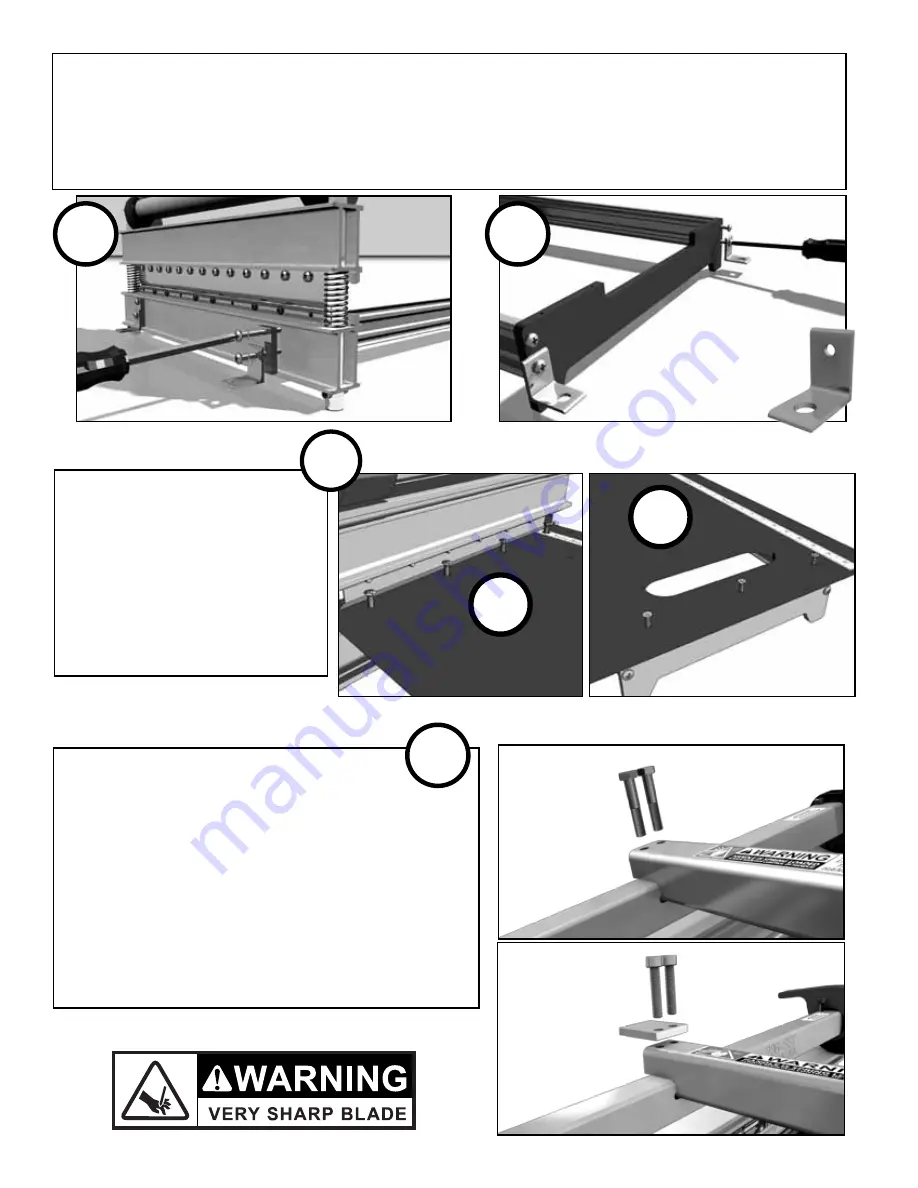
4. TO ATTAcH HAnDlE:
For 220:
Insert
Item F
screws and tighten with 1/2” wrench.
For 226:
Insert
Item F
screws through back stroke stop and
tighten with
Item G
hex wrench.
Note: To ensure correct alignment, start each of the bolts
by hand before using wrench.
3. ATTAcH TAblE
A. Attach table to base starting
with front, start screws with
hand, use Item D screws.
B. Attach back of table to tail
using Item E self tapping screws.
Tighten with #2 Phillips.
3
3b
3A
Tail
ASSEmbly
1. ATTAcH RAIlS
Attach rails and mounting bracket to Power Assembly
base using
Item A
machine screws, fitted with
Item B
star washers.
2. ATTAcH TAIl
Attach tail and mounting bracket to rails using
Item C
machine screws. Make sure holes in tail are
facing up.
2
4
1
220
226

