22
Instruction manual
© 22.02.2017 Bungard GmbH & Co. KG
4.7.1.2.1 Mounting the stencil
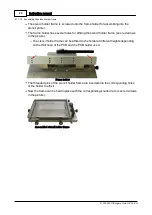
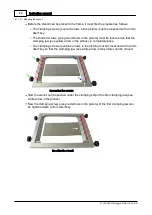
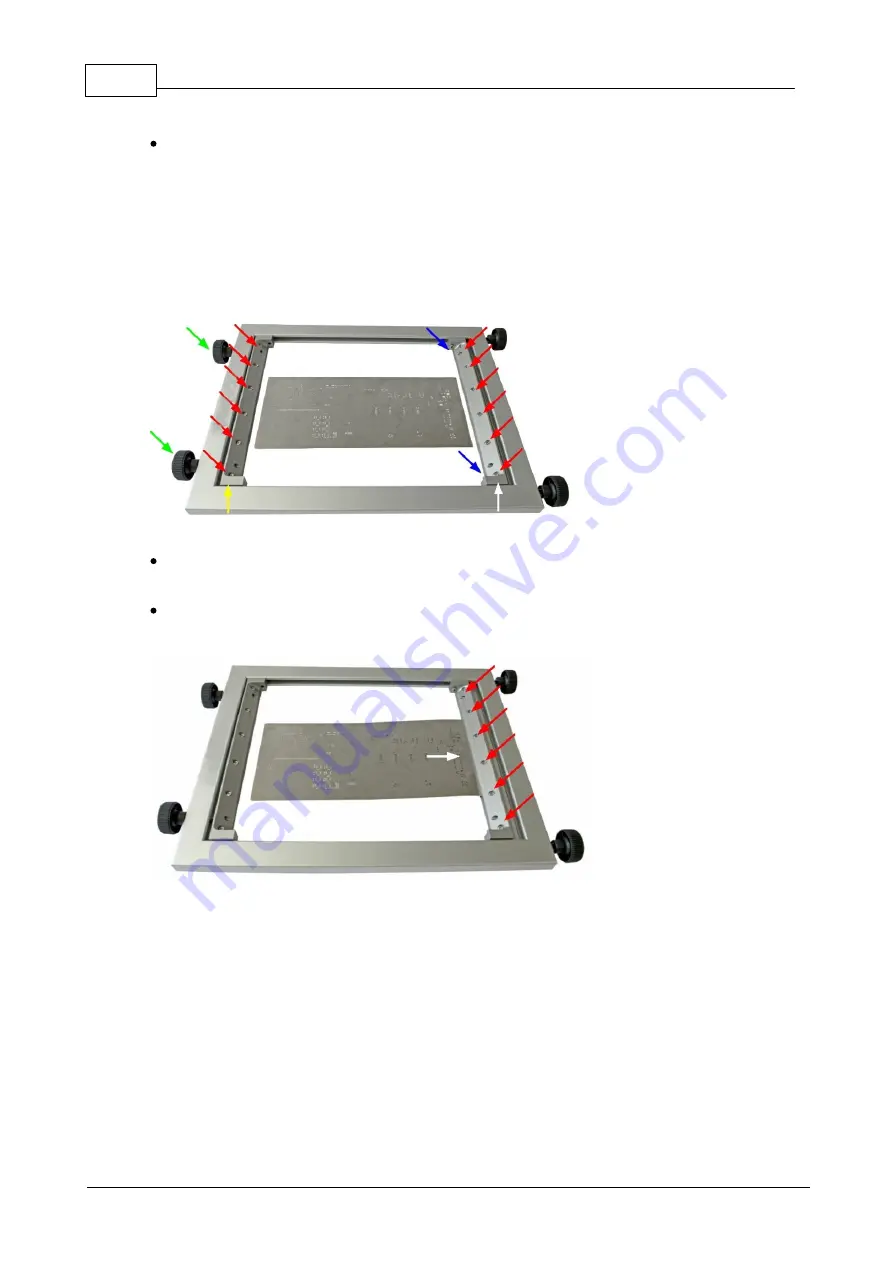
Before the stencil can be placed in the frame, it must first be prepared as follows:
o
The clamping screws (see red arrows in the picture) must be loosened with a 3mm
Allen
®
key.
o
The knurled screws (see green arrows in the picture) must be loosened so that the
clamping jaw (see yellow arrow in the picture) is completely loose.
o
The clamping screws (see blue arrows in the picture) must be loosened with a 3mm
Allen
®
key so that the clamping jaw (see white arrow in the picture) can be moved.
Loos ening the s cr ew s
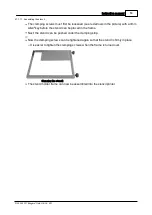
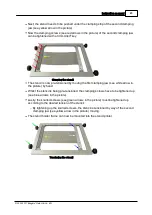
Now the stencil can be pushed under the clamping strip of the first clamping jaw (see
white arrow in the picture).
Now the clamping screws (see red arrows in the picture) of the first clamping jaw can
be tightened with a 3mm Allen
®
key.
Ins er ting the s tencil


