background image

I Englsih

secuENTRY HOME 5000 CYL

Fig.


10

Fig.


12

Fig.


14

Fig.


11

Fig.


13

Fig.


15

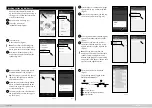
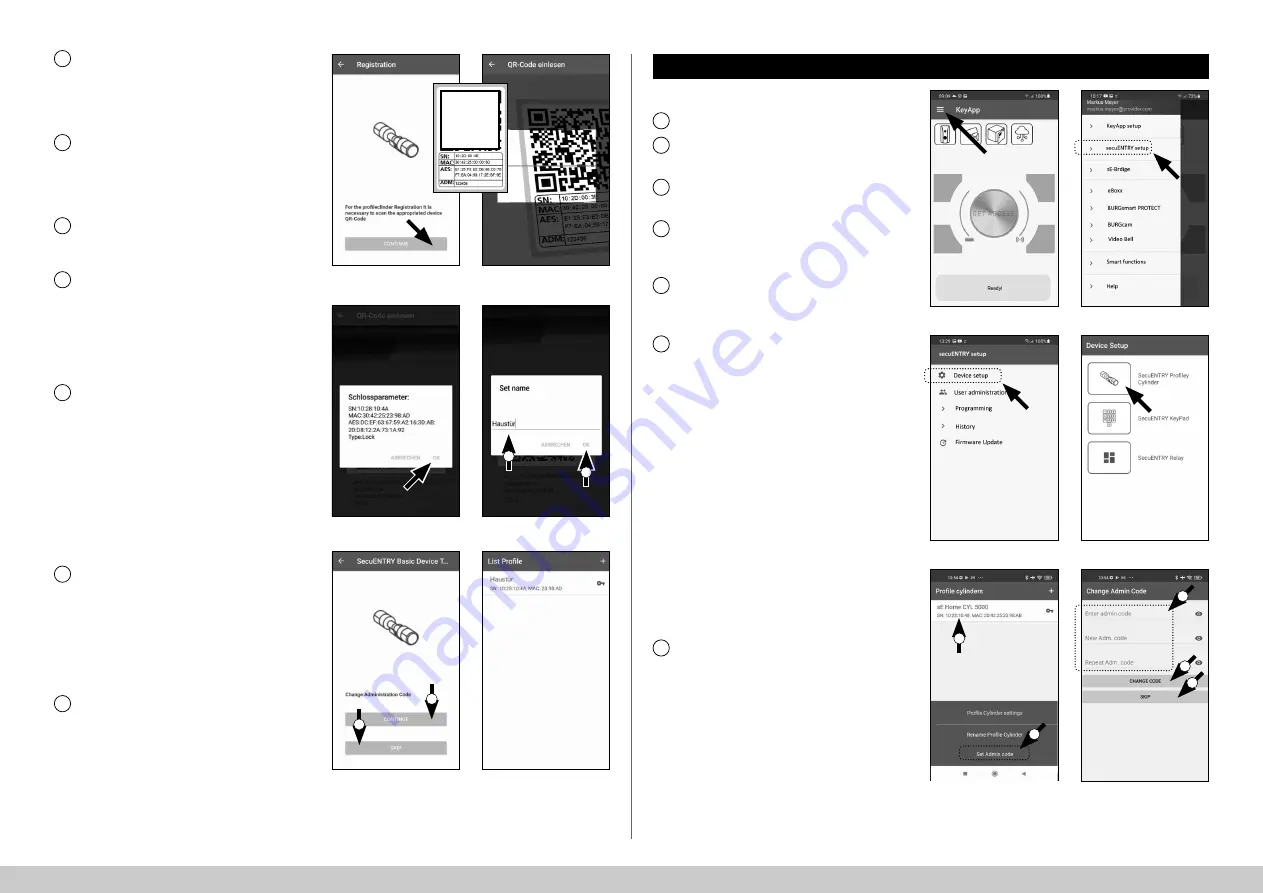
A prompt will appear asking you to 

scan the QR code provided using your 

smartphone camera. The QR code is on 

the sticker enclosed in the packaging 

(see small 

fi

g.).

Tap on "

Continue

" (Fig.


10). You may 

be asked to con

fi

rm the app's access 

to the camera. The camera's picture 

window will then open (Fig.


11). Scan 

the QR


code.

A message appears containing data 

about your cylinder, con

fi

rm this with 

"OK"

 at the bottom right (Fig.


12).

The following window gives you the op-

tion of assigning a name to the cylinder. 

If several cylinders are used, it is recom-

mended to name the cylinder in a way 

that you can directly recognise where 

the cylinder is located or attached. Con-

fi

rm the name with 

"OK"

 (Fig.


13).

A message appears informing you that 

you can change your administrator 

code. As you received a randomly 

generated administrator code at the 

time of delivery, this step is optional. 

Use 

"SKIP"

 to bypass it (I), (Fig.


14).

Note:

 The administrator code can be 

changed at any time at a later date. 

Instructions on how to do this can be 

found in the chapter 

"Change adminis-

trator code"

 on page 4.

Should you wish to change the admin-

istrator code immediately during setup, 

tap on 

"CONTINUE"

 (II) (Fig.


14) for the 

corresponding request. This then leads 

directly to the 

"Change administrator 

code"

 function, which is also described 

in the following chapter on page 4, at 

point 5.
Your secuENTRY cylinder is now fully 

setup. It will now appear in the list of 

setup cylinders 

(Fig.


15).

8

9

10

11

12

13

14

3

QR

I

I

II

II

!

Fig.


21

Fig.


20

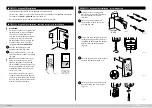
Proceed as follows to delete a cylinder:

Open the main menu (Fig.


16).

Tap on the menu item 

"

secuENTRY setup

" (Fig.


17). 

In the following menu, tap on  

“Device Setup”

 (Fig.


18).

Use the selection menu displayed and 

tap on 

“secuENTRY Pro

fi

ly Cylinder” 

(Fig.


19).

A list with setup cylinders is displayed. 

Select the required cylinder (I) and tap 

on 

“Set Admin Code”

 (II) (Fig.


20).

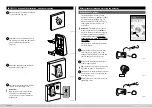
Enter the pre-existing administrator 

code, followed by entering your desired 

administrator code twice (I). Con

fi

rm 

the entries with 

“CHANGE CODE”

 (II) 

(Fig.


21).

Tip: 

The entry is concealed. Tap the eye 

symbol on the right side to visualise 

and check the entry.

Attention: 

Do not select simple codes 

that are easy to guess (e.g. 1-2-3-4-5-6). 

Also, do not select any personal infor-

mation (e.g. birthdays) or other infor-

mation that can be easily be deduced 

by persons who know the user.

Press the 

“SKIP”

 button to cancel the 

process, the administrator code will not 

be changed (III) (Fig.


21).

A message is displayed if the change 

has been made successfully.

1

Change administrator code

Fig.


16

Fig.


17

2

Fig.


18

Fig.


19

3

5

7

6

4

I

II

I

II

III

!

!

Summary of Contents for ENTRY Home 5001 PIN

Page 1: ...aube einsetzen und ist hervorragend für die Neuinstallation wie auch die Nachrüstung geeignet Der ENTRY 5000 CYL kann an Haus und Innentüren angebracht werden Mithilfe der Tastatur ENTRY 7711 Keypad PIN ist es Ihnen möglich mit einem 6 stelligen Benutzercode die Tür auf und abzuschließen Das ENTRY 7711 Keypad PIN kann je nach Belieben und Gegebenheiten bis zu ca vier Meter um die Schließeinheit he...

Page 2: ...tigen Zahlenkombination oder allgemeinen Fehlern leuchten die beiden LEDs neben dem X Symbol Batteriestatus Das System überwacht die Batteriespannung von Tastatur und Zylinder Sobald die Batteriespannung einen kritischen Bereich erreicht wird der Benutzer aufmerksam gemacht Wenn das Batteriestatus Symbol leuchtet müssen die Batterien schnellstmöglich gewechselt werden Zylinderstatus Wenn die einge...

Page 3: ...nder um Ihren secuENTRY Zylinder einzurichten Abb 8 Ihnen wird eine Liste angezeigt in der später bereits registrierte Zylinder zu finden sind Bei einer Neuinstallation der secuENTRY KeyApp und Erst einrichtung eines Zylinders ist diese Liste natürlich leer Um einen neuen Zylinder hinzuzufügen tippen Sie oben rechts auf das Abb 9 secuENTRY KeyApp 1 2 3 4 5 6 7 Abb 9 Abb 3 QR Code Administratorcode...

Page 4: ...der entsprechen den Anfrage auf CONTINUE II Abb 14 Sie gelangen dann direkt in die Funktion Administratorcode ändern welches auch im Folgekapitel auf Seite 4 beschrieben wird an den Punkt 5 Ihr secuENTRY Zylinder ist nun fertig eingerichtet Er erscheint jetzt in der Liste mit eingerichteten Zylindern Abb 15 8 9 10 11 12 13 14 3 QR I I II II Abb 21 Abb 20 Für die Änderung des Administrator codes ge...

Page 5: ...tration Abb 29 Ihnen wird eine Liste über ggf bereits angelegte Benutzer angezeigt Um einen neuen Benutzer anzulegen tippen Sie oben rechts auf das Abb 30 1 2 3 4 Abb 29 Abb 30 Abb 27 Abb 28 Benutzer anlegen und Zutrittsmedium zuweisen Sie haben die Möglichkeit Ihre Tür mithilfe verschiedener Zutrittsmedien zu öffnen Dazu gehört das Öffnen mit einem benutzerdefinierten Code dem Funkschlüssel sE Ke...

Page 6: ...tippen des Diskettensymbols oben rechts III Dem Benutzer wurde innerhalb der KeyApp nun Benutzercode und das ausgewählte Schloss zugewiesen Abb 32 Damit der Zylinder diese Informationen ebenfalls erhält muss der Programmierungs vorgang gestartet werden Die Beschreibung hierzu finden Sie im Kapitel Programmierung Aktualisierung des Zylinders auf Seite 11 I I II II III Benutzer anlegen Funkschlüssel...

Page 7: ...R Code auf dem ganzen Screen angezeigt wird Lassen Sie den QR Code auf dem Screen dargestellt und legen Sie das Smartphone B einen Moment zur Seite Die weiteren Schritte werden an Smart phone A vorgenommen 1 2 3 4 5 Smartphone A Der auf Smartphone B angezeigte QR Code kann nun über die App von Smartphone A eingescannt werden Tippen Sie im Benutzermenü in der Zeile KeyApp eingeben auf das QR Code S...

Page 8: ...e Datei auf Smartphone A zwischen Nach der Programmierung können Sie die Datei wieder löschen Tippen Sie im Benutzermenü oben rechts auf CSV Abb 50 Wählen Sie die CSV Datei aus welche Sie von Smartphone B per Mail erhalten haben I Bestätigen Sie die Auswahl oben rechts mit dem Häkchen Abb 51 Die Daten sind nun in der KeyApp erfasst Weisen Sie danach einen Zylinder zu indem Sie ihn in der Liste der...

Page 9: ...3 Abb 54 Abb 57 Zutrittsmedium von Benutzern ändern Benutzercode Löschen Sie die Eingabe der entspre chenden Zeile und geben Sie sofern gewünscht einen neuen benutzer definierten Code ein I Abb 58 Tipp Die Eingabe erfolgt verdeckt Durch Antippen des Augen Symbols auf der rechten Seite können Sie Ihre Ein gabe sichtbar machen und überprüfen Achtung Bitte wählen Sie keine einfa chen Codes die leicht...

Page 10: ...Öffnen Sie das Hauptmenü Abb 63 Tippen Sie den Menüpunkt secuENTRY setup Abb 64 an Im Untermenü tippen Sie auf User administration Abb 65 Sie sehen die Liste mit angelegten Benutzern Wischen Sie den Eintrag des Benutzers den Sie löschen wollen nach links I und tippen Sie auf das rechts erscheinende LÖSCHEN Feld II Abb 66 3 4 Abb 65 Abb 66 Abb 63 Abb 64 Abb 61 I II Zutrittsmedium von Benutzern ände...

Page 11: ...n Bluetooth Reichweite Sie sich befinden Tippen Sie im Anschluss oben rechts auf PROG FILE II Abb 72 1 2 3 4 5 Abb 69 Abb 71 Abb 67 Abb 68 Abb 70 Wählen Sie die nun in der Liste befindliche Programmierungsdatei aus I und tippen Sie auf Program update unit II Abb 75 Hinweis Wenn Sie mehrere Program mierungsdateien für mehrere Zylinder generiert haben wählen Sie bitte nur den Zylinder aus in dessen ...

Page 12: ...e zu benutzen zu können Mit dem Set ENTRY Home 5001 PIN haben Sie die Möglichkeit das Schloss per KeyApp oder per Tastatur Benutzer zu öffnen 1 2 Abb 81 Abb 86 Abb 83 Abb 85 Abb 82 Aktivieren Sie die Tastatur indem Sie entweder die ON Taste oder die CLOSE Taste drücken I Abb 84 In der Historie des Zylinders wird ein Eintrag Geöffnet ON Taste oder Geschlossen CLOSE Taste generiert Somit lassen sich...

Page 13: ...rden nun aus dem Zylinder abgerufen und in der App als Protokolldatei abgelegt Abb 92 1 2 3 4 5 7 6 Abb 89 Abb 91 Abb 90 Abb 92 Abb 87 Abb 88 Nach dem Abrufen erhalten Sie eine Bestätigungsmeldung welche Sie mit OK bestätigen Abb 93 Gehen Sie nun wieder im Menü einen Schritt zurück und tippen Sie auf den Punkt Lock history Abb 94 Es erscheint eine Liste von Zylindern mit abgerufenen Protokolldatei...

Page 14: ...nen der Einbau des secuENTRY 5000 CYL erklärt Bitte lesen Sie vor der Montage die Montage anleitung sorgfältig durch Entfernen Sie den vorhandenen Türschloss Zylinder indem Sie die Stulpschraube in der Tür lösen und den Zylinder mit eingestecktem Schlüssel herausziehen Abb 98 Entfernen Sie die beiden Sechskant schrauben in den beiden Knäufen mit dem beiliegenden Sechskantschlüssel Abb 99 Ziehen Si...

Page 15: ...r dem secuENTRY Zylinder beiligt Abb 107 Wie Sie einen Benutzercode anlegen erfahren Sie in der Hauptanleitung Ihres secuENTRY Zylinders Wenn der Zylinder sich aktivieren lässt ist die Signalstärke ausreichend und Sie können die Tastatur an der gewünschten Stelle montieren Falls nicht probieren Sie es noch einmal mit einer kürzeren Distanz zwischen Zylinder und Tastatur Abb 107 QR Code Sticker für...

Page 16: ...m Display angezeigt Abb 117 Wenn die Kapazi tät der Batterien im Zylinder zur Neige geht wechseln Sie sie schnellstmöglich Achtung Die Batterien befinden sich in dem Zylinderknauf auf der Innenseite der Tür Sollten Sie den Batteriestatus ignorieren und die Batterie vollständig entleert werden haben Sie keine Möglichkeit mehr das Schloss von außen zu öffnen Eine Anleitung zum Wechseln der Batterien...

Page 17: ...Sie sie fachgerecht Tipp Hinweise zur fachgerechten Entsorgung finden Sie auf Seite 17 dieser Anleitung Legen Sie zwei neue Batterien ein Achten Sie dabei auf die korrekte Polung gemäß der Zeichnung auf der rechten Seite Abb 124 Setzen Sie das Batteriefach wieder in das Gehäuse ein und schrauben Sie es fest Abb 124 2 3 1 Abb 123 Abb 124 Abb 122 Abb 121 Um Ihnen ein qualitativ einwandfreies und hoc...

Page 18: ...www burg biz BURG WÄCHTER KG Altenhofer Weg 15 58300 Wetter Germany www burg biz secuENTRY Set ENTRY Home 5001 PIN BD Hauptanleitung secuENTRY Set ENTRY 5001 PIN HBG SWI 100822 ...

Page 19: ...g or laying of cables is required and it is ideal ly suited for both new installations and retrofitting The ENTRY 5000 CYL can be fitted to house and interior doors Using the ENTRY 7711 Keypad PIN you can unlock and lock the door with a 6 digit user code The ENTRY 7711 Keypad PIN can be installed up to approx four metres from the locking unit depending on preference and conditions The ENTRY Home 5...

Page 20: ... illuminate if an invalid number combination is entered or if general errors occur Battery status The system monitors the keypad and cylinder battery voltage The user is alerted as soon as the battery voltage reaches a critical range Batteries must be changed as soon as possible after the battery status symbol illuminates Cylinder status When the number combination entered is correct the cylinder ...

Page 21: ...o setup your secuENTRY cylinder Fig 8 A list is displayed in which cylinders that have already been registered can be found at a later date This list is of course empty when installing the secuENTRY KeyApp and setting up a cylinder for the first time Add a new cylinder by tapping on the in the top right hand corner Fig 9 secuENTRY KeyApp 1 2 3 4 5 6 7 Fig 9 Fig 3 QR code Administrator code QR The ...

Page 22: ... setup tap on CONTINUE II Fig 14 for the corresponding request This then leads directly to the Change administrator code function which is also described in the following chapter on page 4 at point 5 Your secuENTRY cylinder is now fully setup It will now appear in the list of setup cylinders Fig 15 8 9 10 11 12 13 14 3 QR I I II II Fig 21 Fig 20 Proceed as follows to delete a cylinder Open the mai...

Page 23: ...ation in the submenu Fig 29 A list of users that have already been created is displayed Create a new user by tapping on the in the top right hand corner Fig 30 1 2 3 4 Fig 29 Fig 30 Fig 27 Fig 28 Create user and assign access medium There are various access media available to open your door Including opening with a user defined code the sE Key radio key and the KeyApp itself Once you have created ...

Page 24: ...p right hand corner III The user has now been assigned the user code and the selected lock within the KeyApp Fig 32 The programming process must be started so that the cylinder also receives this informa tion The corresponding description can be found in the chapter Programming Updating the cylinder on page 11 I I II II III Create user Radio key sE Key 1 2 3 4 Fig 33 Fig 35 Fig 34 Fig 36 Note The ...

Page 25: ...40 after which a QR code is displayed on the entire screen Leave the QR code displayed on the screen and put the smartphone B aside for a moment The next steps are performed on smartphone A 1 2 3 4 5 Smartphone A The QR code displayed on smartphone B can now be scanned via the app on smartphone A Tap the QR code symbol in the Enter KeyApp line in the user menu Fig 41 You may be asked to confirm th...

Page 26: ...eceived from smartphone B on smartphone A The file can be deleted again after programming Tap on CSV in the user menu at the top right Fig 50 Select the CSV file that you received by email from smartphone B I Confirm the selection at the top right with the tick Fig 51 The data is now recorded in the KeyApp Next assign a cylinder by tapping it in the list of cylinders already registered and save yo...

Page 27: ... Fig 53 Fig 54 Fig 57 Changing the user access medium User code Delete the entry of the relevant line and if required enter a new user defined code I Fig 58 Tip The entry is concealed Tap the eye symbol on the right side to visualise and check the entry Attention Do not select simple codes that are easy to guess e g 1 2 3 4 5 6 Also do not select any personal infor mation e g birthdays or other in...

Page 28: ...user Open the main menu Fig 63 Tap on the menu item secuENTRY setup Fig 64 Tap on User administration in the submenu Fig 65 A list of users is displayed Swipe the entry of the user you wish to delete to the left I and tap on the DELETE field II that appears on the right Fig 66 3 4 Fig 65 Fig 66 Fig 63 Fig 64 Fig 61 I II Changing the user access medium Radio key sE Key Tap the relevant line Fig 59 ...

Page 29: ...ue tooth range of which you are located Then tap on PROG FILE II at the top right Fig 72 1 2 3 4 5 Fig 69 Fig 71 Fig 67 Fig 68 Fig 70 Select the programming file that is now in the list I and tap on Program update unit II Fig 75 Note If you have generated several programming files for several cylinders please only select the cylinder within the Bluetooth range of which you are located Once again y...

Page 30: ...tery protection strips The ENTRY Home 5001 PIN set allows you to open the lock via KeyApp or via keypad user 1 2 Fig 81 Fig 86 Fig 83 Fig 85 Fig 82 Activate the keypad by pressing either the ON key or the CLOSE key I Fig 84 An entry Opened ON button or Closed CLOSE button is generated in the cylinder history This allows for the Open and Close operations to be differentiated in the history Note For...

Page 31: ...ry data is now retrieved from the cylinder and stored in the app as a log file Fig 92 1 2 3 4 5 7 6 Fig 89 Fig 91 Fig 90 Fig 92 Fig 87 Fig 88 After retrieval a confirmation message appears which you confirm with OK Fig 93 Go back one step in the menu and tap on the item Lock history Fig 94 A list of cylinders with retrieved log files appears Select the required cylinder Fig 95 The menu of the sele...

Page 32: ...ion The installation of the secuENTRY 5000 CYL is explained below Prior to installation please read the installation instructions carefully Remove the existing door lock cylinder by loosening the forend screw in the door and pulling out the cylinder with the key inserted Fig 98 Remove the two hexagonal screws in the two knobs with the enclosed hexagonal spanner Fig 99 Pull off the knob on the outs...

Page 33: ... you haven t already changed it can be found on the sticker enclosed with the secuENTRY cylinder Fig 107 The master operating instructions for your secuENTRY cylinder describe how to create a user code If the cylinder activates the signal strength is sufficient and the keypad can be installed in the desired location If not try again with a shorter distance between cylinder and keypad Fig 107 QR co...

Page 34: ...ecuENTRY cylinder is activated via the KeyApp Fig 117 When the batteries in the cylinder are running low replace them as soon as possible Attention The batteries are located in the cylinder knob on the inside of the door Please note that if you ignore the battery status and the battery is completely discharged you will no longer be able to open the lock from the outside Instructions on replacing t...

Page 35: ...ip Instructions for proper disposal can be found on page 17 of this manual Insert two new batteries Make sure that the polarity is correct according to the drawing Fig 124 Insert the battery compartment back into the housing and screw it tight Fig 124 2 3 1 Fig 123 Fig 124 Fig 122 Fig 121 In order to deliver a flawless and high quality product to you and to better assist you in case of service or ...

Page 36: ...www burg biz BURG WÄCHTER KG Altenhofer Weg 15 58300 Wetter Germany www burg biz secuENTRY Set ENTRY Home 5001 PIN BD Main Instruction Manual secuENTRY Set ENTRY 5001 PIN EN HBG SWI 040422 ...

Page 37: ...ouvelles installations ainsi que pour les anciennes L ENTRY 5000 CYL peut être monté dans les portes d entrée ou d intérieur Le clavier ENTRY 7711 Keypad PIN permet d ouvrir et de fermer la porte avec un code utilisateur à 6 chiffres L ENTRY 7711 Keypad PIN peut être installé jusqu à environ quatre mètres autour de l unité de serrure en fonction de vos souhaits et des circonstances L ENTRY Home 50...

Page 38: ...u d erreurs générales les deux LED à côté du symbole X s allument État de la batterie Le système surveille la tension de batterie du clavier et du cylindre Dès que la tension de batterie atteint une valeur critique l utilisateur en est informé Si l icône d état de la batterie est allumée les batteries doivent être remplacées dès que possible État du cylindre Si la combinaison de chiffres saisie es...

Page 39: ...NTRY Fig 8 Une liste s affiche dans laquelle seront affichés les cylindres déjà enregistrés Bien entendu en cas d une nouvelle installation de l appli secuENTRY KeyApp ou de la première configuration d un cylindre cette liste est encore vide Pour ajouter un nouveau cylindre appuyez sur le en haut à droite Fig 9 secuENTRY KeyApp 1 2 3 4 5 6 7 Fig 9 Fig 3 Code QR Code administrateur QR Le code QR I ...

Page 40: ...CONTINUE II lorsque l invite pertinente apparaît Fig 14 Vous serez alors directement redirigé à la fonction Modifier le code admi nistrateur qui est également décrite dans le chapitre suivant à la page 4 au point 5 Votre cylindre secuENTRY est main tenant prêt à l emploi Il apparaît désormais dans la liste des cylindres configurés Fig 15 8 9 10 11 12 13 14 3 QR I I II II Fig 21 Fig 20 Si vous souh...

Page 41: ...9 Une liste d utilisateurs déjà créés est affichée Pour créer un nouvel utilisateur appuyez sur le en haut à droite Fig 30 1 2 3 4 Fig 29 Fig 30 Fig 27 Fig 28 Créer un utilisateur et attribuer un moyen d accès Vous pouvez ouvrir votre porte à l aide de divers moyens d accès Notamment à l aide d un code définit par l utilisateur la télécommande sE Key et l appli KeyApp elle même En créant un cylind...

Page 42: ...à droite III Le code utilisateur et la serrure sélectionnée sont maintenant attribués à l utilisateur dans l appli KeyApp Fig 32 Pour que le cylindre reçoive également ces informations le processus de programmation doit être lancé Reportez vous au chapitre Programmation Mise à jour du cylindre à la page 11 pour la description pertinente I I II II III Créer un utilisateur Télécommande sE Key 1 2 3 ...

Page 43: ... s affichera en plein écran Laissez le code QR affiché à l écran et mettez de côté le smartphone B pour l instant Les étapes suivantes doivent être effectuées sur le smartphone A 1 2 3 4 5 Smartphone A Le code QR affiché sur le smartphone B peut maintenant être scanné par l inter médiaire de l appli sur le smartphone A Appuyez sur l icône du code QR dans la ligne KeyApp du menu utilisateur Fig 41 ...

Page 44: ... le cache du smart phone A Après la programmation vous pourrez supprimer le fichier Appuyez sur CSV en haut à droite du menu utilisateur Fig 50 Sélectionnez le fichier CSV que vous avez reçu par e mail du smartphone B I Cochez la sélection en haut à droite pour la confirmer Fig 51 Les données sont désormais enregis trées dans l appli KeyApp Attribuez ensuite un cylindre en ap puyant dessus dans la...

Page 45: ...e moyen d accès d un utilisateur Code utilisateur Supprimez l entrée de la ligne cor respondante et si vous le souhaitez saisissez un nouveau code défini par l utilisateur I Fig 58 Astuce les caractères saisis sont dissi mulés En appuyant sur l icône de l œil sur le côté droit vous pouvez rendre visible et vérifier les caractères saisis Attention veuillez ne pas sélectionner des codes simples et t...

Page 46: ...suit Ouvrez le menu principal Fig 63 Appuyez sur la rubrique secuENTRY setup Fig 64 Dans le sous menu appuyez sur User administration Fig 65 La liste d utilisateurs créés s affiche Glissez la désignation de l utilisateur que vous souhaitez supprimer vers la gauche I et appuyez sur le champ SUPPRIMER II affiché à droite Fig 66 3 4 Fig 65 Fig 66 Fig 63 Fig 64 Fig 61 I II Modifier le moyen d accès d ...

Page 47: ... le cylindre dans la portée Bluetooth duquel vous vous trouvez Appuyez ensuite sur PROG FILE II en haut à droite Fig 72 1 2 3 4 5 Fig 69 Fig 71 Fig 67 Fig 68 Fig 70 Sélectionnez le fichier de programma tion qui se trouve maintenant dans la liste I et appuyez sur Program update unit II Fig 75 Remarque si vous avez généré plu sieurs fichiers de programmation pour plusieurs cylindres veuillez ne séle...

Page 48: ... les utiliser Avec le kit ENTRY Home 5001 PIN vous avez la possibilité d ouvrir la serrure par l intermédiaire de l appli KeyApp ou par l intermédiaire du clavier code utilisateur 1 2 Fig 81 Fig 86 Fig 83 Fig 85 Fig 82 Activez le clavier en appuyant sur la touche ON ou sur la touche CLOSE I Fig 84 Une entrée Ouvert touche ON ou Fermé touche CLOSE est générée dans l historique du cylindre Les événe...

Page 49: ...inte nant extraites du cylindre et stockées dans l appli sous forme de fichier jour nal Fig 92 1 2 3 4 5 7 6 Fig 89 Fig 91 Fig 90 Fig 92 Fig 87 Fig 88 Après la récupération vous recevrez un message de confirmation lequel vous devrez confirmer avec OK Fig 93 Maintenant revenez en arrière d un niveau dans le menu et appuyez sur Lock history Fig 94 Une liste des cylindres dont les fichiers journaux s...

Page 50: ...secuENTRY 5000 CYL Vous trouverez ci après les instructions de montage du secuENTRY 5000 CYL Veuillez lire ces instructions attentive ment avant de procéder au montage Retirez le cylindre de serrure existant en desserrant la vis de fixation dans la porte et en retirant le cylindre à l aide de la clé insérée Fig 98 Retirez les deux vis à six pans des deux boutons à l aide de la clé à six pans fourn...

Page 51: ...inistrateur si vous ne l avez pas déjà modifié se trouve sur l autocollant inclus dans l emballage du cylindre secuENTRY Fig 107 Vous pouvez trouver com ment créer un code utilisateur dans les instructions principales de votre cylindre secuENTRY Si le cylindre peut être activé l intensité du signal est suffisante et vous pouvez monter le clavier à l emplacement souhaité Sinon réessayez avec une di...

Page 52: ...diaire de l ap pli KeyApp l état de la batterie respec tive est affiché Fig 117 Si la capacité des batteries dans le cylindre est faible changez les dès que possible Attention les batteries se trouvent dans le bouton du cylindre à l intérieur de la porte Si vous ignorez l état des batteries et qu elles se vident complè tement il sera impossible d ouvrir la serrure depuis l extérieur Les instructio...

Page 53: ...tructions Astuce reportez vous à la page 17 de ce manuel pour des instructions sur l élimination appropriée Insérez deux nouvelles batteries Faites attention à la polarité correcte selon le dessin à droite Fig 124 Replacez le compartiment à batteries dans le boîtier et vissez le fermement Fig 124 2 3 1 Fig 123 Fig 124 Fig 122 Fig 121 Pour être en mesure de vous fournir un produit de qualité élevée...

Page 54: ...www burg biz BURG WÄCHTER KG Altenhofer Weg 15 58300 Wetter Germany www burg biz Kit secuENTRY ENTRY Home 5001 PIN 1RWLFH SULQFLSDOH VHFX 175 6HW 175 3 1 5 6 b ...

Reviews: