Muting entries are executed in the order in which they are listed. If multiple entries for the same channel are
entered, the desired result may not occur due to the command sequence. To change the order of the muting
entries, highlight a field within the entry you would like to move, and use the blue arrows to change its
position. To delete an entry, highlight a field within the entry and click the red .
Note: The default monitor view displays muted channels in gray.
Note: Muting a channel with a pending alarm does not clear that alarm. Only new alarms will be ignored while the
channel is muted.
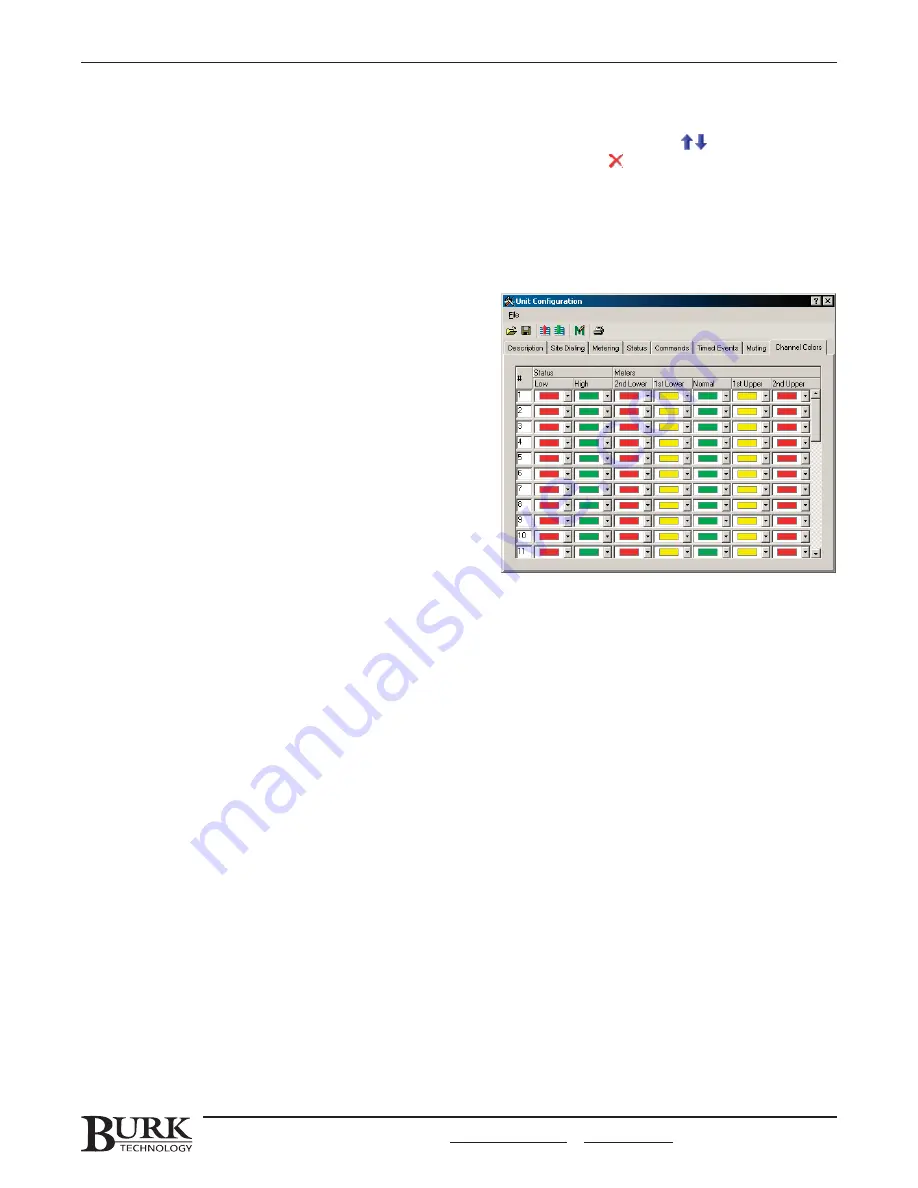
Meter and Status Colors
In the Meter Colors and Status Colors tabs you can
customize the colors that define the value ranges of your
metering channel bar graphs and the colors that indicate
high and low states in the default view. The major difference
starting in version 5 software is that these colors are saved
directly to the I/O unit and not stored locally on a single
PC. This way, any computer accessing the remote site will
view the same colors ranges and status indicators for each
channel, avoiding confusion.
To set up meter and status colors colors:
1. Click the Meter or Status Color tab in the unit
configuration window.
2. For each channel, select a color to represent each
metering range or status indicator.
Note: You do not need to configure alarms for each metering limit in order to use the limit value to define color
ranges.
SAVING & PRINTING CONFIGURATIONS
After making changes in the Unit Configuration window, you can save the settings to an archive (stored on your
hard drive or a floppy disk), save them to your I/O unit, or abandon them and revert to the last uploaded unit
configuration. You can also print your settings for convenient hard-copy access.
Saving to the I/O Unit
To save the configuration to the selected I/O unit, select Save to Unit from the File menu. Lynx will transfer the
configuration settings to the unit and notify you when the upload is complete.
To see the changes in the Lynx default monitor view, close the configuration window, and with the appropriate
unit selected in the Site List, click Refresh in the main toolbar. Any changes you made to labels, limits, unit
names, etc. will be displayed.
Saving to an Archive
You can save your configuration settings in an archive so that they may be easily restored in the future. To
archive your settings, select Save in Archive from the Configuration window’s File menu. The Save dialog will ask
you for a file name for your archive. After entering the file name, click Save. Lynx will notify you when the settings
have been successfully archived.
CHAPTER 4: I/O UNIT CONFIGURATION
41
CUSTOMER SUPPORT: 978-486-3711 • support@burk.com • www.burk.com
Summary of Contents for GSC3000
Page 8: ...GSC3000 VRC2500 INSTALLATION OPERATION MANUAL viii ...
Page 22: ...GSC3000 VRC2500 INSTALLATION OPERATION MANUAL 14 ...
Page 32: ...GSC3000 VRC2500 INSTALLATION OPERATION MANUAL 24 ...
Page 40: ...GSC3000 VRC2500 INSTALLATION OPERATION MANUAL 32 ...
Page 52: ...GSC3000 VRC2500 INSTALLATION OPERATION MANUAL 44 ...
Page 68: ...GSC3000 VRC2500 INSTALLATION OPERATION MANUAL 60 ...
Page 120: ...GSC3000 VRC2500 INSTALLATION OPERATION MANUAL 112 ...
Page 128: ...GSC3000 VRC2500 INSTALLATION OPERATION MANUAL 120 ...
Page 132: ...GSC3000 VRC2500 INSTALLATION OPERATION MANUAL 124 ...
Page 140: ...GSC3000 VRC2500 INSTALLATION OPERATION MANUAL 132 ...
Page 144: ...GSC3000 VRC2500 INSTALLATION OPERATION MANUAL 136 ...


