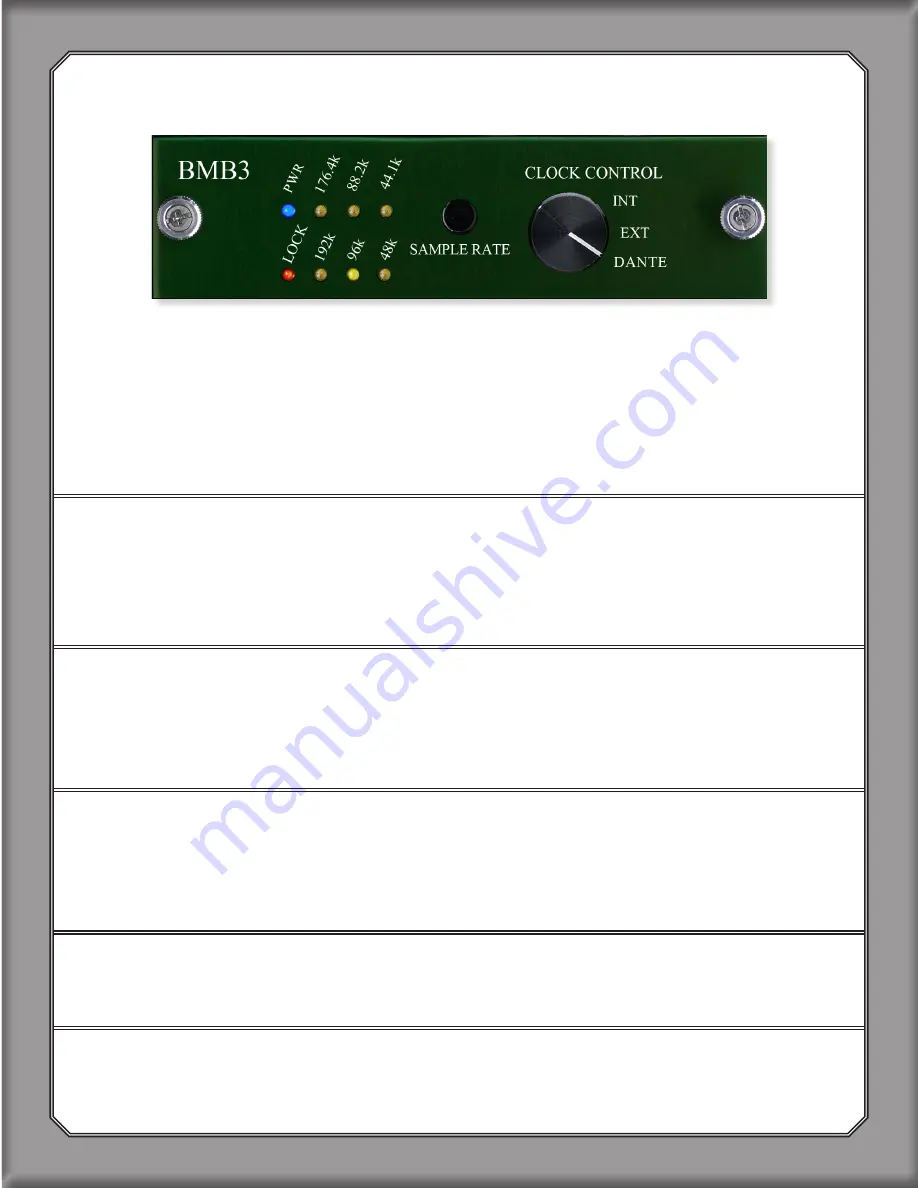
2.5 Set BMB3 Front Panel to INT, EXT, or DANTE
For a complete guide to Dante Clocking, see page 10.
• When using the
B16
on internal clock, set to INT
• If using external word clock, set to EXT
• When clocking off Dante network, set to DANTE
2.6 Connect The Computer’s Native Ethernet Port To Gigabit
Ethernet Switch
Even when using a
Dante
PCIe Card
, Dante Controller requires a native Ethernet port and will
not
work via the
PCIe Card
.
2.7 If Using A PCIe Card, Connect Primary Port Of PCIe Card
To Gigabit Ethernet Switch
When using a
Dante
PCIe Card
, audio is transmitted via the
PCIe Card
.
2.8 For INT, Set BMB3 To Desired Sample Rate
Push the “Sample Rate” button on
BMB3
faceplate to toggle through sample rates. When set
to INT,
BMB3
must
always
be manually set to the desired sample rate. When using EXT or
DANTE clock, the
MOTHERSHIP
will
not
need to be manually set via the front panel.
2.9 For Dante Virtual Soundcard (DVS), Open And Run DVS
2.10 Open “Dante Controller”
Image 9
:
BMB3
Front panel. Set Clock Control to INT, EXT, or DANTE
5
CHAPTER 2


