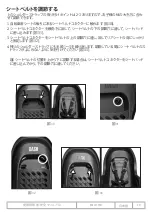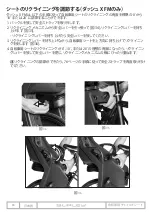
background image

自転車用チャイルドシート

日本語

72

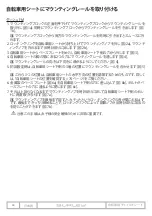
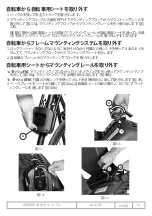
自転車にフレームマウンティングシステムを取り付ける

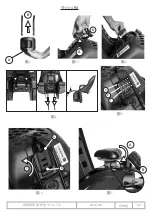
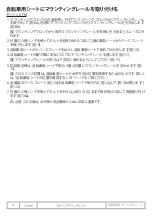
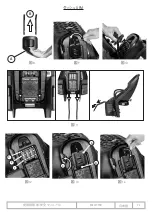
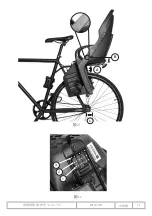
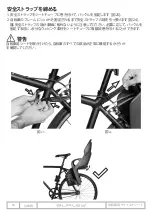
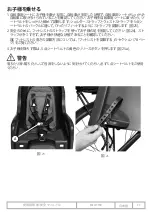
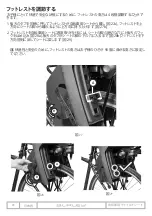
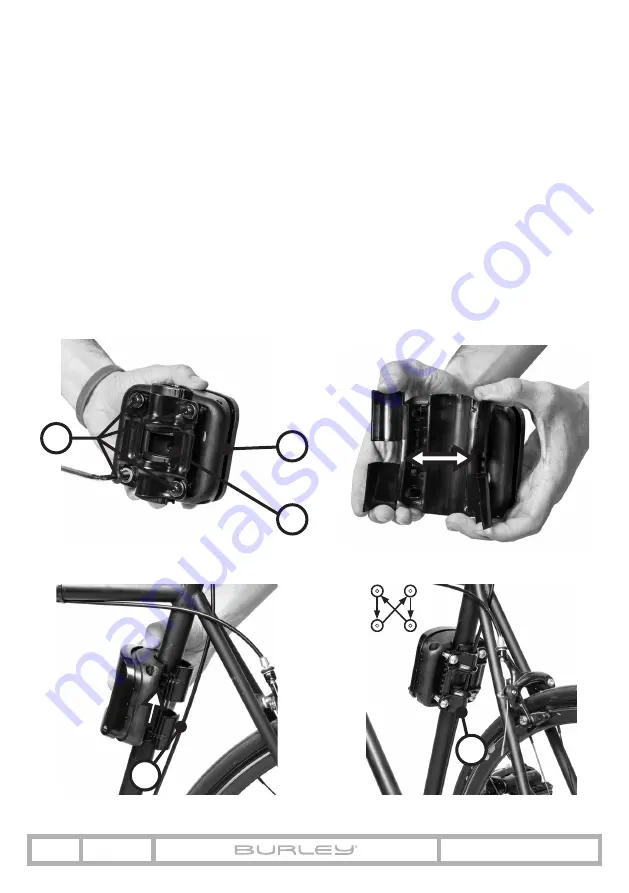
1.  付属の六角レンチを使って 4 本のネジとロックワッシャーを取り外して [図 15c]、マウンティン

グプレート [図 15a] をマウンティングブロック [図 15b] から取り外します。

2.  マウンティングブロックのフレームプロテクターを開いて [図 16]、マウンティングブロックを正

面に向け、マウンティングレールの穴を上向きにして自転車のシートチューブに巻き付けます [

図 17]。 


注:

フレームのこの部分にケーブルがある場合、フレームプロテクターと自転車のフレームの間

には何もない状態になるようにケーブルの下に配置します [図 17a]。

3.  4 本のネジ(ロックワッシャー付き)と付属の六角レンチを使ってマウンティングブロックに舞う

ティングプレートを再度取り付けます [図 18]。4 本のネジを十字にゆっくりと締めます。締め具

の状態は定期的に確認してください。マウンティングプレートとマウンティングブロックの間の

スペースはすべての側で均等になるようにしてください。

注:

フレームのこの部分にケーブルがある場合は、フレームプロテクターとマウンティングプレ

ートの間の中央チャネルに沿って這うように配置してください [図 18a]。

 15

 16

 17

 18

 C

 B

 A

 A

 A

Summary of Contents for DASH FM

Page 1: ...ICYCLE SEAT MANUAL IMPORTANT READ CAREFULLY AND KEEP FOR FUTURE REFERENCE 重要 本書はよく お読みのう え保管して おいてく ださい IMPORTANT LISEZ ATTENTIVEMENT CE DOCUMENT ET GARDEZ LE POUR RÉFÉRENCE FUTURE IMPORTANTE LEA ATENTAMENTE ESTE MANUAL Y CONSÉRVELO PARA FUTURAS CONSULTAS ...

Page 2: ...ais 39 Réglage de l inclinaison du siège 40 Retrait du siège enfant du vélo 41 Retrait de l assemblage 41 Retrait des rails de montage du siège enfant 41 Avant d utiliser votre produit 42 Comment contacter Burley 42 Identification du produit 42 Entretien de votre produit Burley 42 Capacités maximales 42 Garantie limitée Burley 43 CAUTION 4 Compatibility 6 Burley Bicycle Seat Guide 7 Attaching the ...

Page 3: ...juste de la reclinación del asiento 60 Desinstalación del asiento infantil de la bicicleta 61 Desinstalación del sistema 61 Retirar las guías de montaje del asiento infantil 61 Antes de circular con la bicicleta 62 Conecte con Burley 62 Identificación del producto 62 Mantenimiento de su producto Burley 62 Capacidades máximas 62 Garantía limitada de Burley 63 重要 自転車用シートを使用する前に このバーリー のマニュアルをよく理解してく...

Page 4: ...ed only by a kickstand WARNING Do not modify the Bicycle Seat WARNING Do not use the Bicycle Seat if any part is broken WARNING The Safety Strap must always be fastened to the bicycle frame before use see Page 16 The bicycle to which the Bicycle Seat is attached must be in good working order of a type appropriate for the additional load and of proper size and adjustment for the rider Check the bic...

Page 5: ...Particular dangers include entrapment of feet in the wheel and of fingers in brake mechanisms and sprung saddles Always attach the 5 point harness snugly around the child ensuring they are restrained in the Bicycle Seat Ensure that the restraint system is not loose or able to become trapped in any moving parts particularly the wheels When no child is being carried fasten the retention system buckl...

Page 6: ...h wheel diameters of either 26 650B 27 5 700C 29 This Bicycle Seat is compatible with E Bikes as long as the requirements listed above are met This Bicycle Seat must NOT be mounted to Full Suspension Bicycles Motorized Vehicles E Bikes OK Bicycles with triangular or square shape tubes Bicycles with carbon fiber frames Always consult with the bicycle manufacturer to ensure it is compatible with Bic...

Page 7: ...nector 8 Center of Gravity Indicator 9 Serial Number Label 10 Frame Mounting System 11 Mounting Knob 12 Locking Ring 1 2 4 3 6 7 8 9 5 10 14 15 18 16 19 20 11 12 13 21 17 13 Base Plate 14 Mounting Rails 15 Mounting Block 16 Security Indicators 17 Frame Protector 18 Mounting Plate 19 Screws 20 Lock Washers 21 Hex Wrench 22x Recline Mechanism 23x Safety Lever 24x Recline Lever 22x 23x 24x Dash X ...

Page 8: ...Mounting Rails should be such that they are bending downwards Figure 4 5 For initial setup align the Mounting Rails with position 3 on the underside of the Bicycle Seat Figure 5 NOTE These 3 positions are for adjusting the horizontal position of the Bicycle Seat See Checking the Position of the Bicycle Seat Page 14 for further details 6 Insert the metal Base Plate Figure 6a into the slots on the u...

Page 9: ...OWNER S INSTRUCTION SAFETY MANUAL 9 BURLEY COM ENG Figure 1 Figure 2 Figure 3 DASH FM Figure 4 Figure 5 Figure 6 Figure 7 A B A B C A B B A 3 2 1 ...

Page 10: ...ycle Seat Figure 10 4 Pass the Mounting Rails through the 2 holes between the legs of the Bicycle Seat Figure 11 NOTE The orientation of the Mounting Rails should be such that they are bending downwards Figure 11 5 For initial setup align the Mounting Rails with position 3 on the underside of the Bicycle Seat Figure 12 NOTE These 3 positions are for adjusting the horizontal position of the Bicycle...

Page 11: ...OWNER S INSTRUCTION SAFETY MANUAL 11 BURLEY COM ENG DASH X FM Figure 14 Figure 13 Figure 12 Figure 11 Figure 8 Figure 9 Figure 10 A B C B A 3 1 2 ...

Page 12: ...ng this part of the frame the Frame Protector should go underneath them so that there is nothing between it and the bicycle frame Figure 17a 3 Re attach the Mounting Plate to the Mounting Block using the 4 screws with lock washers and the provided Hex Wrench Tighten the 4 screws crisscross and in stages Figure 18 Check the security of the fasteners regularly Ensure that the space between the Mount...

Page 13: ...9 until you hear an audible click and until the 2 green Safety Indicators pop out of the front of the Mounting Block Figure 20 WARNING Do NOT proceed with using your Bicycle Seat until you check its Horizontal and Vertical Position and secure the Safety Strap as detailed on the following pages Figure 19 Figure 20 X CAUTION This step is extremely important for the safety of the child ...

Page 14: ...ty Indicator MUST be positioned either In front of the bicycle s rear wheel axle or No more than 3 93 in 10 cm behind the bicycle s rear wheel axle Figure 21c If the Center of Gravity Indicator is more than 3 93 in 10 cm behind the Bicycle s rear wheel axle Remove the Mounting Rails from the Mounting Block by following the instructions for Removing the Bicycle Seat from your Bicycle on Page 21 Det...

Page 15: ...OWNER S INSTRUCTION SAFETY MANUAL 15 BURLEY COM ENG Figure 21 Figure 22 B C A 3 2 1 ...

Page 16: ...ecured to the Bicycle frame Figure 24 NOTE Be careful to ensure that the free end of the Safety Strap is not able to come in contact with the wheel of the Bicycle If needed excess webbing material can be wrapped around the Seat Tube multiple times before securing the buckle WARNING Ensure that all parts of the bicycle function correctly when the Bicycle Seat is attached Figure 23 Figure 24 ...

Page 17: ...harness buckle and adjust straps so they fit securely Figure 25 2 To ensure the child s safety secure their feet using the straps on the footrest Figure 26 Make sure that the child is comfortable and that the straps are not too tight NOTE See the Adjusting the Footrests section Page 18 for instructions on how to adjust the Footrest height 3 To remove the child press the yellow release button on th...

Page 18: ...ay from the leg of the seat Figure 27b 2 To re attach each footrest to the Bicycle Seat engage the upper rear hook in the appropriate notch in the leg of the seat Figure 28a then rotate the footrest down and towards the leg of the seat Figure 28b until the rear tabs lock into the lower notch in the leg of the seat Figure 29 NOTE For optimal comfort and safety the footrest should be set at a height...

Page 19: ...eat pad Figure 31 3 Pass the Harness Connector through the upper harness adjustment hole then rotate the Harness Connector so that it is secure against the rear seat back Figure 32 4 Repeat steps 1 3 for the other shoulder strap Ensure that harness straps are not twisted during harness adjustment Figure 33 NOTE If you are adjusting from the upper harness position to the lower harness position the ...

Page 20: ...e 34 and then lift the Recline Lever up Figure 35 The Safety Lever can be released once you lift the Recline Lever 3 While lifting up on the Recline Lever lift the front of the Bicycle Seat upwards to increase the recline angle Figure 36 4 Once the Bicycle Seat is in the desired 0 10 or 20 recline release the Recline Lever and close the Safety Lever so that it is flush with the side of the Recline...

Page 21: ... from Your Bicycle 1 Remove the Mounting Plate from the Mounting Block by using the provided Hex Wrench to remove the 4 screws while being careful not to lose the lock washers 2 Remove the Mounting Block from the bicycle frame Removing the Mounting Rails from Your Bicycle Seat 1a Dash FM Remove the Mounting Knob by pulling the Locking Ring towards the Mounting Knob Figure 38a and rotating the Moun...

Page 22: ...h braking pedaling or steering of the bicycle 12 Load does not exceed 40 lbs 18 kg 13 Bicycle is in proper working order refer to bicycle manufacturer s instructions 14 Passenger is wearing a helmet 15 Child is properly secured with the 5 Point Harness 16 Child s body shoe laces or toys cannot come in contact with any moving part of the seat or bicycle 17 Lighting is adequate for riding conditions...

Page 23: ...d warranty period Some states and countries do not allow limitations on how long an implied limited warranty lasts therefore the above limitation and exclusions may not apply to you THE CUSTOMER S EXCLUSIVE REMEDY FOR BREACH OF THIS LIMITED WARRANTY OR OF ANY IMPLIED WARRANTY OR OF ANY OTHER OBLIGATION ARISING BY OPERATION OF LAW OR OTHERWISE SHALL BE LIMITED AS SPECIFIED HEREIN TO REPAIR OR REPLA...

Page 24: ...est soutenu uniquement par la béquille AVERTISSEMENT Ne modifiez pas le siège enfant AVERTISSEMENT N utilisez pas le siège enfant si une pièce est cassée AVERTISSEMENT La sangle de sécurité doit toujours être fixée au cadre du vélo avant utilisation voir page 36 Le vélo auquel le siège enfant est arrimé doit être en bon état de fonctionnement Il doit être à même d accepter un chargement supplément...

Page 25: ...s pieds dans la roue ou les doigts dans le mécanisme de freinage ou la selle à ressort Attachez toujours bien le harnais à 5 points autour de l enfant en veillant à ce qu il soit bien maintenu sur le siège enfant Assurez vous que le système de maintien n est pas desserré ni susceptible de se coincer dans les pièces mobiles en particulier les roues Lorsque vous ne transportez pas d enfant attachez ...

Page 26: ...00C 29 Ce siège enfant est compatible avec les vélos électriques pour autant que les conditions énumérées ci dessus soient remplies Ce siège enfant ne doit PAS être monté sur les éléments suivants Vélos à suspension complète Véhicules motorisés vélos électriques autorisés Vélos avec tubes de formes triangulaire ou carrée Vélos avec cadres en fibre de carbone Consultez toujours le fabricant du vélo...

Page 27: ...6 Bloc de montage 7 Indicateurs de sécurité 8 Protège cadre 9 Plaque de montage 10 Vis 11 Rondelles de frein 12 Clé hexagonale 13 Espace de rangement arrière 14 Identification du produit 15 Connecteur du harnais 16 Indicateur de centre de gravité 17 Mécanisme de montage du cadre 18 Étiquette du numéro de série 19 Bouton de montage 20 Anneau de verrouillage 21 Plaque de la base 22x Mécanisme d incl...

Page 28: ... telle qu ils se plient vers le bas Figure 4 5 Pour le réglage initial alignez les rails de montage sur la position n 3 sur la face inférieure du siège enfant Figure 5 REMARQUE Ces 3 positions permettent de régler la position horizontale du siège enfant Voir Vérification de la position du siège enfant Page 34 pour plus de détails 6 Insérez la plaque de la base en métal Figure 6a dans les fentes si...

Page 29: ...INSTRUCTION DU PROPRIÉTAIRE ET MANUEL DE SÉCURITÉ 29 BURLEY COM FRA Figure 1 Figure 2 Figure 3 DASH FM Figure 4 Figure 5 Figure 6 Figure 7 A B A B C A B B A 3 2 1 ...

Page 30: ... 4 Passez les rails de montage à travers les 2 orifices situés entre les pieds du siège enfant Figure 11 REMARQUE L orientation des rails de montage doit être telle qu ils se plient vers le bas Figure 11 5 Pour le réglage initial alignez les rails de montage sur la position n 3 sur la face inférieure du siège enfant Figure 12 REMARQUE Ces 3 positions permettent de régler la position horizontale du...

Page 31: ...INSTRUCTION DU PROPRIÉTAIRE ET MANUEL DE SÉCURITÉ 31 BURLEY COM FRA DASH X FM Figure 14 Figure 13 Figure 12 Figure 11 Figure 8 Figure 9 Figure 10 A B C B A 3 1 2 ...

Page 32: ...ong de cette partie du cadre le protège cadre doit être placé sous eux de sorte qu il n y ait rien entre celui ci et le cadre du vélo Figure 17a 3 Rattachez la plaque de montage au bloc de montage à l aide des 4 vis avec rondelles de frein et de la clé hexagonale fournie Serrez les 4 vis en croix et par étapes Figure 18 Vérifiez régulièrement la sécurité des fixations Assurez vous que l espace ent...

Page 33: ...e vous entendiez un clic et que les 2 indicateurs de sécurité verts apparaissent à l avant du bloc de montage Figure 20 AVERTISSEMENT N utilisez PAS votre siège enfant tant que vous n avez pas vérifié ses positions horizontale et verticale et que vous n avez pas placé la sangle de sécurité comme indiqué dans les pages suivantes ATTENTION Cette étape est extrêmement importante pour la sécurité de l...

Page 34: ...L indicateur de centre de gravité DOIT être positionné soit à l avant de l essieu arrière du vélo ou pas plus de 10 cm 3 93 po à l arrière de l essieu de la roue arrière Figure 214c Si l indicateur de centre de gravité se trouve à plus de 10 cm 3 93 po de l essieu arrière du vélo Retirez les rails de montage du bloc de montage en suivant les instructions de la partie Retrait du siège enfant du vél...

Page 35: ...INSTRUCTION DU PROPRIÉTAIRE ET MANUEL DE SÉCURITÉ 35 BURLEY COM FRA Figure 21 Figure 22 B C A 3 2 1 ...

Page 36: ...t fermement arrimée au cadre de la bicyclette Figure 24 REMARQUE Veillez à ce que l extrémité libre de la sangle de sécurité ne puisse pas entrer en contact avec la roue du vélo Si nécessaire un excès de sangle peut être enroulé autour du tube de selle plusieurs fois avant de fixer la boucle AVERTISSEMENT Assurez vous que toutes les pièces du vélo fonctionnent correctement lorsque vous fixez le si...

Page 37: ...les correctement Figure 25 2 Pour assurer la sécurité de l enfant fixez ses pieds à l aide des sangles des repose pieds Figure 26 Assurez vous que l enfant est à l aise et que les sangles ne sont pas trop serrées REMARQUE Reportez vous à la section Réglage des repose pieds Page 38 pour savoir comment régler la hauteur des repose pieds 3 Pour sortir l enfant du siège appuyez simplement sur le bouto...

Page 38: ... du siège Figure 27b 2 Pour rattacher chaque repose pied au siège enfant engagez le crochet arrière supérieur dans l encoche appropriée du support du siège Figure 28a puis faites pivoter le repose pied vers le bas en direction du support du siège Figure 28b jusqu à ce que les languettes arrière se verrouillent dans l encoche inférieure du support du siège Figure 29 REMARQUE Pour une sécurité et un...

Page 39: ...ge du siège Figure 31 3 Passez le connecteur du harnais dans l orifice de réglage supérieur puis faites le pivoter de manière à ce qu il soit bien en place contre le dossier du siège Figure 32 4 Répétez les étapes 1 à 3 pour l autre bandoulière Assurez vous que les sangles du harnais ne se torsadent pas lors de l ajustement Figure 33 REMARQUE Si vous effectuez l ajustement depuis la position supér...

Page 40: ...on Figure 35 Relâchez le levier de sécurité une fois que vous avez levé le levier d inclinaison 3 Tout en soulevant le levier d inclinaison soulevez l avant du siège enfant de sorte à augmenter l angle d inclinaison Figure 36 4 Une fois que le siège enfant est à l inclinaison souhaitée 0 10 ou 20 relâchez le levier d inclinaison et fermez le levier de sécurité de manière à ce qu il touche le côté ...

Page 41: ...e du bloc de montage à l aide de la clé hexagonale fournie pour retirer les 4 vis en veillant à ne pas perdre les rondelles de frein 2 Retirez le bloc de montage du cadre du vélo Retrait des rails de montage du siège enfant 1a Dash FM Retirez le bouton de montage en tirant l anneau de verrouillage vers le bouton de montage Figure 38a puis en tournant le bouton de montage dans le sens inverse des a...

Page 42: ...einage le pédalage ou la direction du vélo 12 Le chargement ne dépasse pas 18 kg 40 lb 13 Le vélo est en bon état de fonctionnement reportez vous aux instructions du fabricant du vélo 14 Le passager porte un casque 15 L enfant est correctement attaché avec le harnais à 5 points 16 Le corps les lacets ou les jouets de l enfant ne peuvent entrer en contact avec aucune partie mobile du siège ou du vé...

Page 43: ...ne garantie implicite limitée par conséquent les limitations et exclusions ci dessus peuvent ne pas s appliquer à vous LE RECOURS EXCLUSIF DU CLIENT EN CAS DE NON RESPECT DE CETTE GARANTIE LIMITÉE DE TOUTE GARANTIE IMPLICITE OU DE TOUTE AUTRE OBLIGATION DÉCOULANT DE L EXPLOITATION DE LA LOI OU DE TOUTE AUTRE OBLIGATION SE LIMITE COMME SPÉCIFIÉ ICI À UNE RÉPARATION OU UN REMPLACEMENT À NOTRE SEULE ...

Page 44: ...cicleta apoyada en la pata de cabra ADVERTENCIA No modifique el asiento infantil ADVERTENCIA No utilice el asiento infantil si hay alguna pieza rota ADVERTENCIA La correa de seguridad siempre debe ir sujeta al marco de la bicicleta antes de usarla véase la página 56 La bicicleta a la que va enganchado el asiento infantil debe funcionar perfectamente ser de un tipo adecuado a la carga adicional ten...

Page 45: ...iño Entre otros peligros destacan el atrapamiento de pies en las ruedas o de los dedos en los mecanismos de freno y los muelles del sillín Coloque siempre un arnés de 5 puntos bien ajustado alrededor del niño y asegúrese de que queda bien sujeto en el asiento infantil Compruebe que el sistema de sujeción no quede suelto o pueda engancharse a piezas móviles especialmente las ruedas Cuando no lleve ...

Page 46: ...tros de rueda 26 650B 27 5 700C 29 Este asiento infantil es compatible con bicicletas eléctricas siempre que se cumplan los requisitos especificados anteriormente Este asiento infantil NO debe instalarse en Bicicleta con suspensión total Vehículo motorizados sí en bicicletas eléctricas Bicicletas con tubos de forma triangular o cuadrada Bicicletas con cuadros de fibra de carbono Consulte siempre a...

Page 47: ... montaje 7 Indicadores de seguridad 8 Protector del cuadro 9 Placa de montaje 10 Tornillos 11 Arandelas de seguridad 12 Llave hexagonal 13 Compartimento trasero de almacenamiento 14 Identificación del producto 15 Conector del arnés 16 Indicador del centro de gravedad 17 Sistema de montaje en el cuadro 18 Etiqueta del número de serie 19 Perilla de montaje 20 Anillo de bloqueo 21 Placa base 22x Meca...

Page 48: ... ir orientadas hacia abajo Figura 4 5 En la instalación inicial alinee las guías de montaje con la posición n º 3 situada debajo del asiento infantil Figura 5 NOTA Estas 3 posiciones sirven para regular la posición horizontal del asiento infantil Consulte los detalles en Comprobar la posición del asiento infantil página 54 6 Inserte la placa base de metal Figura 6a en las ranuras situadas bajo el ...

Page 49: ...INSTRUCCIONES DEL PROPIETARIO Y MANUAL DE SEGURIDAD 49 BURLEY COM ESP Figura 1 Figura 2 Figura 3 DASH FM Figura 4 Figura 5 Figura 6 Figura 7 A B A B C A B B A 3 2 1 ...

Page 50: ...debajo del asiento Figura 10 4 Pase las guías de montaje por los 2 orificios situados entre las patas del asiento infantil Figura 11 NOTA Las guías de montaje deben ir orientadas hacia abajo Figura 11 5 En la instalación inicial alinee las guías de montaje con la posición n º 3 situada debajo del asiento infantil Figura 12 NOTA Estas 3 posiciones sirven para regular la posición horizontal del asie...

Page 51: ...INSTRUCCIONES DEL PROPIETARIO Y MANUAL DE SEGURIDAD 51 BURLEY COM ESP DASH X FM Figura 14 Figura 13 Figura 12 Figura 11 Figura 8 Figura 9 Figura 10 A B C B A 3 1 2 ...

Page 52: ...te del cuadro el protector debe colocarse por debajo de ellos para que no haya nada entre el protector y el cuadro de la bicicleta Figura 17a 3 Fije de nuevo la placa de montaje al bloque de montaje con los 4 tornillos y sus arandelas de seguridad utilizando la llave hexagonal suministrada Apriete los 4 tornillos por fases y siguiendo un patrón cruzado Figura 18 Compruebe periódicamente la segurid...

Page 53: ...e Figura 19 hasta que escuche un clic y los 2 indicadores verdes de seguridad sobresalgan por el frontal del bloque de montaje Figura 20 ADVERTENCIA NO utilice el asiento infantil hasta que compruebe su posición horizontal y vertical y fije la correa de seguridad tal y como se detalla en las páginas siguientes PRECAUCIÓN Este paso es de suma importancia para la seguridad del niño Figura 19 Figura ...

Page 54: ...del centro de gravedad DEBE ir colocado delante del eje de la rueda trasera de la bicicleta o bien a no más de 10 cm 3 93 in detrás del eje de la rueda trasera de la bicicleta Figura 21c Si el indicador del centro de gravedad está a más de 10 cm 3 93 in detrás del eje de la rueda trasera Saque las guías de montaje del bloque de montaje según las instrucciones de Desinstalación del asiento infantil...

Page 55: ...INSTRUCCIONES DEL PROPIETARIO Y MANUAL DE SEGURIDAD 55 BURLEY COM ESP Figura 21 Figura 22 B C A 3 2 1 ...

Page 56: ...arla bien al cuadro de la bicicleta Figura 24 NOTA Asegúrese de que el extremo libre de la correa de seguridad no toque la rueda de la bicicleta Si es necesario se puede envolver el exceso de material de correas alrededor del tubo del asiento varias veces antes de asegurar la hebilla ADVERTENCIA Asegúrese de que todas las piezas de la bicicleta funcionan correctamente una vez instalado el asiento ...

Page 57: ...on la hebilla de 5 puntos y apriételas bien Figura 25 2 Para mayor seguridad del niño sujétele los pies con las correas de los reposapiés Figura 26 Asegúrese de que el niño esté cómodo y no le aprieten demasiado las correas NOTA Consulte cómo regular la altura de los reposapiés en el apartado Ajuste de los reposapiés página 58 3 Para sacar al niño pulse el botón de liberación amarillo del arnés de...

Page 58: ...de la pata del asiento Figura 27b 2 Para volver a fijar el reposapiés al asiento encaje la pestaña superior trasera en la muesca pertinente de la pata Figura 28a bascule el reposapiés hacia abajo en dirección a la pata del asiento Figura 28b hasta que la pestaña trasera encaje en la muesca inferior de la pata del asiento Figura 29 NOTA Para que la comodidad y seguridad sean óptimas el reposapiés d...

Page 59: ... ajuste del arnés y por la ranura del cojín del asiento Figura 31 3 Pase el conector del arnés por el orificio superior de ajuste del arnés y gírelo hasta fijarlo al respaldo del asiento Figura 32 4 Repita los pasos 1 3 para la otra correa del hombro Asegúrese de que las correas del arnés no quedan retorcidas durante el ajuste Figura 33 NOTA Si lo que desea es regular el arnés de la posición super...

Page 60: ...y a continuación levante la palanca de reclinación Figura 35 Puede soltar la palanca de seguridad una vez que levante la palanca de reclinación 3 Mientras levanta la palanca de reclinación levante el frontal del asiento para aumentar el ángulo de reclinación Figura 36 4 Una vez reclinado el asiento a 0 10 o 20 suelte la palanca de reclinación y cierre la palanca de seguridad para que quede a ras c...

Page 61: ... montaje del bloque de montaje utilizando la llave hexagonal suministrada para quitar los 4 tornillos y con cuidado de no perder las arandelas de seguridad 2 Retire el bloque de montaje del cuadro de la bicicleta Retirar las guías de montaje del asiento infantil 1a Dash FM Quite la perilla de montaje tire del anillo de bloqueo hacia la perilla Figura 38a y gire la perilla en sentido contrario a la...

Page 62: ...e con el freno el pedaleo o la dirección de la bicicleta 12 La carga no supera los 18 kg 40 lb 13 La bicicleta funciona perfectamente Consulte las instrucciones del fabricante de la bicicleta 14 El pasajero lleva casco 15 El niño está bien sujeto con el arnés de 5 puntos 16 El cuerpo los cordones de los zapatos o los juguetes del niño no tocan ninguna pieza móvil del asiento o de la bicicleta 17 L...

Page 63: ... duración de una garantía limitada implícita por tanto es posible que la limitación y las exclusiones indicadas anteriormente no sean aplicables en su caso EL RECURSO EXCLUSIVO DEL CLIENTE POR EL INCUMPLIMIENTO DE ESTA GARANTÍA O DE CUALQUIER GARANTÍA IMPLÍCITA O DE CUALQUIER OTRA OBLIGACIÓN QUE SURJA CONFORME A LA LEY ESTARÁ LIMITADO SEGÚN LO ESPECIFICADO ANTERIORMENTE PARA REPARAR O REEMPLAZAR Ú...

Page 64: ...を離れないでくだ さい 絶対にスタンドを立てただけの状態で自転車用シートにお子様を乗せたまま自転車から手を 離さないでく ださい 警告 自転車用シートは改造しないでく ださい 警告 いずれかの部品が壊れている場合は 自転車用シードを使用しないでください 警告 使用前に必ず安全ストラップを自転車のフレームに取り付けてください 76 ページ参照 自転車用シートを取り付ける自転車は必ず正常に運転できる状態で 追加で負荷をかけても問 題のない適切なタイプのもので 使用者に適切なサイズで 使用者に合わせて調整を行ったも のである必要があります ご使用の自転車が自転車用チャイルドシートに適したものであるかを確認するために 自転車 の説明書をお読みになるか 自転車のメーカー サプライヤーに問い合わせて情報を入手して ください 留め具はしっかり と締めて 頻繁に確認してく ださい 露出している後ろサドルの...

Page 65: ...確認し お子様の成長に合わせて随時再確認してください 特に危険な状況の例としては 足が車輪にからまったり 指がブレーキ機構やサドルにはさま ったりする状況が挙げられます 必ずお子様の体を 5 点シートベルトでしっかり と締め シートベルトが自転車用シートに固定 されていることを確認してく ださい シートベルトが緩んでいないか あるいは可動部 特に車輪 に巻き込まれるような状態ではな いか確認してく ださい お子様を乗せていないときは ストラップが垂れ下がらないようにシー トベルトのバックルを締めてく ださい 必ず運転者もお子様も安全基準を満たした適切な自転車用ヘルメッ トを着用してください お子様を自転車用シートに乗せるときは 運転者よりも温かい服装をさせて 雨から保護するよ うにしてく ださい お子様を乗せる前に自転車用シートが 直射日光などが原因で 高温になっていないか確認し てくださ...

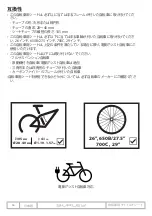
Page 66: ... 必ず以下に当てはまる車輪が付いた自転車に取り付けてくださ い 26 インチ 650B 27 5 インチ 700C 29 インチ この自転車用シートは 上記の条件を満たしている場合に限り 電動アシスト自転車にご 使用いただけます この自転車用シートは以下には取り付けないでく ださい フルサスペンシ ョン自転車 原動機付き自転車 電動アシスト自転車は適合 三角形または四角形のチューブが付いた自転車 カーボンファイバーのフレームが付いた自転車 自転車用シートを使用できるかどうかについては 必ず自転車のメーカーにご確認くださ い 電動アシスト自転車対応 105MM Ø 28 40MM 4 1in Ø 1 10 1 57in 26 650B 27 5 700C 29 ...

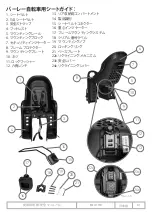
Page 67: ...転車用シートガイ ド 1 シートベルト 2 5 点シートベルト 3 安全ストラップ 4 フッ トレスト 5 マウンティングレール 6 マウンティングブロック 7 セキュリティインジケーター 8 フレームプロテクター 9 マウンティングプレート 10 ネジ 11 ロックワッシャー 12 六角レンチ 13 リア収納用コンパートメント 14 製品識別 15 シートベルトコネクター 16 重心インジケーター 17 フレームマウンティングシステム 18 シリアル番号ラベル 19 マウンティングノブ 20 ロッキングリング 21 ベースプレート 22x リクライニングメカニズム 23x 安全レバー 24x リクライニングレバー ...

Page 68: ... 自転車用シート下側の穴から外します 図 3 4 自転車用シートの脚の間にある2つの穴にマウンティングレールを通します 図 4 注 マウンティングレールの向きは下向きに曲がるようにしてください 図 4 5 初回設定時は 自転車用シート下側の 3 番の位置にマウンティングレールを合わせます 図 5 注 これら3 つの位置は 自転車用シートの水平方向の位置を調節するためのものです 詳しく は 自転車用シートの位置を確認する 74 ページ をご覧ください 6 金属製のベースプレート 図 6a を自転車用シート下側の穴に差し込んで 図 6b ボルトがベ ースプレートの穴に通るように閉じます 図 6c 7 それ以上回らなく なるまでマウンティングノブを時計回りに回して自転車用シート下側のボル トに再度取り付けます 図 7a 注 マウンティングノブを最後まで回すと カチッとというロッキングリングの音が...

Page 69: ...使用説明書 安全マニュアル 69 BURLEY COM 日本語 図 1 図 2 図 3 ダッシュFM 図 4 図 5 図 6 図 7 A B A B C A B B A 3 2 1 ...

Page 70: ...回して 自転車用シートからベースプレート を取り外します 図 9 3 自転車用シートからベースプレートをめく り 自転車用シート下側の穴から外します 図 10 4 自転車用シートの脚の間にある2つの穴にマウンティングレールを通します 図 11 注 マウンティングレールの向きは下向きに曲がるようにしてください 図 11 5 初回設定時は 自転車用シート下側の 3 番の位置にマウンティングレールを合わせます 図 12 注 これら3 つの位置は 自転車用シートの水平方向の位置を調節するためのものです 詳しく は 自転車用シートの位置を確認する 74 ページ をご覧ください 6 金属製のベースプレート 図 13a を自転車用シート下側の穴に差し込んで 図 13b 閉じます 図 13c 7 付属の六角レンチを使ってボルトをそれ以上回らなく なるまで時計回りに回して再度取り付け ます 図 14a 注意...

Page 71: ...使用説明書 安全マニュアル 71 BURLEY COM 日本語 ダッシュX FM 図 14 図 13 図 12 図 11 図 8 図 9 図 10 A B C B A 3 1 2 ...

Page 72: ...ティングレールの穴を上向きにして自転車のシートチューブに巻き付けます 図 17 注 フレームのこの部分にケーブルがある場合 フレームプロテクターと自転車のフレームの間 には何もない状態になるようにケーブルの下に配置します 図 17a 3 4 本のネジ ロックワッシャー付き と付属の六角レンチを使ってマウンティングブロックに舞う ティングプレートを再度取り付けます 図 18 4 本のネジを十字にゆっく り と締めます 締め具 の状態は定期的に確認してく ださい マウンティングプレートとマウンティングブロックの間の スペースはすべての側で均等になるようにしてく ださい 注 フレームのこの部分にケーブルがある場合は フレームプロテクターとマウンティングプレ ートの間の中央チャネルに沿って這うように配置してく ださい 図 18a 図 15 図 16 図 17 図 18 C B A A A ...

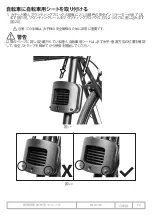
Page 73: ...転車に自転車用シートを取り付ける 1 カチッと鳴り マウンティングブロックの前面に 2 つの緑色の安全インジケーターが出てく る まで 図 19 マウンティングレールをマウンティングブロックの上の 2 つの穴に差し込みます 図 20 警告 以降のページに詳しく記載されている通り 自転車用シートは 必ず水平 垂直方向の位置を確認 して 安全ストラップを締めてから使用を開始してく ださい 注意 この手順は お子様の安全確保のために非常に重要です 図 19 図 20 X ...

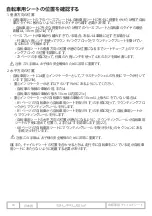
Page 74: ...ます 2 水平方向の位置 自転車用シートには重心インジケーターと して プラスチックシェルの外側にマークが付いて います 図 21b 重心インジケーターが必ず以下のいずれかにあるようにしてください 自転車の後輪の車軸の前 または 自転車の後輪の車軸の後ろ10 cm 以内 図 21c 重心インジケーターがジ自転車の後輪の車軸の 10 cm 以上後ろにきていない場合は 81 ページの 自転車から自転車用シートを取り外す の手順に従って マウンティングブロ ックからマウンティングレールを外します 81 ページの 自転車から自転車用シートを取り外す の手順に従って 自転車用シートか らマウンティングレールを外します 自転車用シートの水平方向の位置が適切になるように マウンティングレールが自転車用 シートの下側に揃えて位置 1 2 または 3 を調節します 図 22 68 ページの 自転車用シートに...

Page 75: ...使用説明書 安全マニュアル 75 BURLEY COM 日本語 図 21 図 22 B C A 3 2 1 ...

Page 76: ... 1 安全ストラップをシートチューブに巻き付けて バックルを固定します 図 23 2 自転車のフレームにしっかり と固定されるまで安全ストラップの端を引っ張ります 図 24 注 安全ストラップの端が車輪に触れないように注意してください 必要に応じて バックルを 固定する前に 余分なウェビング素材をシートチューブに複数回巻き付けることができます 警告 自転車用シートを取り付けたら 自転車のすべての部品が正常に機能するかどうか を確認してください 図 23 図 24 ...

Page 77: ...と締めて調節します シ ョルダーストラップとウェストストラップを 5 点シ ートベルトのバックルに通して ぴったりフ ィ ッ トするようにストラップを調節します 図 25 2 安全のために フッ トレストのストラップを使ってお子様の足を固定してください 図 26 スト ラップがきつすぎず お子様が快適な状態であることを確認してください 注 フッ トレストの高さの調節方法については フッ トレストを調節する のセクション 78 ペー ジ をご覧く ださい 3 お子様を降ろす際は 5 点シートベルトの黄色のリ リースボタンを押します 図 25a 警告 落ちたり滑り落ちたり しして怪我をしないように気を付けてく ださい 必ず 5 点シートベルトをご使用 く ださい 図 25 図 26 A ...

Page 78: ... きます 1 後ろのタブを同時に押してフッ トレストが自転車用シートから離し 図 27a フッ トレストを上 方向にシートの脚から離れるように上方向に持ち上げます 図 27b 2 フッ トレストを自転車用シートに再度取り付けるには シートの脚の適切な穴に上後ろのフッ クをはめ込み 図 28a 後ろのタブがシートの脚の下の穴に入るまで 図 28b フッ トレストを下 方向前側に回してシートに戻します 図 29 注 快適性と安全のために フッ トレストの高さはお子様のひざが 90 度に曲がる高さに設定し てください 図 27 図 28 図 29 A B A B ...

Page 79: ...後ろにあるシートベルトコネクターに触れます 図 30 2 シートベルトコネクターを横向きに回して シートベルトの下の調節穴に通して シートパッ ド に差し込みます 図 31 3 シートベルトコネクターをシートベルトの上の調節穴に通し 回してリアシートの背にしっかり と固定します 図 32 4 残りのショルダーストラップにも手順 1 3を繰り返します 調節している間にシートベルトのス トラップがよじれないように気を付けてく ださい 図 33 注 シートベルトの位置を上から下に調節する場合は シートベルトコネクターをシートパッ ド に差し込んでから 下の調節穴に通してく ださい 図 30 図 31 図 32 図 33 ...

Page 80: ...ックルを放して安全ストラップを取り外します 2 リクライニングメカニズムから安全レバーを引っ張って 図 34 リクライニングレバーを持ち 上げます 図 35 リクライニングレバーを持ち上げたら安全レバーを放してください 3 リクライニングレバーを持ち上げながら 自転車用シートを上方向に持ち上げてリクライニン グを倒します 図 36 4 自転車用シートのリクライニングが 0 10 または 20 の理想の角度になったら リクライニン グレバーを放して安全レバーを閉じ リクライニングメカニズムの横にぴったり重ねます 注 リクライニングの調節ができたら 76 ページの手順に従って安全ストラップを再度取り付け てください 図 34 図 35 図 36 ...

Page 81: ...グブロックからマウンティングレールを取り外しやすくなります 自転車からフレームマウンテ ィ ングシステムを取り外す 1 ロックワッシャーをなく さないように気を付けながら付属の六角レンチを使って 4 本のネジを 外してて マウンティングブロックからマウンティングプレートを外します 2 自転車のフレームからマウンティングブロックを取り外します 自転車用シートからマウンティ ングレールを取り外す 1a ダッシ ュFM マウンティングノブに向かってロッキングリングを引っ張ってマウンティングノブ を外して 図 38a マウンティングノブを反時計回りに回します 図 38b 1b ダッシ ュX FM 付属の六角レンチを使ってボルトを反時計回りに回して取り外します 図 39 2 ベースプレートをシートから離して 図 40a 自転車用シートの脚の間の 2 つの穴にマウンテ ィングレールを通します 図 40...

Page 82: ...転車用シートがブレーキ操作 ペダル操作 ハ ンドル操作の邪魔になっていない 12 耐荷重 18 kg を超えていない 13 自転車が正常に動作している 自転車メーカーの 説明書をご参照ください 14 同乗者がヘルメッ トを着用している 15 お子様が 5 点シートベルトとフッ トストラップでし っかり と固定されている 16 お子様の体 靴紐 またはおもちゃがシートや自 転車の可動部に触れていない 17 走行状況に合った十分な照明がついている 18 破損がないかすべての部品を点検する いずれかの部品が破損している場合は 自転車 用シートを使用しないでください 破損している部品を交換してから自転車用シー トをご使用ください 破損 摩耗した部品の交換については バーレー正 規販売店までお問い合わせください 最大耐荷重 お子様の最大制限体重 18 kg リア収納用コンパートメントの耐荷重 1 0...

Page 83: ...れます 一部の州および国では 黙示的限定保証の期間の制限が認められていないため 上記の制限お よび除外が適用されない場合があります 本限定保証または黙示的保証 または法律の運用またはその他の操作により生じたその他の義 務の違反に対するお客様の排他的な救済は 本書に記載されれている当社の独自の判断によっ て行う修理または交換に限定されるものと します いかなる場合でも 特別損害 偶発的損害 結 果的損害に対する責任は明示的に除外されます 一部の州では 偶発的または間接的な損害の制限の除外が認められていないため 上記の除外 の制限が適用されない場合があります 当社の商品には オーストラリア消費者法で除外できない保証が付帯しています お客様には 重 大な故障に対する交換または返金 およびその他の合理的に予測可能な損失または損害に対す る補償を受ける権利があります また 商品の品質が許容範囲外で ...

Page 84: ...ESIGN 1500 Westec Drive Eugene OR 97402 P 541 687 1644 or 800 423 8445 F 541 687 0436 burley burley com 2019 Burley Design LLC Burley is a registered trademark of Burley Design LLC 170621_02 MAN0515 BURLEY COM ...

Reviews: