7
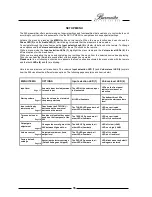
POWER button
The
POWER
button switches the preamp on or off, provided the AC mains switch on the
rear panel has been switched ON and the
POWER
toggle on the front panel has been set to
STBY.
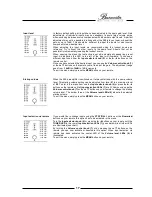
Input selection
The buttons
TUNER
and
TAPE
activate the two inputs Tuner and Tape. Pressing the
DISC
button activates either CD or DVD input, depending on which has been used last. Pressing
DISC
repeatedly switches back and forth between CD and DVD input
The
AUX
button activates whichever auxiliary input has been used last. Pressing the button
repeatedly switches between the inputs AUX, TV, SAT, NET and USB.
The numerical buttons 1 to 9 activate the designated inputs. The mapping of the input
numbers corresponds to the top-to-bottom sequence of inputs engraved on the front panel,
i.e.: 1=TUNER, 2=TAPE, 3=AUX and so forth.
You may also navigate sequentially through the inputs by pressing the
and
STATION-
buttons, with
in increasing and
STATION-
in decreasing order.
REMEMBER:
To be able to select the various inputs using the buttons
S/-
or the
numerical buttons you must first activate the function “input selection by remote control” in
the
SETUP MENU
.
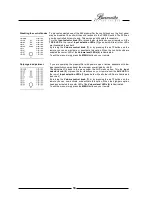
VOLUME buttons
The buttons
and
VOLUME –
raise or lower the playback volume. Volume levels
are indicated by the
Volume LEDs (4)
on the front panel. Briefly pressing the respective
button changes the volume level in small increments. Holding it down changes the level
quickly.
DIM button
Pressing the
DIM
button briefly switches the illumination on the front panel on or off. If “off”
has been selected the illumination will light up only temporarily after each change of
settings. If you choose
MENU
the LEDs will stay lit as long as you navigate the menu and
go out again shortly after you leave the
MENU
function.
Pressing the
DIM
button longer (app. 2 seconds) inverts the phase angle of the activated
input between 0˚ und 180˚. A phase inversion by 180˚ is indicated by an illuminated
PHASE
LED (2)
.
AUDIO button
If a digital input has been selected you can switch the sampling rate of the Sample Rate
Converter between 192kHz (
AUDIO LED (3)
illuminated) and 96kHz (
AUDIO LED (3)
is
dark) by shortly pressing the
AUDIO
button.
Pressing the
AUDIO
button longer (app. 2 seconds) changes the USB Audio class. To be
able to do so, the USB input has to be selected.
To confirm the USB Audio Class you have to check back with your operating system on the
PC.
OSD button
If headphones have been connected, the 099 offers the possibility to switch between the
Headphones
jack (15)
and the
Output terminals (23), (24)
and
(25)
back and forth. With
headphones plugged in briefly press the
OSD
button. This activates the analog outputs and
mutes the headphones output. To return to headphones output, briefly press the
OSD
button again. For details please refer to headphones output in the chapter CONNECTIONS.
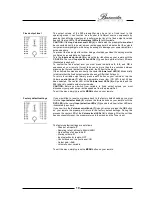
MENU button
The
MENU
button activates and deactivates the MENU function. Whenever the MENU
function is active, both the
Phase LED (2)
and the
Audio LED (3)
on the front panel are
blinking.
Navigation buttons
To navigate through the menu and select different options you may use the buttons
► ◄ ▲ ▼ and
OK
on the remote control of the 099. For details about using the menu
please refer to the chapter SETUP MENU.


