13
REPAIR AND MAINTENANCE
Warning: Turn power switch “OFF” before conducting any
maintenance procedures.
Servicing the Brake
The TT1600R is equipped with Hydraulic brake systems front and
rear. Hydraulic disc brake pads are also self-adjusting for wear, so
if the lever is being pulled back too far,or is hitting the handlebar
the hydraulic system needs to be put through the proper bleeding
process to remove air bubbles. You also need to check for leaks,
loss of fluid, and check the wear on the brake pads. If you are
unfamiliar with hydraulic brakes you may find it better to have a
good bike repair shop do the inspection and bleed process as it
requires a special kit, replacement fluid, and has to be carried out
following proper procedure.
Inspecting and replacing the brake pads:
Burromax stocks replacement brake pads and they are relatively
easy to replace.
It’s important to check the pads regularly – if they
wear out right down to the backing plate, metal-on-metal contact
will destroy brake rotors very quickly.
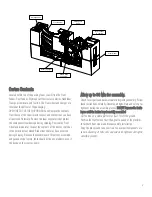
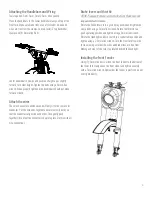
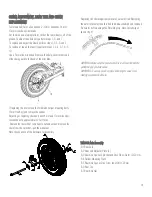
If you need to replace the brake pads, start by removing the caliper
from the brake mounting bracket. Then Push the old pads into the
caliper with a pad pusher tool or a large flat head screwdriver.
Insert the tool in between the two brake pads and Twist or pry. This
action will push the brake pistons back into the caliper. Remove the
split retaining pin holding the brake pads in place. Remove the pads
and spring using needle-nose pliers. At this point it’s a good idea to
clean the inside of the caliper and rotor with a little degreaser and
paper cloth, to remove any brake dust or dirt build-up. Install the
new pads along with the retention pins and spring clip.
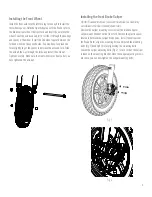
If you need to replace the brake disc, now is time to remove the
wheel and replace it. When reinstalling the wheel make sure that
you reinstall the spacer in the correct locations and the wheel rolls
freely after the axle has been properly tightened.
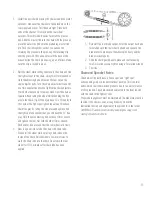
Install the caliper over the Brake Rotor, align the mounting holes
and install the mounting bolts. Before tightening the mounting bolts
Loosen the caliper adjusting bolts one full turn so that the caliper is
loose on the mounting bracket. Finish tightening and
Check all brake mounting bolts.
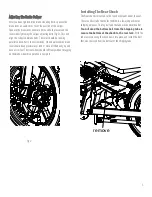
You might have to squeeze the
lever several times before the pads engage. If they don’t grip the
rotor after repeated pumps then you will need to bleed the brakes.
Squeeze the brake lever a couple more times to set the position of
the caliper. Squeeze the brake lever one more time and hold
pressure on the lever while tightening the caliper adjusting bolts.
This will align the caliper and brake pads. The rotor should be
running parallel and central to the caliper body. When depressed
the brake lever should be approximately 1 inch or more off the hand
grip and have a firm feel
The wheel should roll freely without dragging on the brake when
this operation is completed.
Testing the Brakes
To test the brake, squeeze the lever to increase the pressure on the
brake. When depressed The brake lever should be approximately 1
inch or more off the hand grip and have a firm feel. The wheel
should roll freely by hand when the brake is not applied and the
brake should lock up when applied with force.
WARNING:The brakes can cause the electric motorbike to skid the
tire throwing an unsuspecting rider. Practice in an open area free
from obstacles until you are familiar with the brake function. Avoid
skidding to a stop as this can cause you to lose control.
Note: Brakes that are poorly adjusted can be draggy and will cause
excessive wear and poor performance.


