background image

13

For any help concerning set up and use of your TV please call the Customer Helpline

 on page 3

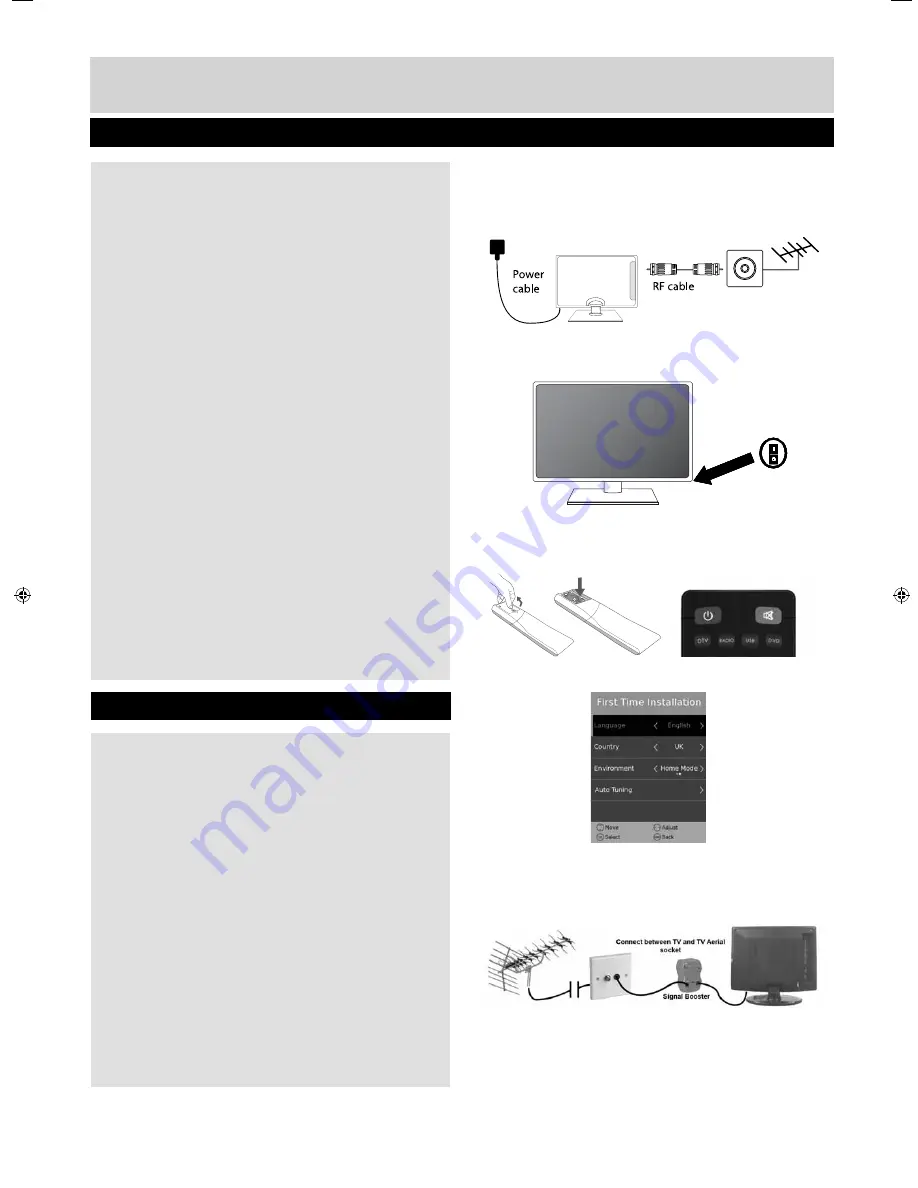
Getting Started - Initial Set Up

3

1

Fig A

Fig B

4

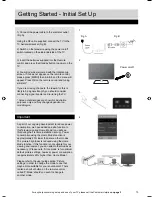
1) Connect the power cable to the electrical outlet 
(Fig A).

Using the RF cable supplied, connect the TV to the 
TV Aerial wall socket (Fig B).

2) Switch on the television using the power on/off 
switch located on the side/underside of the TV.

3) Insert the batteries supplied into the Remote 
control and press the Standby button to power on the 
TV.

4) You will now be welcomed with the initial set-up 
screen. If it does not appear, on the remote control, 
please press [MENU] then 8-8-8-8 and the menu will 
appear. Press OK on the remote control and tuning 
will start.*

If you are missing channels, the reason for this is 
likely to be signal strength, you should consider 
connecting signal booster and re-tuning the TV.  

* Screen shots/images are shown for illustration 
purposes only and may change dependent on
model/region.

Important

As part of our ongoing development to reduce power 
consumption, we have added an extra function to 
this Television called ‘Home Mode’ (you will see 
this during the fi rst time installation set up). Power 
consumption using the Home Mode function is 
approximately 25% lower than some other modes. 
The picture brightness is reduced using the Home 
Mode function. If this function is not suitable for your 
viewing environment, you can select other modes as 
necessary.  (Please note, ‘Store mode’ is for optimum 
default picture settings, however, power consumption 
is approximately 25% higher than ‘Home Mode’). 

Please refer to the user guide section ‘Picture 
settings’ in order to change the mode to one that 
maybe more suitable for your environment. There 
is also a shortcut button on the remote control 
called ‘P-Mode’ should you wish to change to 
another mode.

2

Power on/off

User Guide Bush - 40-402Z-BS-5B2-U1GKUPS-UK BUS-MAN-0019.indd   Sec1:13

User Guide Bush - 40-402Z-BS-5B2-U1GKUPS-UK BUS-MAN-0019.indd   Sec1:13

10/02/2015   10:34:41

10/02/2015   10:34:41

Summary of Contents for 40/402UHD

Page 1: ...40 402UHD 4K Ultra HD Slim LED TV with USB Media Player Model No User Guide ...

Page 2: ...ther device which may cause magnetic or radio interference with the television If interference is apparent move the device causing the interference near the television To disconnect the apparatus from the mains please use the mains plug located on the underside rear of the TV The mains plug shall remain readily operable Batteries battery pack or batteries installed shall not be exposed to excessiv...

Page 3: ... are bright and stationary Moving or low contrast graphics are less likely to cause ageing of the screen Time Displays Teletext Do not view a stationary page for a long period of time TV DVD Menus e g Listings of DVD disc content Pause Mode Do not leave the TV in pause mode for long periods of time e g When watching DVDs or videos Important Once shadow image screen burn occurs it will never disapp...

Page 4: ...ting Started Initial Set Up 13 Ultra High Definition 4K 2K TV Information 14 Remote Control 15 TV Buttons and Input Source Menu 16 Connections 17 19 TV Menu Operation 21 27 Channel Menu 21 Picture Menu 22 23 Sound Menu 24 Time Menu 25 Settings Menu 26 Lock Menu 27 Network 29 7 Day TV Guide and Channel List 30 USB Record Digital Freeview 31 USB Mode Media Player 32 General Information 33 37 Using y...

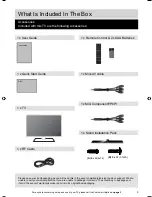
Page 5: ...you are unable to package it correctly The safest way to package your item in the event of warranty service repair is in it s original box packaging 1 x User Guide 1 x Quick Start Guide 1 x RF Cable 1 x Remote Control 2 x AAA Batteries User Guide QSG What Is Included In The Box Accessories Included with this TV are the following accessories 1 x TV 1 x Stand Installation Pack 1 x Mini AV cable 1 x ...

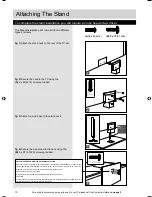
Page 6: ...nd B 5 x ST 3 7x20 6 x M 4x14 1 1 2 5 x ST 3 7x20 1 2 3 4 A 6 x M 4x14 HELPFUL ADVICE FOR FIRST TIME STAND INSTALLATION When securing the self tapping screw s into the base of the stand on first installation the screw s will be naturally tight as they create a thread in the plastic of the stand neck in order to support a TV of this size a Ensure the cross head screw driver tip fits correctly into ...

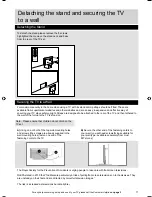
Page 7: ...dents is urging people to take care with flat screen televisions RoSPA stated in 2010 that Toddlers are particularly at risk of pulling flat screen televisions on to themselves They are unsteady on their feet and are attracted by colourful television images The risk is increased as televisions become lighter A Using one or both of the top wall mounting holes and screws the screws are already suppl...

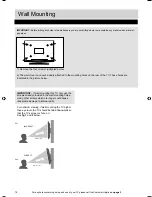
Page 8: ...ached to the mounting holes on the rear of the TV These holes are indicated in the picture below For optimum viewing if wall mounting the TV higher than eye level the TV should be tilted downwards so that the TV s screen is face on See fig 1 and 2 below IMPORTANT If wall mounting this TV only use the screws already provided in the wall mounting holes Using other screws which are longer could cause...

Page 9: ...ecting signal booster and re tuning the TV Screen shots images are shown for illustration purposes only and may change dependent on model region Important As part of our ongoing development to reduce power consumption we have added an extra function to this Television called Home Mode you will see this during the first time installation set up Power consumption using the Home Mode function is appr...

Page 10: ...ls of connection To check your input resolution 1920x1080 simply press the button marked i info on your remote control b It is possible to upscale your regular 1080p content to 4k using an up scaling device cable These are available to purchase separately from your retailer see c for details of connection To check your input resolution 3840x2160 simply press the button marked i info on your remote...

Page 11: ...channel information Press twice for programme information about current programme 20 ASPECT 21 SLEEP 22 SUBTITLE 23 AUDIO 24 TEXT 25 TEXT HOLD 26 DISPLAY 27 TEXTZOOM DVD ZOOM 28 DVD Menu Record To restart the current chapter To advance forward to the next chapter To stop eject Disc hold for 4 seconds to eject disc To play in fast rewind mode To play in fast forward mode To play pause 29 REC LIST 3...

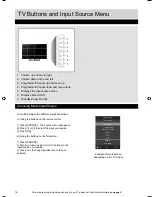
Page 12: ... OK B Using the buttons on the Television 1 Press SOURCE 2 Scroll up down using CH CH buttons to the input source you require 3 Press Vol to change input source to the one selected Choosing Mode Input Source Example of Source menu depending on the TV model 1 Volume up and menu right 2 Volume down and menu left 3 Programme Channel up and menu up 4 Programme Channel down and menu down 5 Displays the...

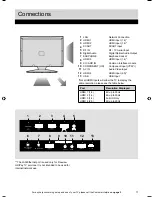
Page 13: ...I input 1 4 SCART SCART input RF IN RF TV Aerial Input Digital Audio Digital Optical Audio Output EARPHONE Earphone Socket HDMI 3 HDMI input 1 4 CI CARD IN Common Interface module COMPONENT HD Component input YPbPr AV IN Audio Video Input HDMI 4 HDMI input 2 0 USB USB Input 1 2 3 4 5 6 7 8 9 10 11 12 13 1 2 3 6 7 8 9 10 11 12 13 4 5 Port Resolution Displayed HDMI 1 1 4 HDMI 2 1 4 HDMI 3 1 4 HDMI 4...

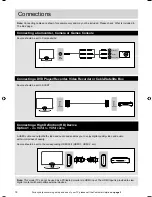
Page 14: ...esponding HDMI Port HDMI 1 HDMI 2 etc Connecting a Camcorder Camera or Games Console Connecting a High Definition HD Device Option 1 via HDMI to HDMI cable Note This model TV can not be used as a PC laptop monitor via HDMI input The HDMI Input is provided to view digital content with compatible external devices SCART SCART Source should be set to SCART Connecting a DVD Player Recorder Video Record...

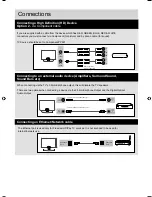
Page 15: ...nd TV Source should be set to Component YPbPr Connecting a High Definition HD Device Option 2 via Component cable Connecting an Ethernet Network cable 3 5mm EARPHONE OPTION 1 for 3 5mm EARPHONE Output OPTION 2 for Digital Optical Audio Output DIGITAL AUDIO OUT OPTICAL 3 5mm AUDIO IN DIGITAL AUDIO IN OPTICAL When connecting via the TV s 3 5mm Earphone output this will disable the TV speakers There ...

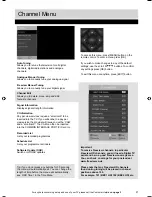
Page 16: ...analogue channels Analogue Manual Tuning Allows you to manually tune your analogue signal Freeview Manual Tuning Allows you to manually tune your digital signal Channel Edit Allows you to delete move skip and add favourite channels Signal Information Displays signal strength information CI Information Pay per view services require a smartcard to be inserted into the TV If you subscribe to a pay pe...

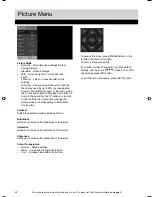
Page 17: ...ons are not pressed change the picture mode to another setting to de activate this function Contrast Switch the balance between black and white Brightness Increase or decrease the brightness of the picture Saturation Increase or decrease the saturation of the picture Sharpness Increase or decrease the sharpness of the picture Colour Temperature Normal Default settings Warm Increases red within the...

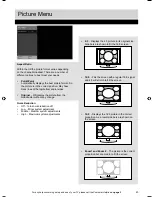
Page 18: ...The picture is the correct proportion but zoomed in to fill the screen Picture Menu Aspect Ratio Within the UK the picture format varies depending on the channel broadcast There are a number of different options to best meet your needs Point2Point Automatically displays the best picture format So the picture is in the correct position May have black lines at the top bottom and or sides Original Wi...

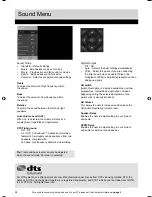
Page 19: ...Off Auto Selects the best settings automatically PCM Select this option if you are connecting to a Stereo Hi fi via coax cable Pulse code modulation PCM is a digital representation of an analogue signal AD switch Audio Description is a service available on certain programmes It provides a description of what is happening during the selected programme for a person who is visually impaired AD Volume...

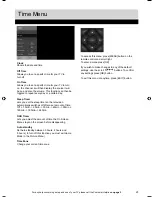
Page 20: ...elevision automatically switches off after a set amount of time Off 10min 20min 30min 60min 90min 120min 180min 240min OSD Timer Lets you adjust the amount of time the On Screen Menu stays on the screen before disappearing Auto standby Set Auto standby between 3 hours 4 hours and 5 hours to turn off this function you must exit Home Mode in the Picture Menu Time Zone Change your current time zone T...

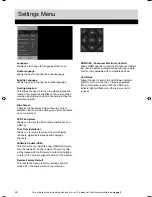
Page 21: ...First Time Installation Allows you to retune the television for all digital channels digital radio stations and analogue channels Software Update USB This menu lets you install the new software firmware onto the television Further details of how to do this will be issued with the firmware Contact the helpline or refer to the product support section of the website Restore Factory Default This reset...

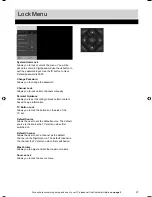
Page 22: ...channels manually Parental Guidance Allows you to set the rating to block certain content based on age information TV Button Lock Allows you to lock the buttons on the side of the TV set Default Source Allows the user to set the default source The default source is the source the TV starts on when first switched on Default Channel Allows the user to set a channel as the default channel on the Digi...

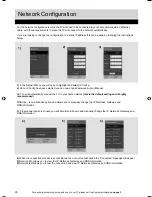
Page 23: ...P Config 2 Once IP Config has been selected you can now choose between Auto or Manual AUTO will automatically connect the TV to your home network this is the default setting and is highly recommended MANUAL is an advanced option and allows you to manually change the IP Netmask Gateway and DNS information 3 If the manual option is chosen you will able to scroll down and manually change the IP Netma...

Page 24: ...el 4 5 Channel 5 6 ITV2 7 BBC THREE 9 BBC FOUR 12 15 13 00 11 Dec 2014 Norfolk Tim wonnacott and the teams are in Norfolk in search of great buys to take to auction Expertise comes from Catherine Southon and Jonathan Pratt and Tim visits Ham House Lifestyle 12 00 Bargain Hunt Daily Politics The Blue Planet Let s Do Christmas with Gino and Mel Come Dine with Me Coronation Street Three Wise Women Yo...

Page 25: ...reeview mode when used in conjunction with a compatible USB memory stick or USB hard drive The benefits of this are as follows Pause live TV and then playback fast forward and rewind up to live TV One button record if you decide you want to record the current programme Easy programmable recording from the 7 day TV Guide Record TV and watch listen back on your computer laptop Due to the nature of t...

Page 26: ...ish to play view press OK button 2 Select the drive you require If your drive only has 1 partition you will only see 1 item 3 You can now access the item Press OK to view 4 While viewing you control the item using Fig A or by pressing i and using and OK USB Mode Media Player Fig A 4 3 2 1 Tips If you experience a playback issue please ensure the files being used are the correct format example the ...

Page 27: ... remote control to select the desired analogue channel chosen as per point 2 above 4 On the TV remote control press Menu Now navigate through the menus to select Manual Tuning or Analogue Manual tuning refer to the Tuning Channel menu section of this user guide if necessary 5 Manually tune in the channel usually the Sky box is at a frequency between 800Mhz and 850Mhz once the Sky box channel is fo...

Page 28: ...rage you may be able to use a loft type aerial but it is highly likely that you will also need to connect a booster between the back of the TV and the TV aerial wall socket Unfortunately to receive a good enough digital signal it is not possible to use a portable indoor type aerial This may change once the analogue signal is switched off in 2012 and the Digital signal strength is increased TV I ha...

Page 29: ...els only I cannot change the channel access the menu or use the red button During Time Shift you cannot change the channel access the menu or use the red button USB Record TV models only When using the USB to record the picture breaks up or experience loss of sound Check the USB Memory Stick meets the minimum requirements of Read Speed 20 MB s Mega Byte Per Second Write Speed 6 MB s Mega Byte Per ...

Page 30: ...y Consumption Info Voltage and power consumption 110 240v 50 60Hz 60 75 90W ecomode standard max EEI A Energy Rating Wallmounting VESA 200 x 200 mm Supplier Bush Model ID 40 402UHD Energy effiency class A Visible screen size diagonal 102 cm 40 inches On mode model average power consumption 60 W Annual energy consumption 1 88 kWh Standby power consumption 2 0 5 W Off mode power consumption 0 W Scre...

Page 31: ...vid H 264 Motion JPEG JPEG Max Solution 640 480 Max Data Rate 10 Mbps asf wmv VC1 Max Solution 1920 1080 Max Data Rate 40 Mbps flv swf H 264 AVC Sorenson H 263 Music mp3 MPEG1 2 Layer1 Layer2 Layer3 Sample Rate 16KHz 48KHz BitRate 32K 448Kbps wma asf WMA BitRate 128Kbps 320Kbps Sampling rate 8KHz 48KHz WMA pro BitRate 768Kbps Sampling rate 96KHz ogg OGG Sample Rate 48KHz m4a aac AAC HEAAC Sample R...

Page 32: ...BUS MAN 0019 ...

Reviews: