background image

18                                     

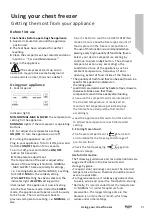
Installing your chest freezer

Installing your chest freezer

Bringing it all together

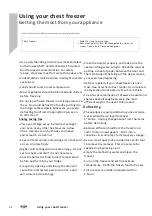
Electrical connection

              Any electrical work that is required to 
              install this appliance MUST be carried 
              out by a qualified electrician.

               Warning: THIS APPLIANCE MUST BE 
               EARTHED
Before making any electrical connections, 
ensure that:

.

Electrical safety is only guaranteed when the 

  earth system of your house is in accordance 
  with the related local regulations.

.

Do not damage the chest freezer circuit.

.

Do not bend, stretch or pull the supply cable to 

  avoid electric shock.

.

Do not use electrical appliances inside the food 

  storage compartments of the appliance, unless 
  they are of the type recommended by the 
  manufacturer.

.

Ensure the power socket is suitable for the 

  maximum power of the  machine (fuses in the 
  power circuit must be 13 amp).

.

The supply voltage should be the same as that 

  indicated in the technical specifications and the 
  appliance rating plate.

.

The appliance should be earthed and in 

  compliance with the applicable law.

.

When installed, the power socket must be within 

  easy reach.

.

If the socket outlets in your home are not suitable 

  for the plug supplied with this unit check with a 
  qualified electrician for replacement.

.

The use of adapters, multiple connectors or 

  extension cables are not recommended.

.

The appliance must be connected to a 220-240 

  volt 50Hz AC supply by means of a three pin 
  socket, suitably earthed and protected by a 13 
  amp fuse.

.

Should the fuse need to be replaced, a 13 amp 

  fuse approved to BS1362 must be used.

.

The plug contains a removable fuse cover that 

  must be refitted when the fuse is replaced. If the 
  fuse cover is lost or damaged, the plug must not 
  be used until a replacement cover has been fitted 
  or the plug is replaced.

.

A damaged plug should be cut off as close to the 

  plug body as possible, the fuse should be removed 
  and the plug disposed of safely. 
          

Plug replacement (UK & Ireland only)

Should you need to replace the plug; the wires 
in the power cable are coloured in the 
following way:

Blue  Neutral 'N'

Brown  Live 'L'

Green & Yellow  Earth 'E'

As the colours of the wires in the power cable 
may not correspond with the coloured 
markings identifying the terminals in your 
plug, and proceed as follows:

The green & yellow wire must be connected to 
the terminal in the plug that is marked with the 
letter E or by the earth symbol.

The blue wire must be connected to the 
terminal that is marked with the letter N.

The brown wire must be connected to the 
terminal that is marked with the letter L.

If the power supply cord is damaged, it must 
be replaced by the manufacturer or its service 
agent or a similar qualified person in order to 
avoid a hazard.

Summary of Contents for BECFB142L

Page 1: ...1 2 6 10 3mm 3 4 5 A5 140X210 GB T 1804 c 6 B C D E F B C D 1 2 3 4 1 2 3 4 B 202 1 1 A A 80g 80g CKBSH G03...

Page 2: ...BECFB142L...

Page 3: ...ance to get you up and running quickly Sound good Then let s get started Help and Guidance We re here to help you get the most from your chest freezer Should you require any guidance a simple solution...

Page 4: ...Using your chest freezer Parts Transportation 17 Installation 17 Electrical Connection 18 Light bulb replacement 25 Before first use 21 Using your appliance 21 Useful information 21 Care and Maintena...

Page 5: ......

Page 6: ...Safety information 1...

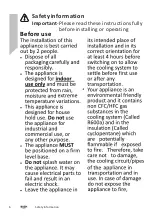
Page 7: ...Safety information Important Please read these instructions fully before installing or operating 6 Safetyinformation Before use...

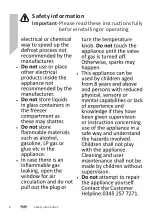
Page 8: ...Safety information 7 Safety information Important Please read these instructions fully before installing or operating...

Page 9: ...8 Safetyinformation Safety information Important Please read these instructions fully before installing or operating...

Page 10: ...Safety information 9 Safety information Important Please read these instructions fully before installing or operating...

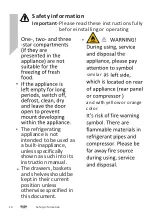
Page 11: ...erating similar and with yellow or orange color z The refrigerating appliance is not intended to be used as a built inappliance unless specifically shown as such into its instruction manual z The draw...

Page 12: ......

Page 13: ...Getting to know your chest freezer 2...

Page 14: ...ain important information which will help you get the best from your chest freezer and ensure safe and correct installation and operation If you require any further assistance our technical experts ar...

Page 15: ...your chestfreezer Getting to know your chest freezer You ll be up and running in no time 1 Door 2 Wheels 3 Drain port Accessories included Instructions x 1 Parts 3 4 1 2 5 4 Basket 5 LED light 6 Contr...

Page 16: ......

Page 17: ...Installing your chest freezer 3...

Page 18: ...proper ventilation Do not placethe appliance neara heat sourceor in direct sunlight Adjust the feet at front to levelthe appliance It should be installedon a smoothsurface to avoid excessive vibratio...

Page 19: ...ofadapters multipleconnectors or extension cablesare not recommended The appliance mustbe connected toa 220 240 volt 50Hz ACsupply by meansof a threepin socket suitablyearthed and protected by a13 amp...

Page 20: ......

Page 21: ...Using your chest freezer4...

Page 22: ...within MIN NORMAL MAX SUPER There are totally 8 settings i e 7 settingbetween MIN andMAX 1 setting for SUPER MAX is the coldestsetting While SUPER setting has beenselected the indicator light ofSUPER...

Page 23: ...ternal temperatureto rise andit will consume moreenergy Close the door s properly and makesure the seals and hingesare airtight Checkthe seals by putting a sheetof paper betweenthe door and the main b...

Page 24: ......

Page 25: ...Care and Maintenance 5...

Page 26: ...ng actions If it lastsless than 24hours keepthe doors closed This willallow the stored food tostay cold as longas possible Ifit lasts morethan 24 hours itis advised toempty the freezer compartment and...

Page 27: ...t and humanhealth whichcould otherwise be causedby inappropriatewaste handling ofthis product For more detailed informationabout recycling thisproduct pleasecontact yourlocal council office your house...

Page 28: ......

Page 29: ...Product support 6...

Page 30: ...edin the appliance Adjust thethermostat to a coolersetting Cool warmfood beforeplacing in thechest freezer The appliance isnear a heatsource Positionthe chest freezer awayfrom a heatsource Question He...

Page 31: ...open 8am 7pmMonday to Saturday and10am 4pm Sunday For security andtraining purpose telephone calls toand from customerservice centres maybe recorded andmonitored Call fromRepublic of Ireland will attr...

Page 32: ...8 Lines are open8am 8pm 365 days ayear Callmay be recorded and monitored YourBush Guarantee The guaranteeis subject to the following provisions The guaranteedoes not cover accidental damage misuse cab...

Page 33: ...act our customer helpline 0345 257 7271 The original spare parts for some specific components are available for a minimum of 7 or 10 years based on the type of component from the placing on the market...

Page 34: ......

Page 35: ......

Page 36: ......

Page 37: ...Contact www bush support co uk Helpline 0345 257 7271 CKBSH G03...

Reviews: