Functions
Simple everyday use
Functions
28
If you require any technical guidance or find that your product is not operating as intended, a simple solution can often be found in the
Troubleshooting
section of these instructions,
clockwise direction. Always use the oven between the
maximum and minimum settings. When switching the
oven off, turn the knob in the clockwise direction to the
“
0
” position.
Preheating
We recommend you preheat your oven for 10 minutes.
For recipes needing high temperatures, such as
bread, pastries, scones or soufflés, the best results are
achieved if the oven is preheated first. For best results
when cooking from frozen or cooking chilled ready
meals, always preheat the oven first.
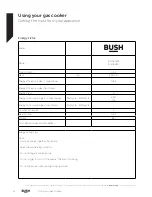
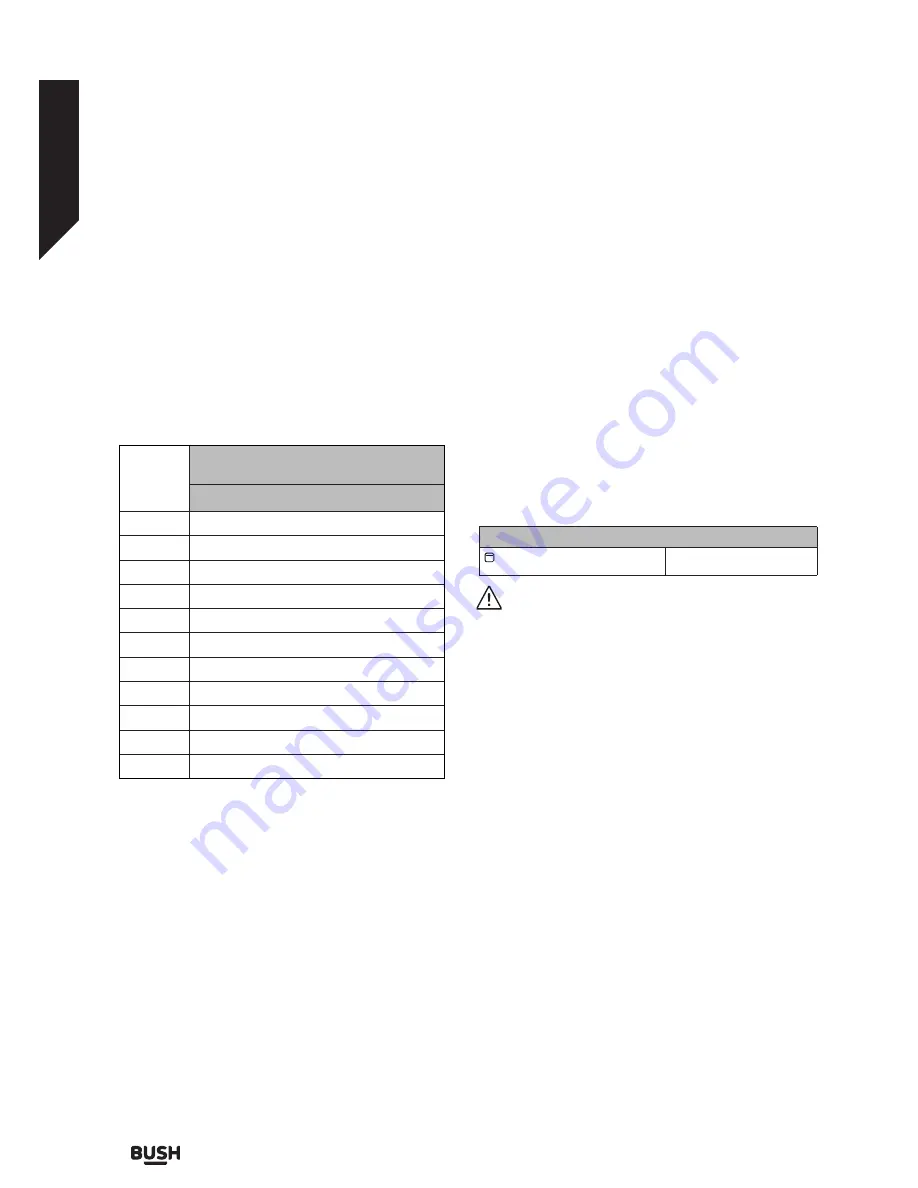
Product Dimensions
(Width*Depth)
90*60
Position
Temperature(°C)
MAX
270
9
240
8
230
7
220
6
200
5
190
4
180
3
170
2
150
1
140
Cooking
•
Ensure that food is placed centrally on the shelf and
that there is sufficient room around the baking tray /
dish to allow for maximum circulation.
•
Stand dishes on a suitably sized baking tray on the
shelf to prevent spillage onto the oven base and to
help reduce the amount of cleaning required.
•
The material and finish of the baking tray and dishes
used will affect base browning. Enamel, dark, heavy
or nonstick utensils increase base browning. Shiny
aluminium or polished steel trays reflect the heat
away and reduce base browning.
•
When cooking more than one dish in the oven,
place dishes centrally on different shelves rather
than cluster several dishes on one shelf, this will
allow the heat to circulate freely for the best
cooking results.
•
If you are cooking more than one tray of similar
items, for example cakes or biscuits, swap the trays
during cooking or remove the top tray when the
food on it is cooked and move the lower tray to the
higher shelf to finish cooking.
•
Do not place baking trays directly on the oven base
as it interferes with the oven air circulation and can
lead to base burning. Use the lower shelf position.
Grill burner controls
Function Description
Turn the control clockwise to
set the Grill.
CAUTION:
Accessible parts may become hot
while the grill is in use. Young children should be
kept away. As soon as you ignite the burner, place the
grill heat shield under the control panel. Then lift the
oven door up slowly until it stops at the semi-open
position (approximately 30°) and touches the heat
shield.
Assembling the grill heat shield
Summary of Contents for BGC60SB
Page 1: ...Instruction manual Gas Cooker BGC60SW BGC60SB Max 8 9 9 7 5 2 3 4 1 ...
Page 4: ......
Page 5: ...1 Safety information ...
Page 10: ......
Page 11: ...Getting to know your gas cooker 2 ...
Page 14: ......
Page 15: ...Installing your gas cooker 3 ...
Page 24: ......
Page 25: ...Functions 4 ...
Page 30: ......
Page 31: ...Using your gas cooker 5 ...
Page 36: ......
Page 37: ...Care and maintenance 6 ...
Page 40: ......
Page 41: ...Product support 7 ...
Page 46: ...Contact www argos support co uk Helpline 0345 257 7271 ...


