background image

21

or online at 

www.bush-support.com

 If you still require further assistance, call one of our experts on 

0345 257 7271

.

Temperature Adjustment Warnings

•  It is not recommended that you operate your 

freezer in environments colder than 10°C in 
terms of its efficiency. 

•  Do not start another adjustment while you are 

already making an adjustment.

•  Temperature adjustments should be made 

according to the frequency of door openings, 
the quantity of food kept inside the freezer 
and the ambient temperature in the location 
of your freezer.

•  In order to allow your freezer to reach the 

operating temperature after being connected 
to mains, do not open the door frequently or 
place large quantities of food in the freezer. 
Please note that, depending on the ambient 
temperature, it may take 24 hours for your 
freezer to reach the operating temperature. 

•  A 5 minute delay function is applied to 

prevent damage to the compressor of your 
freezer when connecting or disconnecting to 
mains, or when an energy breakdown occurs. 
Your freezer will begin to operate normally 
after 5 minutes.

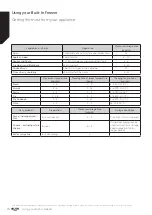
•  Your appliance is designed to operate in the 

ambient temperature (T/SN = 10°C - 43°C) 
intervals stated in the standards, according to 
the climate class displayed on the information 
label. We do not recommend operating your 
appliance out of the stated temperature limits 
in terms of cooling effectiveness.

Climate 

Class

Ambient Temperature 

o

C

T

Between 16 and 43  (°C)

ST

Between 16 and 38  (°C)

N

Between 16 and 32  (°C)

SN

Between 10 and 32  (°C)

Accessories

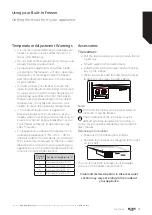
The Icematic

•  Pull the lever towards you and remove the ice 

maker tray

•  Fill with water to the marked level
•  Hold the left end of the lever and set the ice-

tray on the icebox

•  When ice cubes have formed, twist the lever 

to drop the ice cubes into the icebox.

Note:

Do not fill the icebox with water in order to 
make ice. It can be broken.
The movement of the ice maker may be 
difficult while the refrigerator is running. In 

such a case should be cleaned by removing the 
glass shelves.

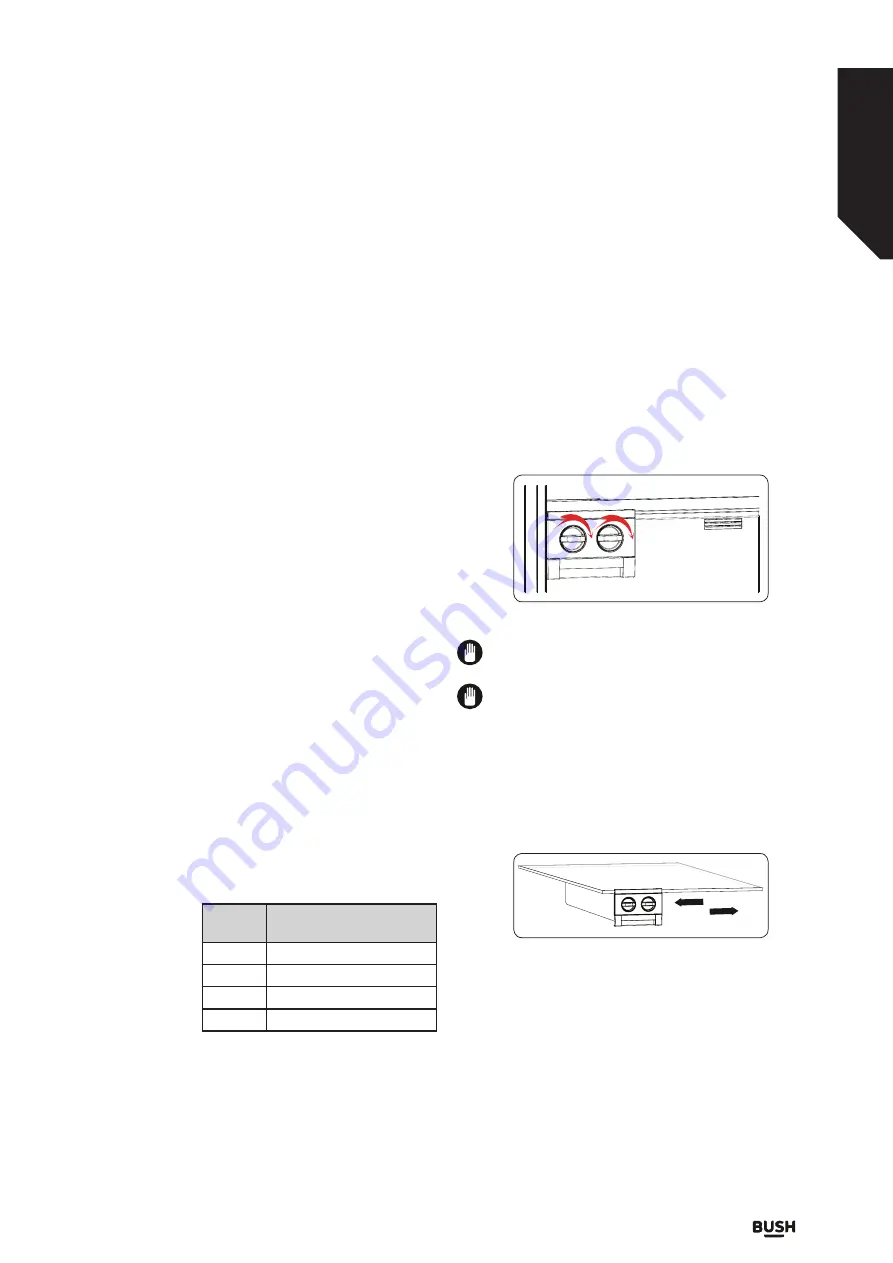
Removing the icemaker

•  Take out of the freezer glass shelves
•  Remove the icemaker by dragging left or right 

on the shelf.

You can remove the icemaker to use a larger 
volume of the freezer compartment.

Visual and text descriptions in the accessories 

section may vary according to the model of 

your appliance.

Using your Built-In Freezer

Getting the most from your appliance

Functions

Summary of Contents for MBI55177FRZ

Page 1: ...Instruction manual Built In Freezer MBI55177FRZ...

Page 2: ...ns here with your instructions Don t worry there s nothing too technical coming up Just simple step by step guidance to get you up and running quickly Sound good Then let s get started Help and Guidan...

Page 3: ...ing Help and assistance Disposal Guarantee 5 7 6 10 11 14 14 15 16 18 1 2 3 4 16 27 20 20 21 Information on No Frost Technology Using your Built in Larder Display and Control Panel Operating your Free...

Page 4: ...tion can often be found in the Troubleshooting section of these instructions 4 Icon Type Meaning WARNING Serious injury or death risk RISK OF ELECTRIC SHOCK Dangerous voltage risk FIRE Warning Risk of...

Page 5: ...Safety Information 1...

Page 6: ...as a refrigerant this information will be provided on the label of the cooler you should take care during transportation and installation to prevent the cooler elements from being damaged R600a is an...

Page 7: ...cerning use of the appliance Very vulnerable people are not expected to use appliances safely unless continuous supervision is given If the supply cord is damaged it must be replaced by the manufactur...

Page 8: ...If you require any technical guidance or find that your product is not operating as intended a simple solution can often be found in the Troubleshooting section of these instructions 8...

Page 9: ...Getting to know your Built In Freezer 2...

Page 10: ...and running in no time Ready Let s begin Please read these instructions carefully They contain important information which will help you get the best from your Built In Freezer and ensure safe and co...

Page 11: ...o know your Built In Freezer You ll be up and running in no time Getting to know your Built In Freezer 3 4 5 6 7 1 2 8 1 Freezer LED strip 2 No Frost air circulation system 3 Ice tray x 1 4 Control pa...

Page 12: ...If you require any technical guidance or find that your product is not operating as intended a simple solution can often be found in the Troubleshooting section of these instructions 12...

Page 13: ...Installing your Built In Freezer 3...

Page 14: ...st 5 cm away from electrical ovens If your freezer is placed next to a deep freezer there must be at least 2 cm between them to prevent humidity forming on the outer surface Do not cover the body or t...

Page 15: ...e product or on its packaging indicates that this product may not be treated as household waste Instead it shall be handed over to the applicable collection point for the recycling of electrical and e...

Page 16: ...ng and foam may be kept for re transportation optional Fasten your appliance with thick packaging bands or strong cords and follow the instructions for transportation on the packaging Remove all movab...

Page 17: ...Functions 4...

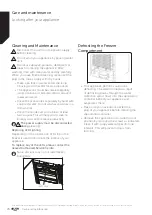
Page 18: ...compartment To defrost the frost and ice in the freezer compartment you are periodically required to turn off the freezer place the food that needs to be kept frozen in a separately cooled container a...

Page 19: ...Using your Built In Freezer 5...

Page 20: ...be frozen within 24 hours is shown on the appliance label For optimal appliance performance in maximum freezer capacity set the appliance to active super freeze mode 24 hours before you put the fresh...

Page 21: ...s designed to operate in the ambient temperature T SN 10 C 43 C intervals stated in the standards according to the climate class displayed on the information label We do not recommend operating your a...

Page 22: ...itable temperature and that the contents have deteriorated The storage life of frozen food depends on the room temperature the thermostat setting how often the door is opened the type of food and the...

Page 23: ...move the tail and head 2 Lean fish Bass Turbot Flounder 4 Fatty fishes Tuna Mackerel Bluefish Anchovy 2 4 Shellfish Clean and in a bag 4 6 Caviar In its packaging or in an aluminium or plastic contain...

Page 24: ...sh and hull the stems 8 12 Maximum storage time months Thawing time at room temperature hours Thawing time in oven minutes Bread 4 6 2 3 4 5 220 225 C Biscuits 3 6 1 1 5 5 8 190 200 C Pastry 1 3 2 3 5...

Page 25: ...Care and Maintenance 6...

Page 26: ...h soap and water Do not wash accessories in a dish washer Clean the condenser with a brush at least twice a year This will help you to save on energy costs and increase productivity The power supply m...

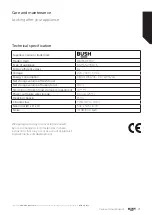
Page 27: ...V 50 Hz Energy consumption 0 813 kWh 24h 297 kWh year Net storage volume of fresh food Net storage volume of frozen food 197 lt Star rating of frozen food storage compartment 4 Power cut failure safe...

Page 28: ...If you require any technical guidance or find that your product is not operating as intended a simple solution can often be found in the Troubleshooting section of these instructions 28...

Page 29: ...Product Support 7...

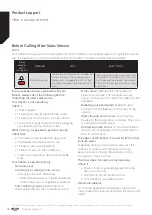
Page 30: ...pliance performs poorly Check that You have not overloaded the appliance The freezer temperature set to 16 The doors are closed perfectly There is no dust on the condenser There is enough place at the...

Page 31: ...lacing them inside the appliance 3 Drinks or other liquids should be covered when inside the appliance If left uncovered the humidity inside the appliance will increase therefore the appliance uses mo...

Page 32: ...ve you a fast and efficient service please have the following information ready Model Ref Serial number Date of purchase You can find these on the rating plate a small information panel usually a stic...

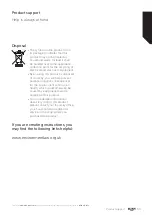
Page 33: ...ng of electrical and electronic equipment By ensuring this product is disposed of correctly you will help prevent potential negative consequences for the environment and human health which could other...

Page 34: ...It must be used solely for domestic purposes The guarantee will be rendered invalid if the product is re sold or has been damaged by inexpert repair Specifications are subject to change without notic...

Page 35: ...g this period by the dealer from who your purchased the unit The guarantee is subject to the following provisions The guarantee does not cover accidental damage misuse cabinet parts knobs or consumabl...

Page 36: ...Contact www bush support com Helpline 0345 257 7271 52297731...

Reviews: