Getting to know your Stereo Flat Micro System
You’ll be up and running in no time
Getting to know your Stereo Flat Micro System
17
section of these instructions, or online at
www.argos-support.co.uk
If you still require further assistance, call one of our experts on
0345 600 3021
.
Initial set-up
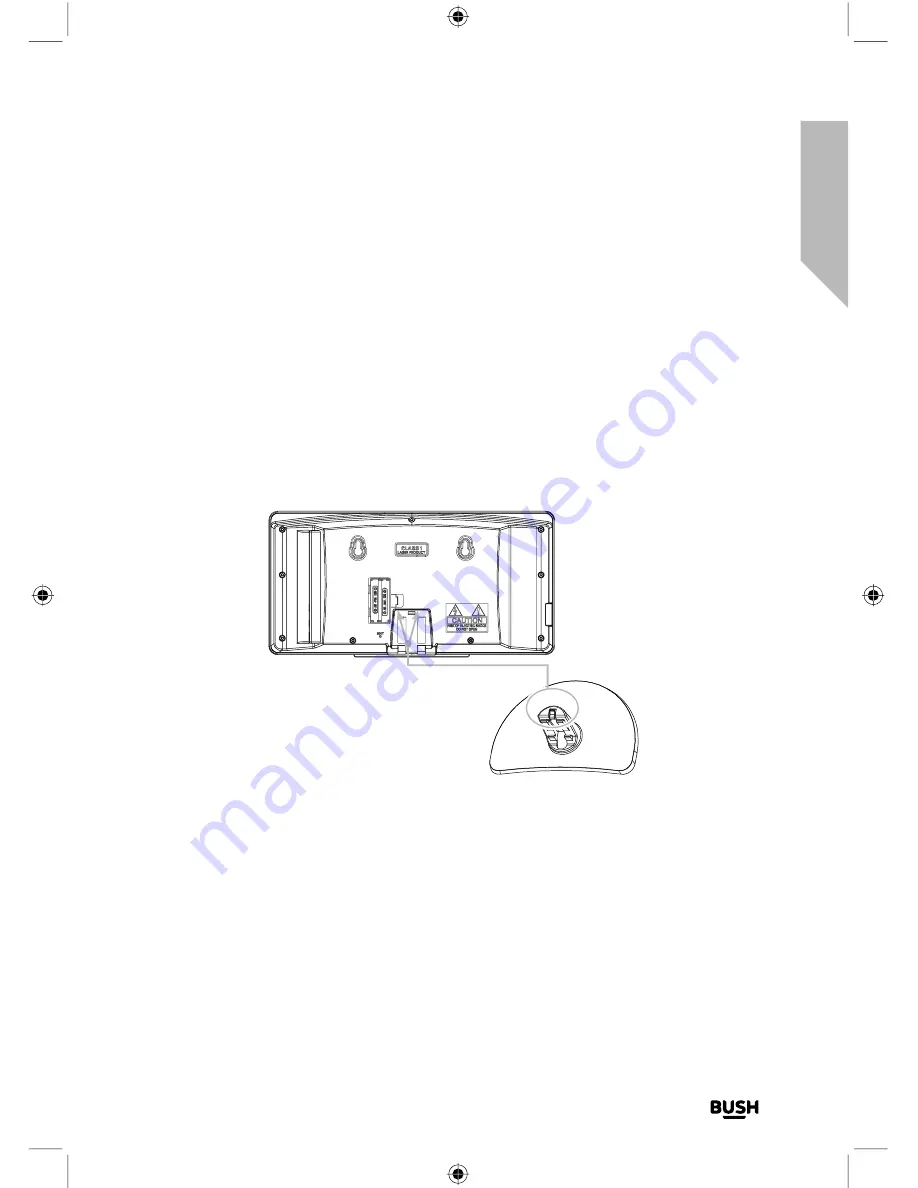
Clip your Micro onto its stand
When assembled the flat part of the stand faces towards the front.
For ease of assembly we recommend that you place your Flat Micro face down onto a
soft cloth on a stable surface. Place the two prongs on the stand at the top of the two
long grooves on the back of the Micro and then press down. The stand will clip into
place.
Power connection
1.
Fully extend the wire radio aerial on the back of the Micro to receive the best possible
radio reception and sound quality.
2.
Connect the mains power lead into the bottom power socket behind the right hand
speaker on the side of your Micro.
3.
Plug the mains power plug into the mains power wall socket and switch on. Welcome
will be displayed, followed by Scan, as your Micro begins an automatic scan for DAB
radio stations. After a short delay the number of stations found during the scan will
also be displayed.
Fig 6.
Summary of Contents for WM2760DAB
Page 1: ...Instruction manual WM2760DAB ...
Page 6: ...This page is left intentionally blank ...
Page 7: ...1 Safety information ...
Page 12: ...This page is left intentionally blank ...
Page 13: ...Getting to know your Stereo Flat Micro System 2 ...
Page 24: ...This page is left intentionally blank ...
Page 25: ...3 Using your Stereo Flat Micro System ...
Page 40: ...This page is left intentionally blank ...
Page 41: ...Other information 4 ...
Page 46: ...This page is left intentionally blank ...
Page 47: ...Product support 5 ...
Page 54: ...This page is left intentionally blank ...
Page 55: ...This page is left intentionally blank ...
Page 56: ...Contact www argos support co uk Helpline 0345 600 3021 ...


