background image

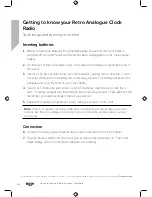
Getting to know your Retro Analogue Clock Radio

15

section of these instructions,  or online at 

www.argos-support.co.uk 

If you still require further assistance, call one of our experts on 0345 600 3021.

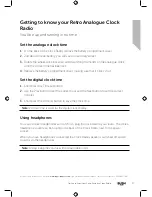
Getting to know your Retro Analogue Clock 
Radio

You’ll be up and running in no time

8. 

Preset

•  Short press: Preset recall 

•  Long press: Preset store

9. 

Alarm 1 & Alarm 2

•  Short press: Turns the Alarm on or 

off

•  Long press: Set the Alarm

10. 

Snooze/Sleep

•  Short press when an alarm sounds: 

Activates a 9 minute Snooze

•  Short press: Set the Sleep time

11. 

Volume -

•  Short press: Decreases the volume

•  Long press: Progressively decreases 

the volume

12. 

•  Short press: Increases the volume

•  Long press: Progressively increases 

the volume

13. 

Battery compartment cover

14. 

Power socket

15. 

Headphone socket

16. 

Analogue Clock time set wheel

17. 

1 x AA Battery for the Analogue clock

18. 

2 x AAA back up batteries for Alarm 

1 & 2 time settings.

1. 

Digital display

2. 

Telescopic Antenna

3. 

Power button

•  Short press: Power on 

•  Long press: Preset off 

4. 

Time set

•  Short press: Set the time

5. 

Prev

•  Short press: Changes the hour in 

time settings

•  Short press: In FM mode, moves 

down the frequency band by 
0.05MHz

•  Long press: In FM mode, scans 

down the frequency band

6. 

Next

•  Short press: Changes the minutes 

in time settings

•  Short press: In FM mode, moves up 

the frequency band by 0.05MHz

•  Long press: In FM mode, scans up 

the frequency band

7. 

Dimmer

•  Short press: Changes the display 

brightness

Summary of Contents for WO322

Page 1: ...Instruction manual WO322 ...

Page 2: ... instructions Don t worry there s nothing too technical coming up Just simple step by step guidance to get you up and running quickly Sound good Then let s get started Help and Guidance We re here to help you get the most from your Retro Analogue Clock Radio Should you require any guidance a simple solution can often be found online at www argos support co uk If you still require further assistanc...

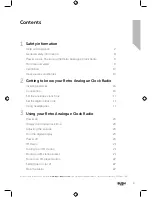
Page 3: ... 17 Set the digital clock time 17 Using headphones 17 3 Using your Retro Analogue Clock Radio Power on 20 Display the Digital clock time 20 Adjusting the volume 20 Dim the digital display 20 Power off 20 FM Radio 21 Tuning to an FM station 21 Storing an FM station preset 21 Tune to an FM preset station 22 Setting Alarm 1 or 2 22 Stop the Alarm 22 3 section of these instructions or online at www ar...

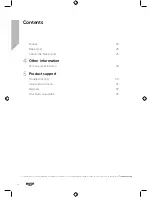
Page 4: ...cal specification 26 5 Product support Troubleshooting 30 Help and assistance 31 Disposal 32 Your Bush Guarantee 33 4 If you require any technical guidance or find that your product is not operating as intended a simple solution can often be found in the Troubleshooting Contents ...

Page 5: ...This page is left intentionally blank 5 section of these instructions or online at www argos support co uk If you still require further assistance call one of our experts on 0345 600 3021 ...

Page 6: ...This page is left intentionally blank ...

Page 7: ...1 Safety information ...

Page 8: ... care medical equipment or during an electrical storm To avoid possible hearing damage do not listen to this radio at high volume levels for long periods of time Always keep the volume within reasonable limits Power source Only use the power supply that came with the product Using an unauthorised power supply will invalidate your guarantee and may irrecoverably damage the product Disconnect your C...

Page 9: ...AUTION Danger of explosion if batteries are incorrectly replaced Replace only with the same or equivalent type Positioning the Retro Analogue Clock Radio It is important that you consider carefully in advance where your Clock Radio will be situated and make sure that it is on a flat and stable surface within 1 4 metres of a power socket Please ensure that the mains power lead is not a trip hazard ...

Page 10: ...n Do not block or cover slots holes or openings on the product by placing on soft furnishings such as carpets rugs or beds as these are provided for functionality and or ventilation to ensure safe operation of the product Heat sources and flames Do not leave it in high temperatures as electronic devices and plastic parts may warp in heat Keep it away from bright sunlight or heat sources such as a ...

Page 11: ...ety information 11 section of these instructions or online at www argos support co uk If you still require further assistance call one of our experts on 0345 600 3021 This page is left intentionally blank ...

Page 12: ...This page is left intentionally blank ...

Page 13: ...2 Getting to know your Retro Analogue Clock Radio ...

Page 14: ...u ll be up and running in no time Ready Let s begin Please read these instructions carefully They contain important information which will help you get the best from your product and ensure safe and correct installation and operation If you require any further assistance our technical experts are happy to help For full details refer to the product support section at the end of these instructions F...

Page 15: ... volume 12 Volume Short press Increases the volume Long press Progressively increases the volume 13 Battery compartment cover 14 Power socket 15 Headphone socket 16 Analogue Clock time set wheel 17 1 x AA Battery for the Analogue clock 18 2 x AAA back up batteries for Alarm 1 2 time settings 1 Digital display 2 Telescopic Antenna 3 Power button Short press Power on Long press Preset off 4 Time set...

Page 16: ...note the and markings and position the battery the correct way around This battery will power the Analogue clock on the front of your Clock Radio 4 Insert 2 x 1 5V AAA size also known as LR 03 batteries making sure to note the and markings and position the batteries the correct way around These batteries will remember your alarm settings if there is a power cut 5 Replace the battery compartment co...

Page 17: ...k until the correct time has been set 4 Replace the battery compartment cover making sure that it clicks shut Set the digital clock time 1 Short press the Time set button 2 Use the Prev button to set the correct hour and the Next button to set the correct minutes 3 Short press the Dimmer button to save the clock time Note 24 hour time is used for the digital clock display Using headphones You can ...

Page 18: ...This page is left intentionally blank ...

Page 19: ...3 Using your Retro Analogue Clock Radio ...

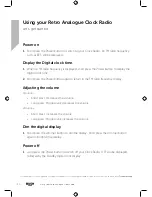
Page 20: ...uency is displayed short press the Power button to display the digital clock time 2 Short press the Power button again to return to the FM radio frequency display Adjusting the volume Volume Short press Decreases the volume Long press Progressively decreases the volume Volume Short press Increases the volume Long press Progressively increases the volume Dim the digital display 1 Short press the Di...

Page 21: ...ton to scan down the frequency band Short press the Prev or Next button to fine tune each frequency in 0 05MHz steps Note If reception is still poor try adjusting the aerial or moving the Clock Radio to another location Storing an FM station preset Your Clock Radio can store up to 10 FM stations in its preset memories for instant access to your favourite stations 1 Tune the Radio to the FM radio s...

Page 22: ...fore you set an alarm Please remember to use 24 hour clock 1 Long press the Alarm 1 or 2 button to set an alarm 2 Use the Prev button to set the correct hour and the Next button to set the correct minutes for your alarm Note Please remember to use 24hour clock for your alarm settings 3 Immediately after setting your alarm time short press the Dimmer button bb will be displayed to indicate that the...

Page 23: ...y displayed and the LED next to Alarm 1 or Alarm 2 as appropriate will turn off Sleep timer You can set your Clock Radio to switch to Standby mode automatically using the sleep timer You can choose from Sleep OFF 90 75 60 45 30 and 15 minutes With your Clock Radio switched on not in Standby mode 1 Short press the Snooze Sleep button to enter the Sleep timer settings 2 Repeatedly short press the Sn...

Page 24: ...This page is left intentionally blank ...

Page 25: ...Other information 4 ...

Page 26: ...ion Helpful technical information Technical specification Please use only the specified external adapter OBELIEVE Model name 0501000B Power adapter Output DC 5V 1A Input AC 100 240V 50 60Hz Batteries not supplied 1 x AA for the Analogue clock 2 x AAA back up batteries for Alarm 1 2 time settings Headphone socket 3 5mm Stereo Audio output 1 x 3W RMS Frequency range FM 87 5 MHz to 108 MHz ...

Page 27: ...This page is left intentionally blank section of these instructions or online at www argos support co uk If you still require further assistance call one of our experts on 0345 600 3021 ...

Page 28: ...This page is left intentionally blank ...

Page 29: ...Product support 5 ...

Page 30: ...dphones to listen to your Clock Radio or unplug the headphones Radio reception is poor Make sure that you have fully extended the telescopic aerial Rescan for FM Radio stations Try moving your Clock Radio to another location to see if reception improves Check that you do not have other electrical equipment too close to your Clock Radio causing interference The function buttons do not respond Check...

Page 31: ...give you a fast and efficient service please have the following information ready Model Ref Serial number Date of purchase Local call rates applies Lines open 8am 7pm Monday to Saturday and 10am 4pm Sunday Calls to Argos enquiry lines may attract a charge and set up fee from residential lines depending on your call plan tariff Mobile and other providers costs may vary see www bt com pricing for de...

Page 32: ... old product will help prevent potential negative consequences for the environment and human health Batteries contain substances that may be harmful to the environment and human health Keep out of the reach of children and seek immediate medical help if swallowed Batteries should not be disposed of in the normal household waste but taken to appropriate local recycling facilities where and when the...

Page 33: ...disclaim any liability for loss or damage arising from the breakdown of the product This guarantee is in addition to and does not diminish your statutory or legal rights Important Data Protection Information If you provide us with information about another person you confirm that they have appointed you to act for them to consent to the processing of their personal data including sensitive persona...

Page 34: ...This page is left intentionally blank ...

Page 35: ...This page is left intentionally blank ...

Page 36: ...Contact www argos support co uk Helpline 0345 600 3021 ...

Reviews: