background image

Understanding the Equatorial Mount

The Equatorial Mount  is designed to move in any direction. It can be set to allow manual controls
to track the movements of celestial bodies across the sky. This is referred to as diurnal movement:
movement of celestial bodies in the direction opposite to that of the earth’s rotation and around
the earth’s axis.

By aligning the telescope’s polar axis at celestial North, you will place the telescope in parallel with
the earth’s axis and thus be able to locate stars in the sky based on star atlas information. 

1.   Set up the telescope at night. Loosen the Declination Lock Knob and rotate the telescope

around the declination axis until the arrow on the declination scale points to 90 degrees.
Tighten the Declination Lock Knob. 

2.  Look up the latitude of your area in any geographical atlas. Loosen the Latitude Lock Knob

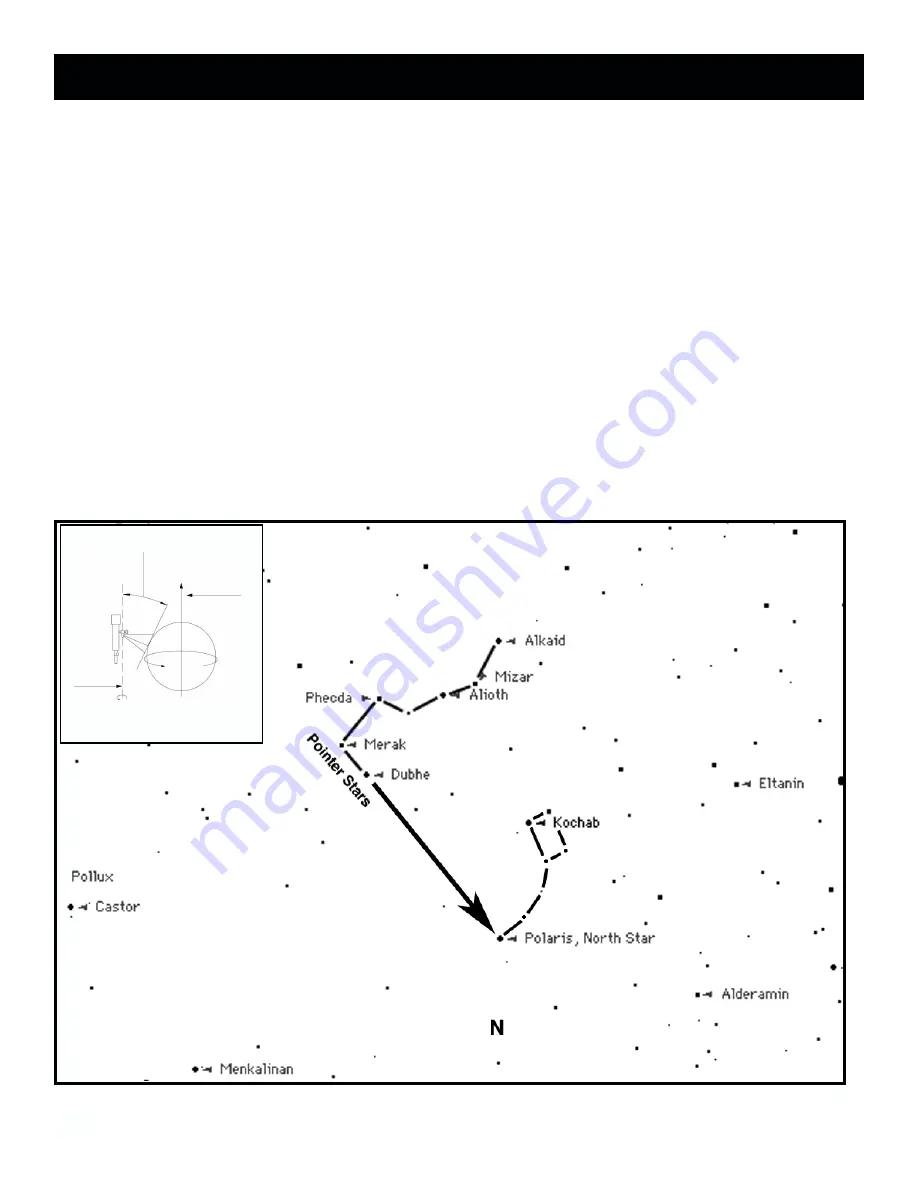
and set the latitude scale to the correct latitude for your area. Aim the Finderscope at Polaris.
You will probably notice that Polaris is not dead center in the Finderscope’s field of view. This
is probably because your telescope is not absolutely level with the ground. Loosen the
Horizontal Axis Lock Knob again and turn the telescope so that it is directly aimed at Polaris.
Tighten both the Horizontal Axis Lock Knob and Latitude Lock Knob. Polaris is 1 degree from
the North celestial pole. Therefore, the sighting of stars will have to be slightly adjusted as you
locate them in the heavens.

8.

HOW TO USE YOUR NEW TELESCOPE (CONTINUED)

POLAR

AXIS

LATITUDE

N

N

S

S

EARTH’S AXIS

(CELESTIAL AXIS)

POLAR AXIS & EARTH’S AXIS

Summary of Contents for 78-9500

Page 1: ...Telescope Instruction Manual 78 9500 60mm RefraCtor Lit 91 0264 08 01...

Page 2: ...Never Look Directly At The Sun With Your Telescope Permanent Damage To Your Eyes May Occur 2...

Page 3: ...n s rings and moons This is one of the most satisfying objects in the sky to see simply because it looks like it does in pictures Imagine seeing what you ve seen in textbooks or NASA images from your...

Page 4: ...jective Lens 5 Latitude Lock Knob 6 Tripod Leg 7 Accessory Tray Braces 8 Accessory Tray 9 Rack and Pinion Focusing Mechanism 10 Declination Lock Knob 11 Counterweight Shaft 12 Counterweight 13 Fine Ad...

Page 5: ...cope 20mm 12mm 4mm Eyepieces Erect Image Eyepiece For Land Use Barlow Lens PARTS LIST QUICK ASSEMBLY DIAGRAM 5 78 9500 60mm RefRactor Step 2 Step 1 1 Spread tripod legs and attach accessory tray 2 Att...

Page 6: ...e Equatorial Mount 2 Locate the Counterweight and Counterweight Shaft Loosen the thumb screw located on the Counterweight and slide the Counterweight onto the Counterweight Shaft and tighten thumb scr...

Page 7: ...of 105x or 135 power 35 x 3 105x or 105 power The magnification calculation would look like this 700 mm 20mm 35 power 35 power x 3 105 power Focusing Telescope 1 After selecting the desired eyepiece a...

Page 8: ...he declination scale points to 90 degrees Tighten the Declination Lock Knob 2 Look up the latitude of your area in any geographical atlas Loosen the Latitude Lock Knob and set the latitude scale to th...

Page 9: ...ly found in the main telescope tube which is important for continuing your exploration of the night sky 3 The low power eyepieces are perfect for viewing the full moon planets star clusters nebulae an...

Page 10: ...ree of defects in materials and workmanship for the lifetime of the original owner The Lifetime Limited Warranty is an expression of our confidence in the materials and mechanical workmanship of our p...

Page 11: ...11 M NOTES...

Page 12: ......

Reviews: