


Page 19 of 38
INSTRUCTION, USE AND
MAINTENANCE MANUAL
GB
1
Fig. 27
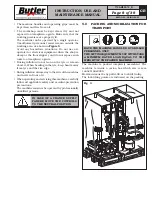
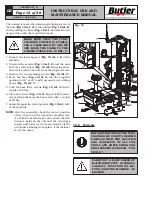
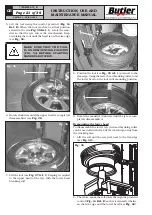
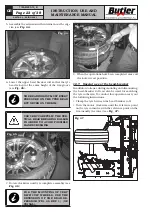
5. Move the lower roll close (
Fig. 27 Ref. 1
) with the
key (
Fig. 14 Ref. G1
).
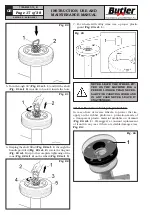
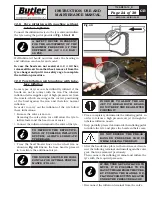
6. Only now turn the wheel clockwise (see
Fig. 28
)
pressing the pedal (
Fig. 15 Ref. A
) and, at the same
time, the push button (
Fig. 14 Ref. G1
), keeping
it pressed until there's room enough for the bead
breaking. Then operate the lower bead breaking
roll pressing the push button (
Fig. 14 Ref. E
) and
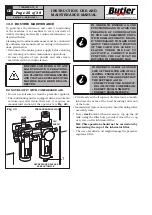
keep on with the bead breaking until the operation
is completed (see
Fig. 29
).
THE BEADING DISC MUST EXERT
PRESSURE ON THE TYRE BEAD
BUT NEVER ON THE RIM.
USE VERY CAREFULLY THE VER-
TICAL BEAD BREAKING ROLLER
IN ORDER TO AVOID POSSIBLE
HANDS CRUSHING.
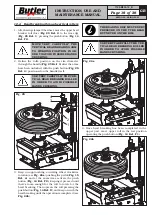
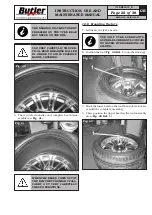
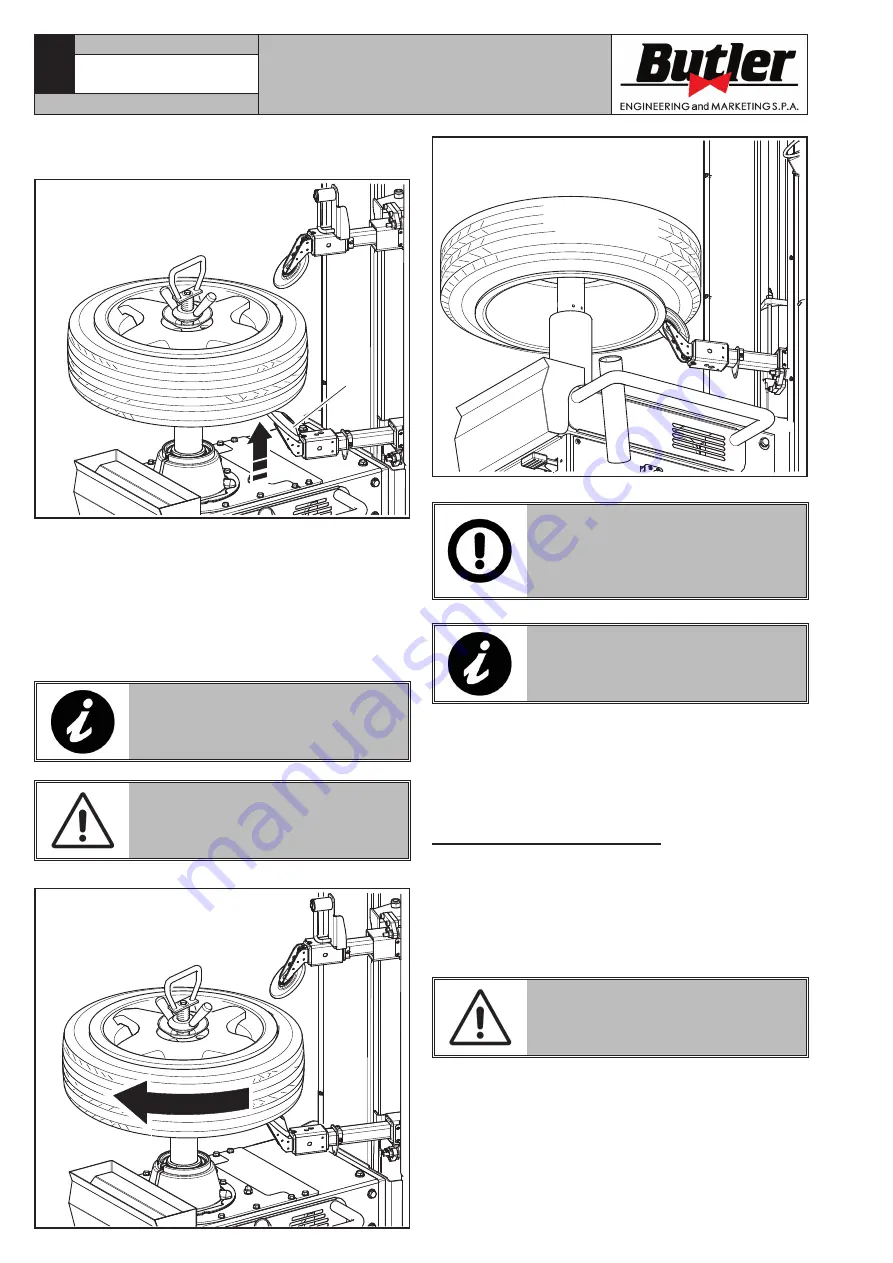
Fig. 28
Fig. 29
WHILE THIS OPERATION IS BEING
CARRIED OUT PAY ATTENTION
NOT TO DEFORM THE TYRE SIDE.
GREASE THE BEAD BEFORE THE
ROLL RE-ENTERS.
USE ONLY TYRE LUBRICANTS.
SUITABLE LUBRICANTS CONTAIN
NO WATER, HYDROCARBONS, OR
SILICON.
7. Once bead breaking in the lower part has been
completed, move the lower roll to rest position
activating the push-button (
Fig. 14 Ref. G2
).
8. Rotate the rim until the valve is positioned on the
immediate right of the roll.
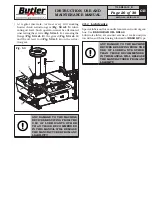
12.5 Demounting the tyre
When both beads are broken, the tyre can be de-
mounted.
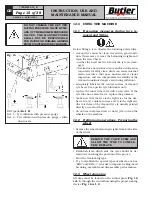
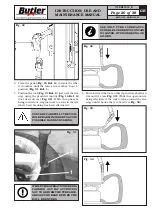
1. Define the tool position on the rim diameter through
the handle (
Fig. 30 Ref. 1
) after the arm has been
unlocked with the push button (
Fig. 30 Ref. 2
)
positioned on the handle itself.
MOVE VERY CAREFULLY THE TO-
OLS HOLDER ARM TO WORKING
POSITION, IN ORDER TO AVOID
POSSIBLE HANDS CRUSHING.
SEIDO.30 - SEIDO.30FI
7105-M005-10_B


