Section 2
– Mockup and Fit Check
BONGO bass Section 2- 3 -
2.4
Attach the Neck to the Body
1.
Insert the neck into the neck, aligning the mounting holes in the neck and body.
2.
Attach the neck to the body using the supplied screws (4), item #12 on the material list – do not
over tighten!
2.5
Fit Check & Alignment of the Pickguard (
#2
on materials list)
1.
Temporarily place the pickguard into position around the neck.
2.
Carefully slide the Pickguard under the neck and adjust the Pickguard so that it is snug against
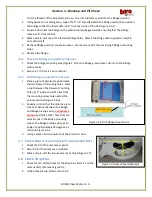
the neck while centered/aligned with the pickup cavities (Figure 2.2).
3.
Mark and pre-drill one mounting hole for the Pickguard – temporarily attach the pickguard using
3/8” screws (#4 on material list).
4.
With the pickguard in place, recheck the pickguard and pickup cavity alignment to ensure proper
positioning. If incorrect, repeat step #2 & #3 using another pickguard hole.
5.
Once confirmed, mark and pre-drill the remaining holes for the pickguard. Ensure all holes are
pre-drilled.
2.6
Fit Check the Bridge
1.
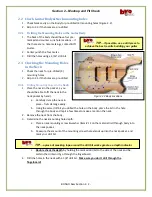
Check the Bridge mounting area (yellow area in
Figure 2.2) for six Bridge mounting holes.
2.
Skip to 2.6.2 if holes are pre-drilled.
2.6.1
Positioning and Alignment of the Bridge
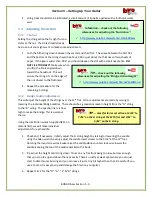
(Figure 2.6.1)
1.
Take the Bridge assembly (#6 on material list) and adjust the low saddle position to
a
p
p
r
o
x
i
m
a
t
e
l
y
TIP…
rubbing the threads of the screw on a bar of soap or candle will help prevent the
wood from splitting
INFO
…
the “scale” of your BONGO
bass guitar is 34”. This is not a musical scale;
rather it is the length of the guitar strings as
measured from the nut to the low E saddle on
the Bridge. This section ensures that the Bridge
is positioned correctly.
Figure 2.6.1 Bridge Positioning


