Section 4
– Assembling Your Guitar
JEM Section 4
- 5 -
spring claw so there is a little play in the block. The block still needs to be able to
move if you plan on using a whammy bar.
4.5
Install the Strings
Like most projects, there often several tricks that will make the assembly easier and your guitar better.
Properly stringing your guitar is just one of those tricks. Please review the
following videos:
“TECH TIP: Restringing your Floyd Rose Guitar”: this video deals with replacing the strings on a Floyd
Rose Guitar but includes tricks that can be used for your initial string installation.
https://www.youtube.com/watch?v=zEH3Ey76yb4&nohtml5=False
“Framus Tutorial: Setup of a Guitar with a Floyd Rose Tremolo”: this video also covers the replacement
of the strings as well as additional setup procedures you will need for section 5.
https://www.youtube.com/watch?v=YN7qF6JLoIc
Additional resources are available on
as well as the internet. Although these videos address
restringing a guitar, the principles and techniques will help you string your guitar – as well as provide a
visual for stringing your guitar.
1.
At the headstock, remove the 3 string lock blocks
from the nut using the 3mm Allen wrench and
align the tuners so that the hole is parallel to the
tuner shaft.
2.
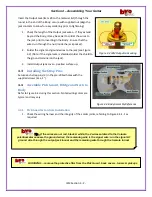
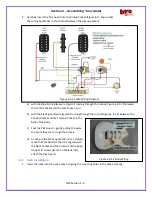
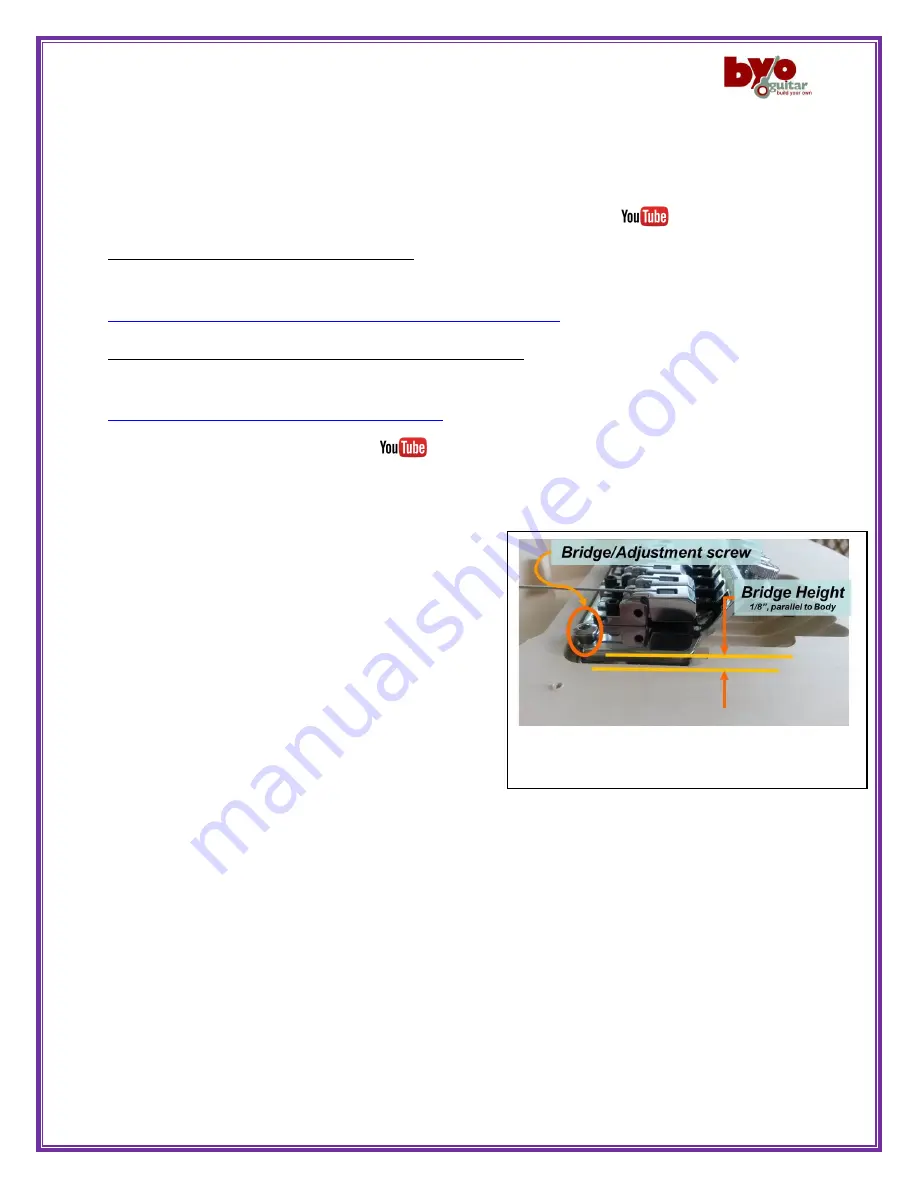
While holding the bridge assembly by the string
locking bolts, use the 3mm Allen wrench to
adjust the initial height of the bridge base so that
it is approximately 1/8” above the Body. Ensure
that the base notches are in the collared head of
the adjustment screw (Fig. 4.5-1).
3.
Carefully uncoil each of the strings (6), ensuring
that the stings do not have a kink.
4.
Select the low E string (largest diameter string) and remove the “string ball”, cutting the string
approximately 1” from the ball. Place the string between the low E saddle and the retaining
block, then tighten the associated string locking bolt with the 3 mm Allen wrench. Bend the
string down against the saddle with your finger to form a 90 degree bend.
5.
Adjust the hole in the first tuner to be perpendicular to the neck.
6.
Run the string upward through the hole in the tuner till snug on the neck and nut slot; gently
pull the string backward for a length of about 2 frets (check the video).
7.
Run the string forward (toward the end of the headstock) wrapping the around the tuner and
under the sting; bend over the string (toward the end of the headstock).
8.
Tighten the string down with the tuner; when the string is snug against the 1
st
slot in the nut,
trim the excess string.
9.
Repeat steps 4-8 using the next smaller diameter string & the tuner.
Figure 4.5-1 Tremolo String Installation

