Section 4 - Finishing Your Guitar
Lunatic
Section 4 - 5 -
video deals with replacing the strings on a Floyd Rose Guitar but includes tricks that can be used for your
initial string installation.
https://www.youtube.com/watch?v=zEH3Ey76yb4&nohtml5=False
“Framus Tutorial: Setup of a Guitar with a Floyd Rose Tremolo”: this video also covers the replacement
of the strings as well as additional setup procedures you will need for section
5.
https://www.youtube.com/watch?v=YN7qF6JLoIc
Additional resources are available on as well as the internet. Although these
videos address restringing a guitar, the principles and techniques will help
you string your guitar – as well as provide a visual for stringing your guitar.
1.
At the headstock, remove the 3 string lock blocks
from the nut using the 3mm Allen wrench and
align the tuners so that the hole is parallel to the
tuner shaft;
2.
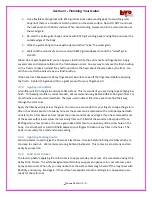
While holding the bridge assembly by the string
locking bolts, use the 3mm Allen wrench to
adjust the initial height of the bridge base so that
it is approximately 1/8” above the Body. Ensure
that the base notches are in the collared head of
the adjustment screw (Fig. 4.7-1);
3.
Carefully uncoil each of the strings (6), ensuring
that the stings do not have a kink;
4.
Select the low E string (largest diameter string) and remove the “string ball”, cutting the string
approximately 1” from the ball. Place the string between the low E saddle and the retaining
block, then tighten the associated string locking bolt with the 3 mm Allen wrench. Bend the
string down against the saddle with your finger to form a 90 degree bend;
5.
Adjust the hole in the first tuner to be perpendicular to the neck;
6.
Run the string upward through the hole in the tuner till snug on the neck and nut slot; gently
pull the string backward for a length of about 2 frets (check the video);
7.
Run the string forward (toward the end of the headstock) wrapping the around the tuner and
under the sting; bend over the string (toward the end of the headstock);
8.
Tighten the string down with the tuner; when the string is snug against the 1
st
slot in the nut,
trim the excess string;
9.
Repeat steps 4-8 using the next smaller diameter string & the tuner;
10.
Replace the nut locking blocks, but do not tighten;
11.
Install the Tremolo arm (item #6 on the material list) on the Bridge. Offset the arm end by
approximately 2” (or at your preferred offset) from the high E string.
Figure 4.7-1 Tremolo String Installation
Tip…
Put a shim
or block between the string
locking bolts and the guitar
body. This will help hold the
Bridge in place.


