Section 2
– Mockup & Fit Check
SG Section 2- 3 -
4.
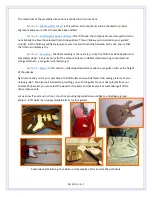
Mark 1 lower hole in each of the Pickups
–
drill starter holes and partially insert 2 mounting
screws.
a.
Check the overall alignment of all components;
b.
Realign as necessary;
c.
When the alignment is correct, pre-drill all remaining holes: 8 for the Pickups, 4 for the
Pickguard and 2 for the Neck base cover;
d.
As a final check, mount all components.
2.2.2
Truss
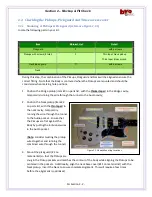
access cover (Figure 2.2.2)
1.
Align the plastic cover (Item # 16 on parts list)
with the Truss access hole.
2.
Mark and pre-drill the 3 holes.
2.3
Checking Electrical wiring and
components
Your SG guitar kit comes with a wiring harness that is
ready for installation during assembly of your guitar
(Section 4). Check the harness to ensure that all wiring remains solidly soldered to each component
–
re-
solder as required (…if necessary, check
Figure 4.2 for wiring color codes).
2.4
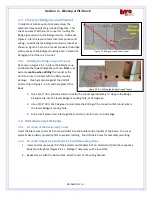
Check Bridge assembly (Figure 2.4-1)
1.
The SG
bridge assembly consists of a “Tune
-o-
matic”
bridge and a “stop tail piece”, each with 2 posts (
Items
# 5 & 7 on parts list). Each post is press fit into the body
at assembly - hole alignment will be validated during
this step.
2.
Partially insert (approximately 1/8”) the “tune
-o-
matic”
inserts & posts into the holes closest to the neck
–
install bridge over the posts.
Partially insert (approximately 1/8”) the “stop tail piece”
inserts & posts into the holes furthest from the neck
–
install
(slide) the stop piece over the posts.
Please call BYOGuitar if there are any issues with steps 1-2 above.
Figure 2.2.2 Truss Cover Alignment
Figure 2.4-1 Bridge Assembly Alignment


