background image


Page 9


Figure 5 


Figure 6 

Summary of Contents for LP

Page 1: ...LP Custom Guitar Kit Assembly Instructions ...

Page 2: ...s Wiring harness with 4 pots 2 Vol knobs 2 Tone knobs 3 way switch with selector plate Rear cover with 4 screws Rear switch cover with 3 screws Pickguard with screws Bridge Assembly Tune o matic bridge with 2 posts Stop Tail piece with 2 posts Neck 6 tuners 3 each side of headstock 6 small tuner screws 6 bushings and washers Nut Truss rod cover with 3 screws Pickups 2 Chrome Alnico V pickups 4 mou...

Page 3: ...g the Pickups 10 To attach the pickups to the guitar body 10 Installing the Nut 10 To install the nut 10 Finish 11 The Body 11 Solid Color Finish 11 The Neck 11 Pickup wiring diagram 12 Installing the Electronics 13 To install the electronics 13 Using the wiring diagram complete the soldering 13 Setup 13 Adjusting the Action 14 The Nut 14 The Bridge 14 Pickup Height 14 Intonation 14 ...

Page 4: ...r Fit the neck Drill the mounting holes for the bridge Sand the body and neck Sand some more Finish the body and neck Assemble the guitar Wire it up Final set up and adjustments Plug it in and enjoy It s recommended that you assemble your guitar before applying the finish Drill all the holes to eliminate any accidental chipping of the finish while drilling Fit the neck and locate the bridge before...

Page 5: ...h the tuners should fit snug 2 Slide a washer over the tuner shaft and screw the threaded bushing onto the tuner 3 Align the tuners perpendicular to the edge of the headstock and parallel to each other Use a strip of masking tape to secure their position on the headstock 4 Using a 1 16 drill bit in a drill press drill 3 8 deep holes into the headstock Note Drilling the holes deeper than 3 8 could ...

Page 6: ...location of the neck in and out it s important to understand how to determine where the neck should be located The distance from the nut edge closet to the fingerboard to the 12th fret is equal to the distance from the 12th fret to the bridge figure 2 Figure 2 ...

Page 7: ...idge This step is the same if you are installing a set neck or a bolt on neck It s important to get the correct neck alignment If the alignment isn t correct the E strings won t run parallel to the edges of the fingerboard Clamp two straight boards to each side of the neck and use a ruler to align the neck with the center of the bridge figure 4 If the bridge holes are already drilled the center is...

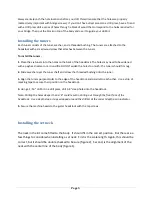
Page 8: ...e figure 5 If the angle is not correct you won t be able to get the correct action With the neck in the pocket place a straight edge on the frets Push the straight edge back until it s over the bridge The straight edge should be just over the bridge figure 6 ...

Page 9: ...Page 9 Figure 5 Figure 6 ...

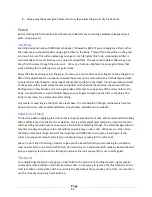
Page 10: ...e edge of the mounting ring The thinner mounting ring is the neck pickup The thicker one is the bridge pickup The thin edge of the mounting rings should be installed toward the neck To attach the pickups to the guitar body Push the wire on the neck pickup the thinner pickup through the hole to the hollow body and place the pickup in the pickup cavity with the thin edge towards the neck Push the wi...

Page 11: ...r fingers to clean out any filler in the holes The body is now ready for a sand and sealer coating Vinyl sealer is used to give the final coat a level base It is also helpful in filling scratches which are too deep to sand out We recommend Behlen s Vinyl Sealer available on our website Solid Color Finish The last step before applying the color coats is to apply a white primer coat We recommend Ohi...

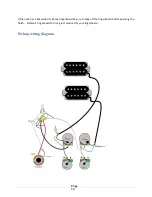
Page 12: ...ge 12 If the neck has a Rosewood or Ebony fingerboard be sure to tape off the fingerboard before applying the finish Behlen s Fingerboard Oil is a great product for your fingerboard Pickup wiring diagram ...

Page 13: ...switch Solder the pickups to the pots Each pickup has 4 wires Only two are used the green and the black bare The red and white wires are soldered together and be taped off so they are insulated These wires can be used for coil tapping if desired The signal and ground wires get soldered to the volume pots according to the diagram Setup Truss Rod First check your tuning Put a capo at the first fret ...

Page 14: ...should be a gradual increase in height from the first string to the sixth string Pickup Height Each pickup is adjustable on the bass and treble sides Finding the best combination of tone and volume will require some experimentation A good place to start is to adjust the pickup height so the first string is 1 8 over the pickup pole and the sixth string is about 3 16 over its pole Intonation Adjustm...

Reviews: