Copyright 2015 © C. B. Gi
Ʃ
y Cra
Ō
er Supply 2
F.
Bone ukulele saddle
G.
Bone ukulele nut
H. (4) washer-head screws
I. (3) drywall screws (two longer, one shorter)
J. Bridge/tail bracing block
K.
(4) Ukulele tuners
Tools Needed
The following tools are what we recommend for completing this kit—they are the same ones we used when
making this guide. You may be able to substitute other tools and methods, but please before using any tool
(hand or power) make sure you follow all safety recommendations!
Drill (hand drill or press)
Wood File or Rasp
Wood glue
Clamps (at least 2 or 3)
1/8” drill bit
A Phillips screwdriver
A ruler or measuring tape
A pencil
Small wood saw (optional)
Hole saw/Forstner bit/Spade bit for sound hole (optional)
Sandpaper (recommended)
Scratch awl (recommended)
Blue painter’s tape (recommended)
A digital chromatic tuner
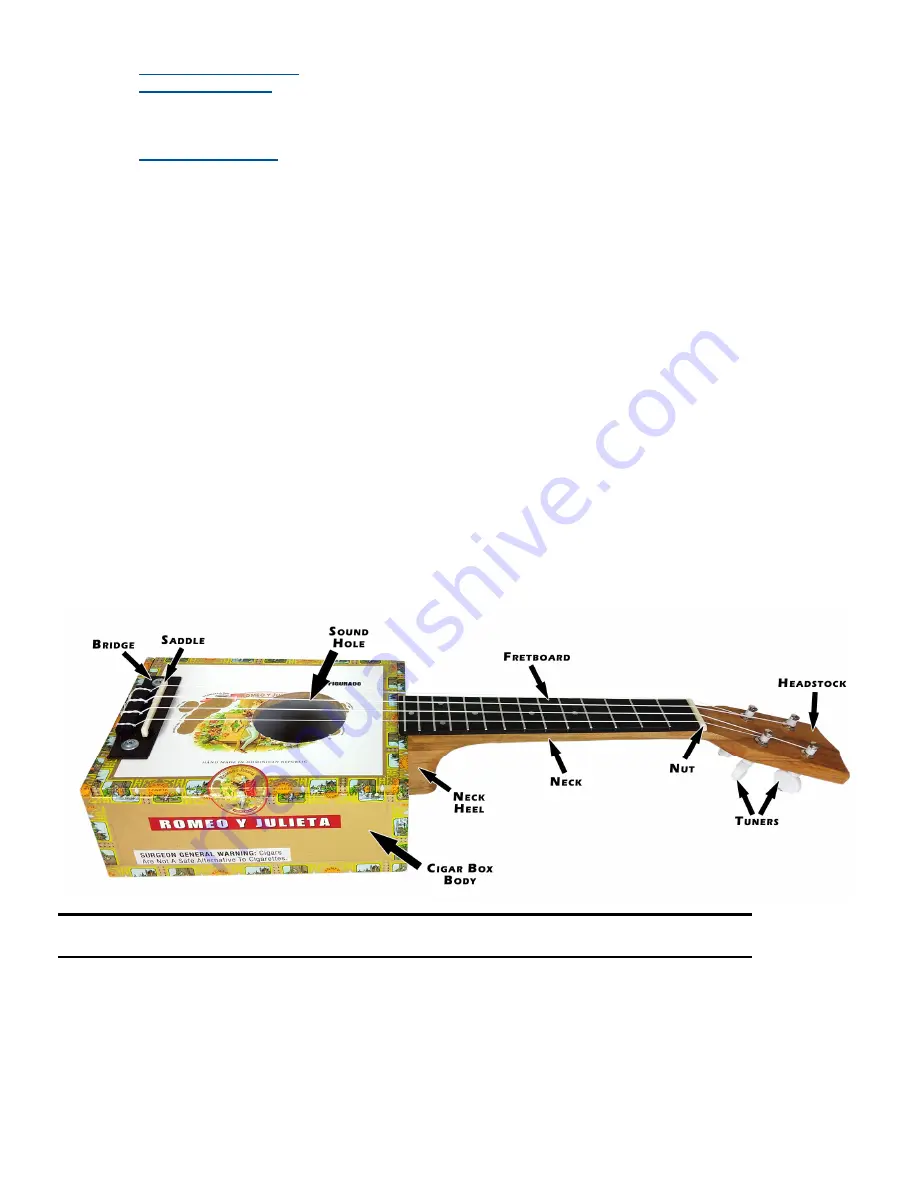
The diagram below shows a completed cigar box ukulele built from this kit, with all of the key components la-
beled. Refer to this diagram throughout the rest of these instructions, if you are not sure of where we’re head-
ed.
P
1—A
Step 1—Install the Neck Brace
To start building your C. B. Gitty Ukulele Kit, take the neck bracing block and fit it against the inside of the box
on which you’ll be mounting the neck. The block should not extend above the rim of the box edge, but if it
does, use a file or rasp to make it flush.
Usually the shorter ends of the cigar box are chosen for the ends of the instrument (as shown above), so that
it will have a horizontal orientation and be more comfortable to hold.


