Copyright 2016 © C. B. Gitty Crafter Supply 3
A. Front Body Panel
B. Back Body Panel
C. Fretboard
D. Nut
E. Tailpiece
F. Bracing Block
G. Body Side—Top
H. Body Side—Bottom
I. Body Sides (2)—Left and Right
J. Tuners (4) - style of tuners supplied in kit may vary slightly from those pictured
K. Tuner Mounting Screws (8)
L. Fretboard Mounting Screws—Short (7)
M. Fretboard/Neck Mounting Screws—Long (2)
N. Neck Brace with (2) Screws
O. String Ferrules/Bushings (4)
P. Bridge
Q. Set of Ukulele Strings
R. Neck Top/Middle Pieces (2—one with engraved branding)
S. Neck Bottom Piece (with tuner mounting holes)
Tools Needed
The following tools and supplies are what we recommend for completing this kit—they are the same ones we
used when making this guide. You may be able to substitute other tools and methods, but please before us-
ing any tool (hand or power) make sure you follow all safety recommendations!
Wood glue
Hand drill
Phillips screwdrivers (#1 and #2 points recommended)
Ruler or measuring tape
Clamps (or several heavy books, or even strong rubber bands)
Cotton swabs or paper towels/tissues
Sand paper
A digital chromatic tuner
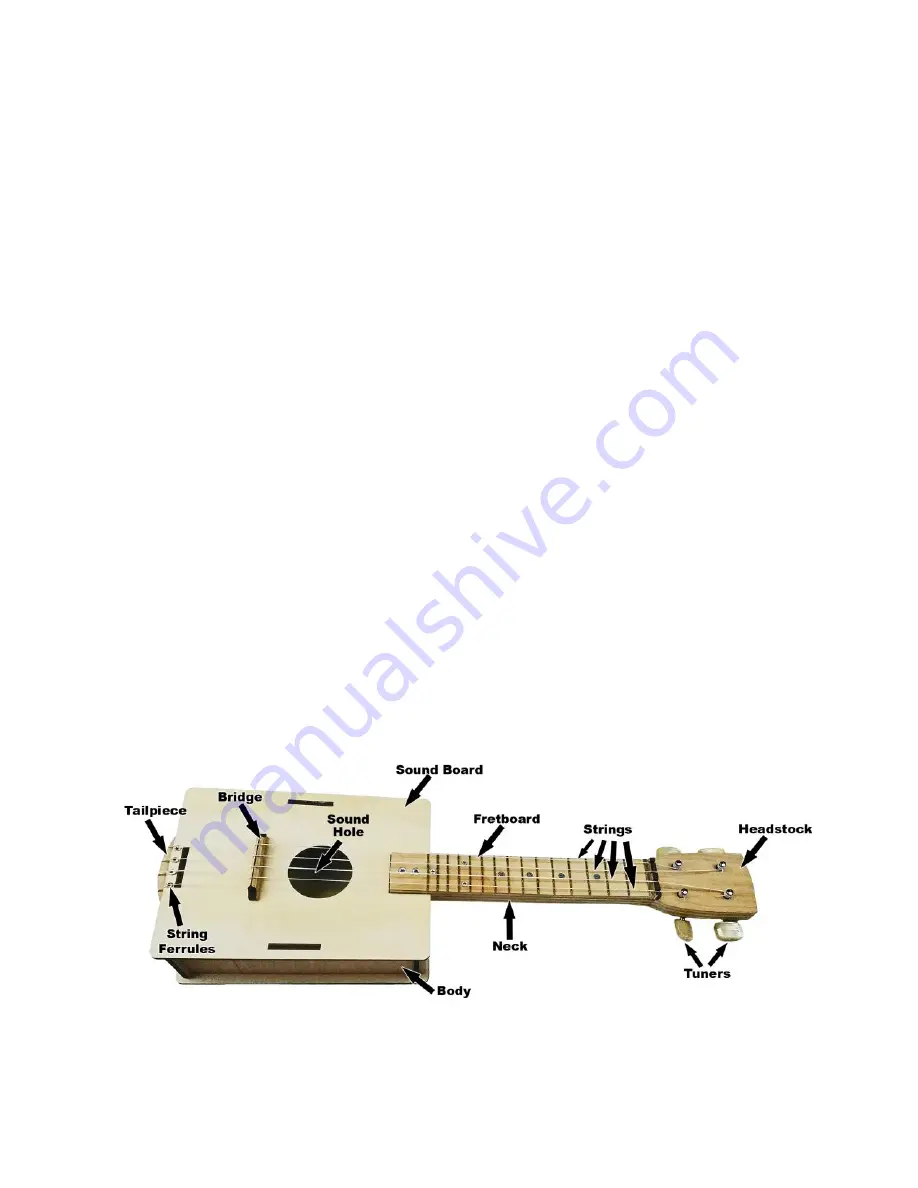
The photo below shows a completed ukulele built from this kit, with all of the key components labeled. Refer
to this diagram throughout the rest of these instructions, if you are not sure of where we’re headed.


