Copyright 2016 © C. B. Gitty Crafter Supply 6
Smaller quick clamps come in handy here, but a full-size clamp will work as well. A small weight can also
work, as long as you can keep even downward pressure.
Step
5
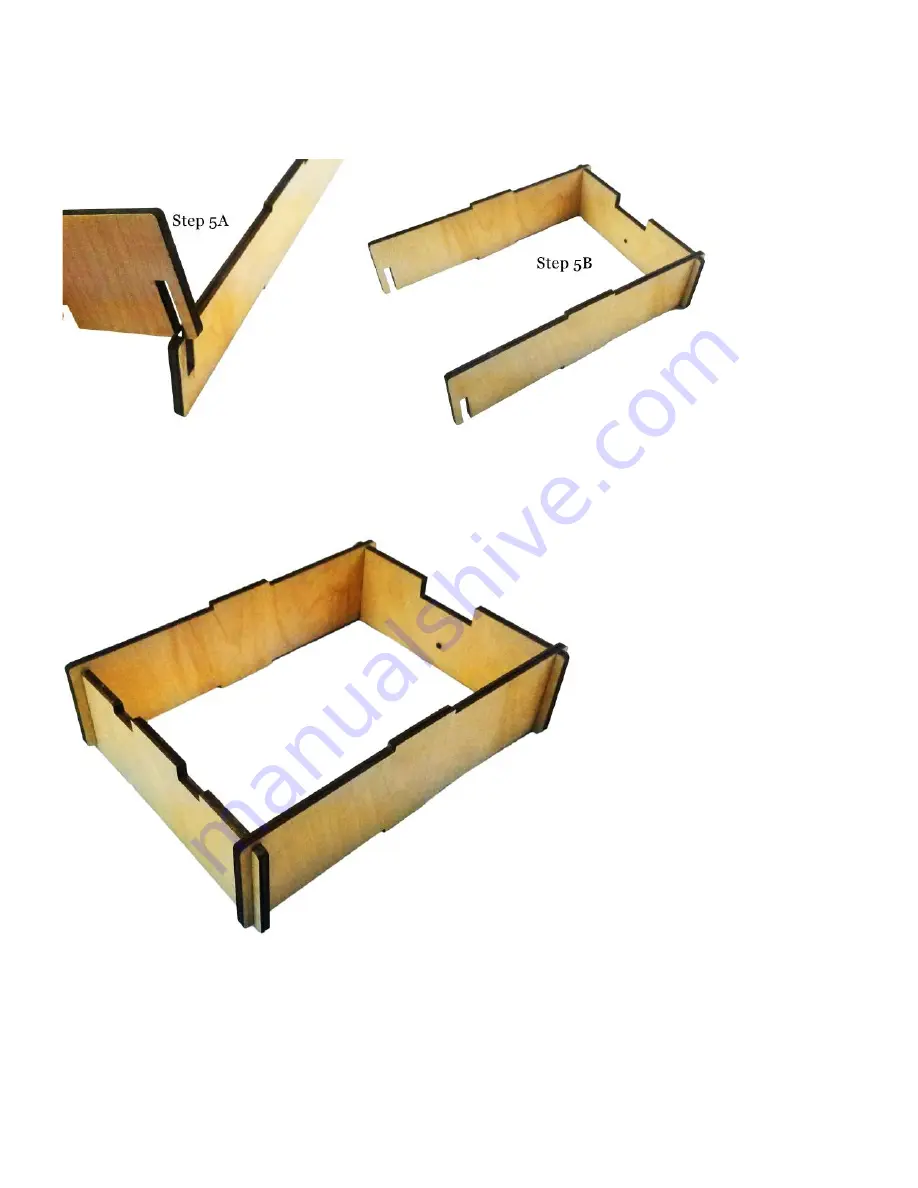
—Assembling the Instrument Body
The body of your ukulele is made up of 4 parts. Two sidewall pieces (Part I), and two end pieces (Parts G &
H). These parts fit together by sliding the open sides at the end of each piece together until they are flush.
Take care not to use too much force to piece these together to avoid breaking the wooden tabs.
To ensure a flush, tight fit on the corners, gently tap with a hammer or press together with your clamp.
We recommend squeezing a little glue into the slots to help sturdy up the box, but it is not absolutely neces-
sary to do so. The top side of this box has the cut-out for the neck as well as the tailpiece, and the bottom
simply has two tabs that will fit into the piece that make up the back of the instrument.
Step
6
—Gluing on the Back
Now it’s time to attach the back piece of the ukulele (Part B) to the body frame you have assembled. Run a
thin layer of glue around the bottom edge the body frame. Line up the two tabs on either side with the holes
on the back plate and carefully press into place. Set your clamps evenly around the sidewall, or place your


