5
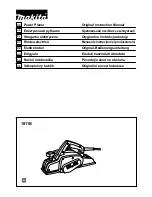
Operating instructions for the hand-
held plane
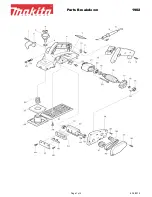
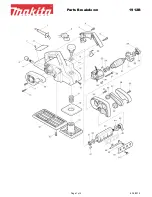
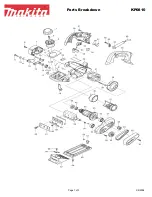
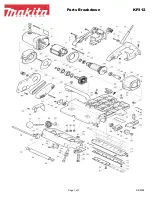
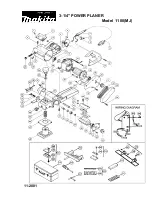
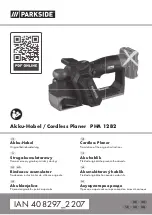
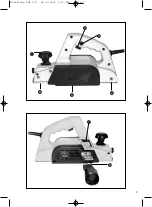
MACHINE DESCRIPTION
1
Knob for setting the planing depth
2
ON/OFF switch
3
Safety lock-off
4
Rear baseplate
5
Belt guard
6
Front baseplate
7
Chip outlet
8
Adapter for chip extraction
USE
The electric hand-held plane is for the planing,
rebating and chamfering of wooden parts.
POWER SUPPLY
Before using your machine for the first time, make
sure your power supply is the same as that specified
on the type plate. Under no circumstances should
your power supply exceed that specified by more
than 10%.
SWITCH
The electric hand-held plane is equipped with a
safety switch to prevent accidents. To switch the
machine on, press the lock-off button on the side of
the machine and then press the ON switch. To
switch off the hand-held plane, release the ON
switch, which will then jump back to its starting
position.
CHIP EXTRACTION
For optimum chip extraction, you can use the
adapter supplied to connect the hand-held plane to a
chip extraction system.
Slide the adapter over the chip outlet on the side of
the machine. You can now attach a suitable chip
extraction system to the round socket on the adapter.
USING THE MACHINE
Important: The electric hand-held plane must be
switched on before coming into contact with the
workpiece.
Setting the planing depth
The planing depth can be set between 0 and 2 mm
by turning the setting and guide knob to the left or
right. Always turn the knob until it engages.
When you have finished working with the plane, set
the planing depth so that the knife is lowered and
protected against damage.
Planing flat surfaces
Set the desired planing depth. Place the front
baseplate of the electric hand-held plane on the
workpiece and switch it on. Holding the plane in both
hands, slide it over the surface, making sure both the
front and rear baseplates are lying flat on the
workpiece.
To finish the planed surface, set a very low planing
depth and rework the planed surface as often as
necessary.
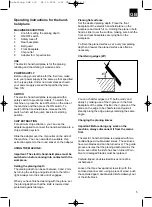
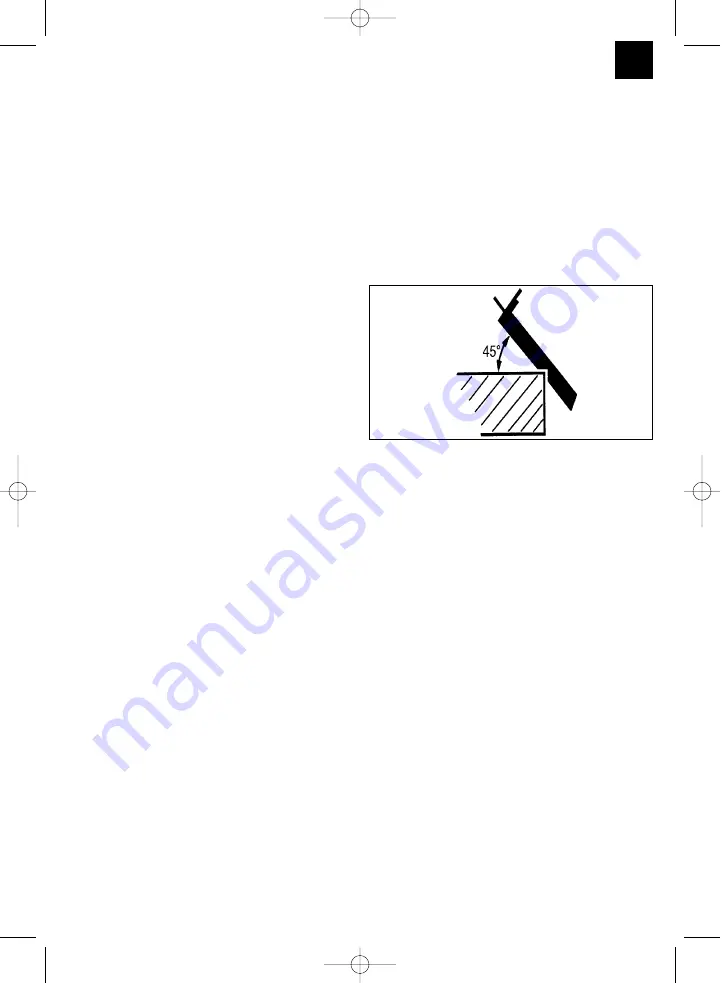
Chamfering edges (45°)
You can chamfer edges to 45° both quickly and
easily by making use of the V-groove in the front
baseplate of the plane. Position the V-groove of the
plane on the edge to be chamfered and guide it
steadily along the edge, always retaining the same
angle.
Changing the planing knives
Important: Before doing any work on the
machine, always disconnect it from the mains
first.
The electric hand-held plane is equipped with two,
carbide-tipped, double-sided knives. These knives
have two blades and can be turned over. The guide
groove ensures that the planing depth remains the
same, even after the knife has been turned. Worn,
blunt or damaged blades must be replaced.
Carbide-tipped, double-sided knives cannot be
resharpened.
Loosen the three hexagonal screws (9) with the
enclosed spanner and, using a piece of wood, push
the carbide-tipped, double-sided knife sideways out
of the knife block.
GB
Anleitung LHP 600 24.10.2001 9:51 Uhr Seite 5