background image

To check for accurate weight measurement:

1. Make note of the current weight in the feed bin using the Control Feed app.
2. Place the calibration weight in the feed bin. Every C-Lock provided calibration

weight will have the exact weight marked on it.

3. Ensure the SmartFeed bin weight increases by the correct amount.
4. If the weight increase is incorrect - check that the feed bin is fully suspended only

by the load cell bars. If it is suspended correctly, please calibrate the scale.

To calibrate the scale:

1. Remove all feed and debris from the feed bin. If needed, open the cleaning door

to remove the last bits of feed.

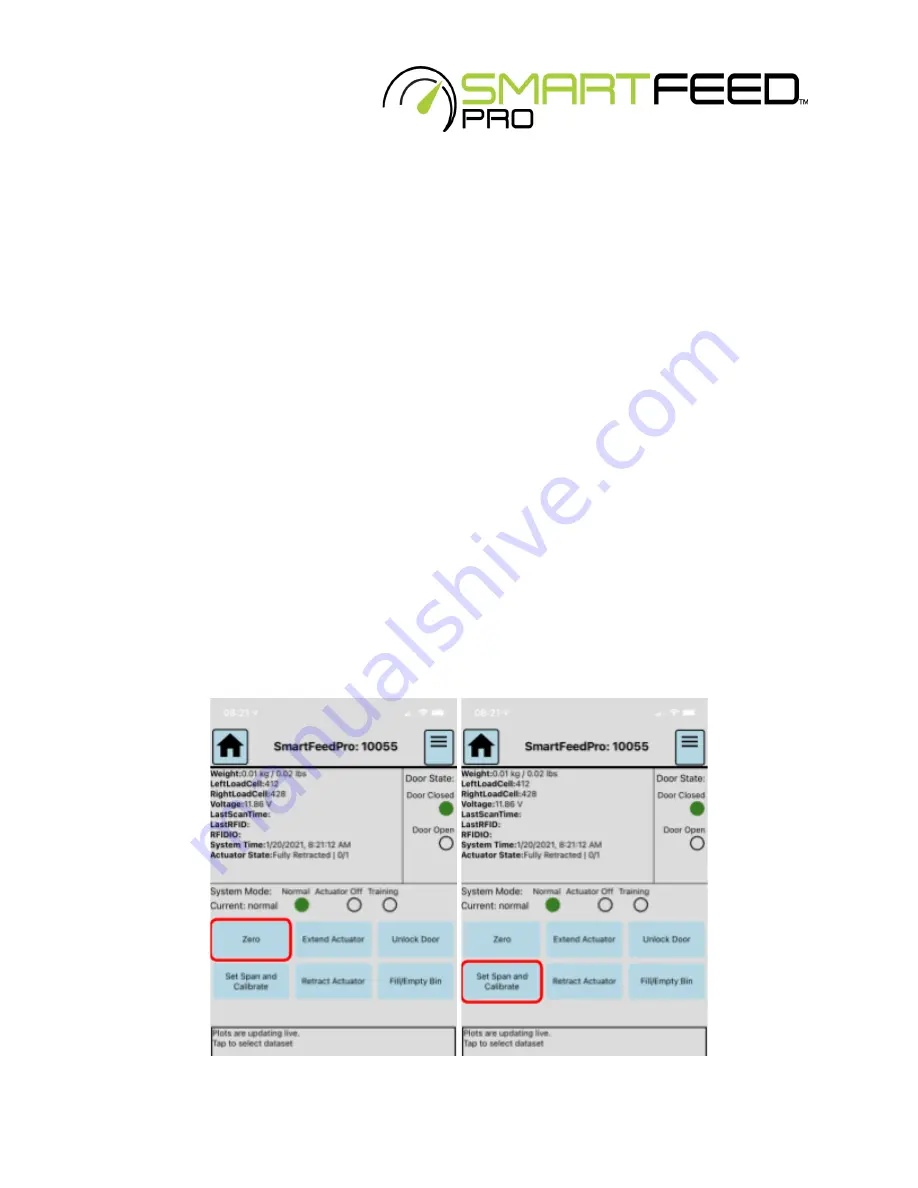
2. From the Control Feed app, tap Zero
3. When prompted to zero, ensure nothing is touching the bin. Then tap Yes.
4. tap Set Span and Calibrate
5. Type in the mass of your calibration weight, ensuring to select the appropriate

units of weight (lb or kg).

6. Type in the mass of your calibration weight, ensuring to select the appropriate

units of weight.

7. tap “Calibrate”
8. The correct weight should now be displayed on Control Feed.

16

Summary of Contents for SmartFeed Pro

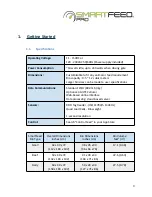
Page 1: ...for assembly operating maintenance inspection safety warnings and cleaning procedures For technical support please contact us at support c lockinc com 605 791 5657 For additional information visit ou...

Page 2: ...nd Off 7 Installing the Control Feed Mobile Application 9 Setup 9 Adjusting the Closed Door Height 9 Manually Opening the Door 10 Engaging the Training Latch 11 Adjusting the SmartFeed Height 12 Conne...

Page 3: ...Online User Interface 21 Home 22 SmartFeed 22 Feed Intake 25 Animal Statistics 25 Feed Types 26 Feed Intake Allotment 27 Data 28 Maintenance 28 Appendix A Configuring the Cellular Modem 29 2...

Page 4: ...WiFi 802 11b n g Optional 4G LTE Cellular Web based online interface Data processing cloud based server Sensors RFID Tag Reader ISO 11784 5 134KHz Quad Load Cells Bin weight 1 second resolution Contr...

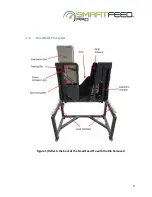
Page 5: ...1 2 SmartFeed Pro Layout Figure 1 Reflects the back of the SmartFeed Pro with the Bin Removed 4...

Page 6: ...ipment 5 Check regularly to ensure that feed has not fallen below the SmartFeed bin and is piling up Anchoring the Frame to the Ground Caution SmartFeed is front heavy and can tip over easily if not a...

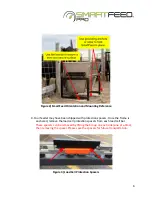
Page 7: ...ection spacers Once the frame is anchored remove the load cell protection spacers from each load cell bar These spacers can be removed by lifting the bin up on each side one at a time then removing th...

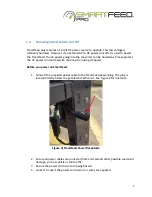
Page 8: ...ord and exercise caution when using AC power Before you power on SmartFeed 1 Connect the provided power cable to the SmartFeed power plug The plug is located directly below the gate latch mechanism Se...

Page 9: ...t on SmartFeed will illuminate to signify that it has power 3 Once power is applied please allow 1 minute for the system to initialize 4 Use the mobile Control Feed application to scan for your system...

Page 10: ...To install Control Feed on your mobile device search for Control Feed by C Lock Inc in the Google Play Store or Apple App Store or scan the QR code below Apple App Store Google Play Store https apps...

Page 11: ...button on the Control Feed app 2 Open the gate far enough to be held open by the training latch 3 Remove the gate height adjustment pin and re insert into the desired hole 4 For smaller animals place...

Page 12: ...4 for instructions on using the Mobile app The latch release switch should only be used if SmartFeed is powered off To open the door manually 1 Locate the latch release switch This switch can be foun...

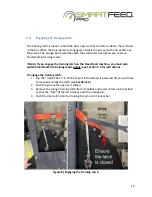
Page 13: ...the SmartFeed machine you must also switch SmartFeed into training mode online See Section 5 2 for instructions To engage the training latch 1 Tap the Unlock Door in Control Feed If SmartFeed is powe...

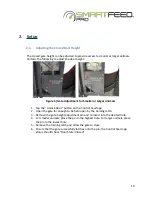
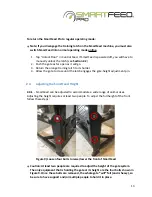
Page 14: ...engages the gate height adjustment pin 2 4 Adjusting the SmartFeed Height 2 4 1 SmartFeed can be adjusted to accommodate a wide range of animal sizes Adjusting the height requires at least two people...

Page 15: ...Fi requires configuration when connecting to a new WiFi network Ethernet requires additional equipment and an ethernet cable run to SmartFeed Cellular requires a cellular modem available at additional...

Page 16: ...ional work is required For international customers an activated 2FF Mini SIM card will be required Please ensure that the SIM card has a data plan allowance of at least 1GB per month of data For instr...

Page 17: ...ars If it is suspended correctly please calibrate the scale To calibrate the scale 1 Remove all feed and debris from the feed bin If needed open the cleaning door to remove the last bits of feed 2 Fro...

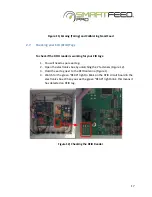
Page 18: ...need a spare ear tag 2 Open the electronics box by unlatching the 2 fasteners Figure 12 3 Hold the ear tag next to the RFID antenna Figure 1 4 Watch for the green READ light to blink on the RFID circ...

Page 19: ...Lock Inc in the Google Play Store or Apple App Store Initial Operation of Control Feed 1 Begin by tapping Start Scanning for Systems 2 A list of nearby devices within 50ft 15m will appear See Figure...

Page 20: ...ibrate the bin e Manually move the high power kick out actuator f Manually unlock the door g Indicate that the bin is about to be emptied or filled h View a real time plot of data i Change WiFi networ...

Page 21: ...mode will allow SmartFeed to the door to keep animals out but will not enable the actuator to push animals out This means that once the door does unlock for an animal they will be able to eat as much...

Page 22: ...with the WiFi network you wish SmartFeed to use 3 In the box that appears select WPA2 If the network is an open network no password select None 4 Enter the password for the network under Password if...

Page 23: ...3 This will allow the animals to see and understand that there is feed in the bin Once the animal becomes familiar with the feed in the bin close the door 50 open Section 2 1 and continue feeding the...

Page 24: ...n the table If color is Time last Synced Green Seconds ago Yellow Minutes ago Red Hours ago Grey Days ago For additional assistance click the button in the upper left corner 5 2 SmartFeed SmartFeed ma...

Page 25: ...he Upload Image button to select an image for your SmartFeed feeder not required 4 Real Time Displays the last RFID tag detected Current Local Time and Current Mass 5 Up to the Minute Mass Measurement...

Page 26: ...eat again This feeder is set to When calculating animal intake SmartFeed must know what state it is set to When using the training latch Section 2 1 set this to Training for all other settings use No...

Page 27: ...ntries when viewing in the browser 4 Click the Go button to view the summary table for the chosen data range The first sets of tables are categorized by type of feed Each animal s intake is displayed...

Page 28: ...tment Smartfeed Pro Only A maximum of 10 feed types is allowed 2 Click Save Feed List for changes to take effect If an animal encounters the SmartFeed with an unrecognized RFID tag the Default Daily A...

Page 29: ...has visited a SmartFeed feeder 2 It also includes how much of each feed type that animal is able to receive per day 3 You may also give the animal a Visual ID by changing the Animal Name This does no...

Page 30: ...page please contact C Lock 6 Maintenance To clean the inside of the feed bin unlatch the two cleaning door locks and allow the door to drop Use a power washer to spray and remove all debris and resid...

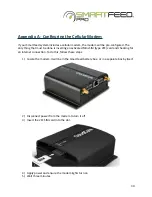
Page 31: ...erting an activated Mini SIM type 2FF card and checking for an Internet connection To do this follow these steps 1 Locate the modem It will be in the SmartFeed battery box or in a separate box by itse...

Page 32: ...with SMARTFEED 7 Join this network when prompted for the password enter smartfeed 8 On the laptop tablet or smartphone go to http www c lockinc com ip You should be presented with the following messag...

Reviews: