Repeater Panel Installation
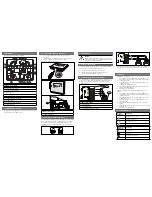
Fit the appropriate number of 8 Zone Extender PCBs in the MFP Repeater panel(s) as required for the
system. These are installed by securing the PCBs to the lid with the spacers and nuts supplied and then
connecting the supplied 6 way looms as shown in Figure 5 below.
Repeater Wiring
Up to eight MFP Repeater panels may be connected to one MFP Main panel with power and
communication transmitted using 2 core cable. Install the MFP Repeater panel(s) then run the cables in
accordance with relevant regulations. Fire resistant cable is recommended, of 1.5mm CSA. On larger
installations where there are long cable runs (greater than 400 metres), and many Repeaters, it is
advisable to use cabling with the largest CSA that may be practically used, typically 2.5mm CSA.
Wiring may be run from the MFP Main panel to the MFP Repeater(s) in whatever way best suits the
installation. In multiple Repeater installations the wiring may be spurred if necessary.
Once installed, check the wiring before terminating at the MFP Main panel, or at the MFP Repeater(s),
for shorts and open circuits. Check there is no leakage to Earth from either conductor.
Under no
circumstances must the wiring be “meggered” with any panels connected
. When these checks have been
made, make the wiring off at the MFP Main panel and the MFP Repeater(s).
Setting the Repeater Addresses
Each Main Receiver PCB must have a unique address to
enable the system to be monitored. The addresses are
set up by fitting the supplied links on SW4, which is
numbered 1, 2, 4, 8. (Note that “8” is for future
expansion and is not currently used and must not be
linked.) The address settings are shown in Figure 6 right.
Although addresses must be unique to each Repeater,
they need not be sequential, i.e. it is acceptable to use
addresses 3 and 7 for a two Repeater system.
The addresses are read when the system is powered up and therefore must be set when there is no power
on the system. Altering the addresses when the system is powered will not take effect until the next
power up cycle. Once the Repeater(s) have been addressed the system may be tested.
6 of 8
8 way Connector
(fixed in MFP Repeater panel’s base)
+1 -2
To Keyswitch
PL3
KEY
PL1
Loom to Base
+Ve 0V
Main Receiver PCB
SW4
8
4
2
1
A
D
D
R
E
S
S
PLK1
LINK TO DISABLE
PSU SENSE
PL2
EXPANSION
PL1
INPUT
8 Zone
Extender PCB
PL1
INPUT
8 Zone
Extender PCB
PL2
OUTPUT
PL1
INPUT
8 Zone
Extender PCB
PL2
OUTPUT
PL2
OUTPUT
Repeater Network
Connections (2 way)
Connections for Aux O/P’s (3 way)
and Ext. PSU (3 way)
MFP Repeater Panel
Figure 5 - Repeater PCBs Connections
SW4
8
4
2
1
=1
SW4
8
4
2
1
=2
SW4
8
4
2
1
=3
SW4
8
4
2
1
=4
SW4
8
4
2
1
=5
SW4
8
4
2
1
=6
SW4
8
4
2
1
=7
SW4
8
4
2
1
=8
Figure 6 - Repeater Address Settings
FF596 MFP Repeater Panel
Installation Instructions
•
Approved Document No. DFUR50010A Rev 2


