134
135
EN
EN
21
Handlebars and stem
21.1 Adjusting the handlebar height
Depending on the model, the handlebar height can only be changed by
replacing or converting the handlebars.
• Have your specialist bike dealer brief you accordingly.
• Have the necessary work performed by your specialist dealer.
21.2 Handlebar incline
If you change the angle of the handlebars, the angle of the
other controls will also change.
Then adjust the inclination of the other control elements such
as the brake lever to the new situation
on the handlebars” on page 135
.
Models with LightSKIN handlebars
When adjusting the handlebar incline, please note that the
light cone of your headlight also moves.
After adjusting the incline of the handlebars, make sure to
check the adjustment of the lighting
1. Loosen the screws on the stem cap until the handlebars can be turned
(fig. 16).
2. Turn the handlebars to the desired position.
3. Tighten the four screws of the stem cap alternately so that there is an
even gap between stem cap and stem body.
4. Tighten the screws (5-6 Nm).
16
21.3 Stem
!
WARNING
Risk of accident and injury!
If the stem is marked "KEEP THIS SIDE DOWNWARD", then it has a pre-
determined mounting direction and is specially adapted to the internal
cable and wire routing of the e-bike. The note must always be on the
underside of the stem, otherwise the clamping is not guaranteed,
which can lead to accidents and serious injuries.
» Work on the stem may only be carried out by a specialist dealer.
22
Controls on the handlebars
22.1 Brake lever
In order to be able to grip the handlebars securely during braking, you
should only operate the brake levers with your index and middle finger. If
this is not possible in a convenient manner, adjust the position of the brake
levers along the handlebars in order to be able to operate the levers the
way described.
22.1.1 Adjusting the brake lever incline and position
Adjust the incline and position of the brake levers so that your fingers rest
relaxed on the brake levers when you sit on the e-bike (fig. 17 on the left).
Your arm, wrist and fingers should form a line in side view. Your wrist
should be stretched as much as possible to relieve it (fig. 17 on the right).
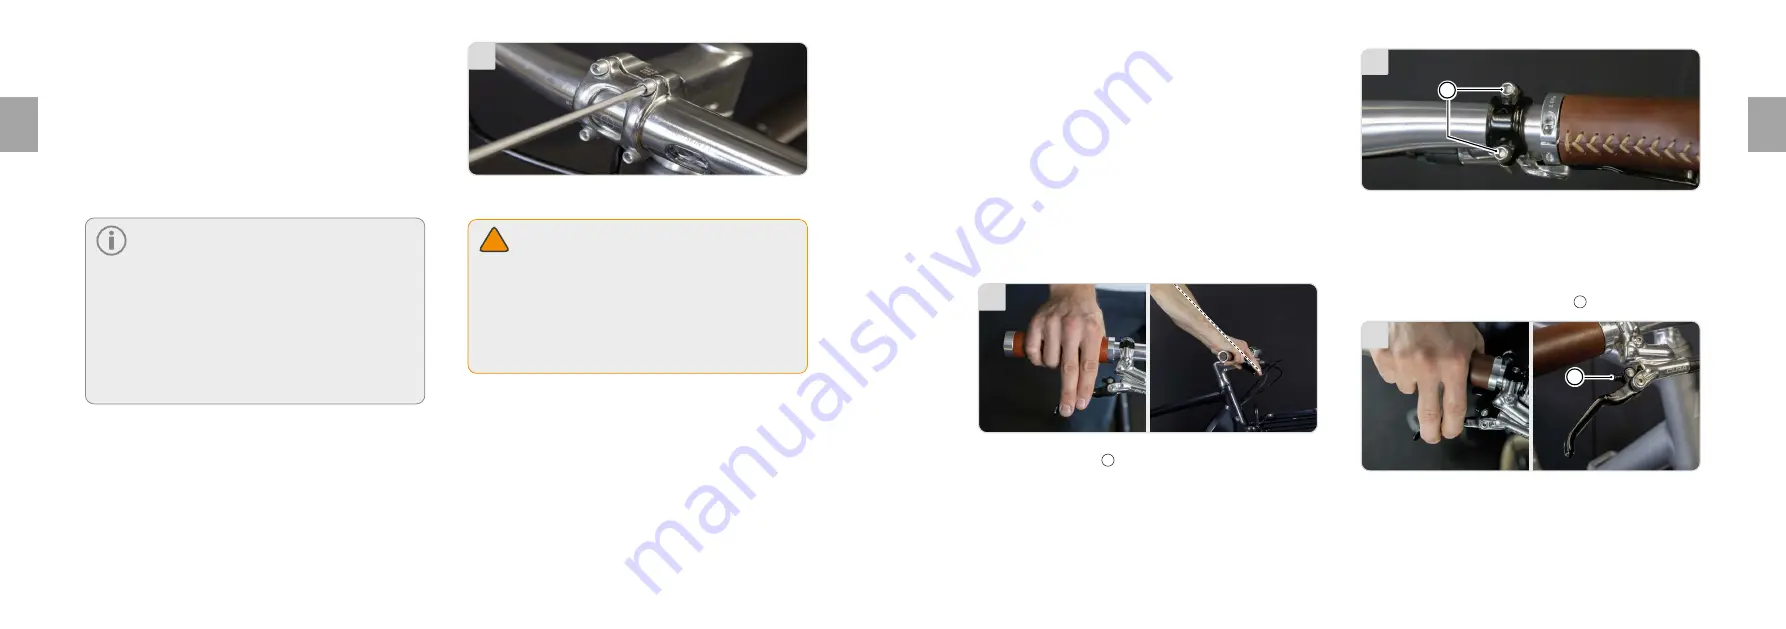
17
1. Loosen the two screws 1 of the brake lever clamp on the handlebars
so that you can move and tilt the brake lever (fig. 18).
2. Turn the brake lever to the desired position.
3. First tighten the upper screw of the brake lever clamp and then the
lower screw (2.5-3 Nm).
1
18
22.1.2 Adjusting the grip width of the brake lever
Adjust the grip width of the brake levers to your hand size so that you can
operate the brake lever safely with the first phalanx of the two placed
fingers (fig. 19 on the left).
• Adjust the grip width of the adjusting screw 1 (fig. 19 on the right).
1
19
Summary of Contents for Schindelhauer Oskar
Page 144: ......
Page 145: ...288 289 FR FR...
Page 146: ...290 291 FR FR...
Page 147: ...Schindelhauer Bikes Belt driven Since day one...


