50
A 3
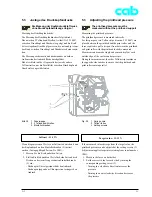
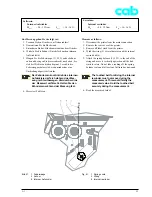
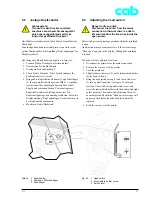
2. Für breite Etiketten empfiehlt sich die Stellung 1.
Hier ist die Druckkopfabstützung (2) vollkommen
deaktiviert.
3. Für schmale Etiketten lösen Sie die Rändelschraube (3)
und schieben Sie diese langsam in Richtung der
Stellung 5. Der Druckkopf (1) wird dabei außen
angehoben.
4. Überprüfen Sie die Justage, indem Sie die Gleichmä-
ßigkeit der Druckintensität kontrollieren.
5. Ziehen Sie die Rändelschraube (3) an.
Eine Fehljustage der Druckkopfab-
stützung kann auch zu Faltenbildungen
im Transferfolienlauf führen.
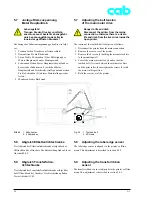
Bild 37
1 Druckkopf
2 Kopfabstützung
3 Rändelschraube
4 Langloch
Fig. 37
1 Printhead
2 Printhead support
3 Knurled knob
4 Elongated hole
2. Position 1 is recommended for wide labels.
In this position, the printhead support (2) is completely
disabled.
3. For narrow labels, loosen the knurled knob (3) and
slide it slowly towards position 5. This lifts the outside
of the printhead (1) up.
4. Test the adjustment by checking the evenness of the
print density.
5. Retighten the knurled knob (3) once you are satisfied
with the printed image.
Incorrect adjustment of the printhead
support may also cause wrinkles in the
transfer ribbon.


