56
A 3
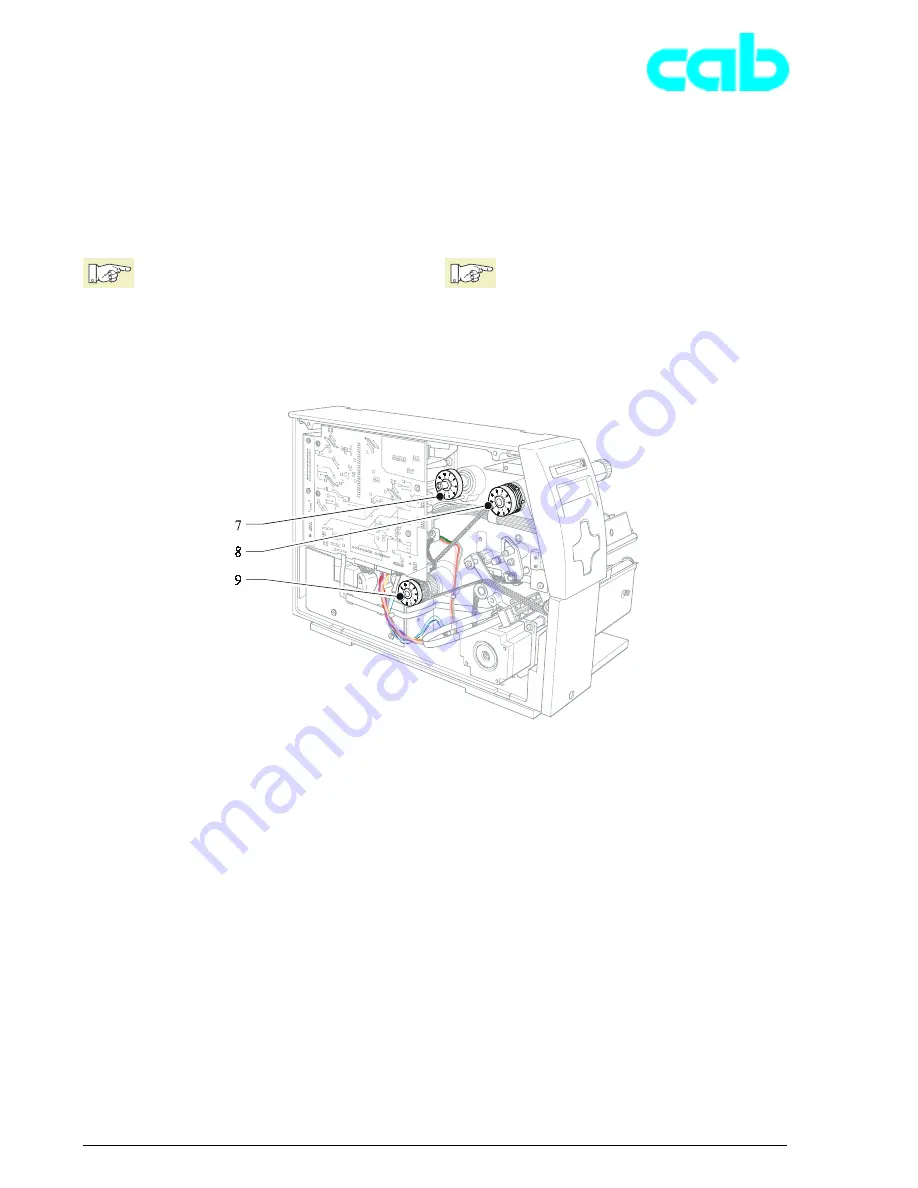
Gehen Sie zur Justage wie folgt vor:
1. Drucker vom Netz trennen.
2. Rückwand demontieren.
3. Wickelmoment durch Drehen an der Rändelmutter der
jeweiligen Kupplung (7, 8, 9) ändern:
- Drehung im Uhrzeigersinn - höheres Moment
- Drehung entgegen Uhrzeigersinn - kleineres Moment
Die Zahlen auf der Rändelmutter sind
keine Einstellwerte, sie dienen nur der
Orientierung!
4. Messung wiederholen.
5. Nach Ende der Justage Rückwand montieren.
Make the adjustment as follows:
1. Unplug the power cable.
2. Remove the rear cover.
3. Adjust the winding torque by turning the knurled nut of
the corresponding clutch (7, 8, 9):
- Turning it clockwise increases the torque
- Turning it anti-clockwise decreases the torque
The numbers on the knurled nut are not
setting values, they are for orientation
only.
4. Repeat the measuring.
5. Refit the rear cover after completing the adjustment.
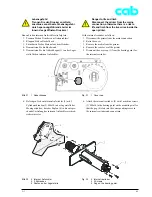
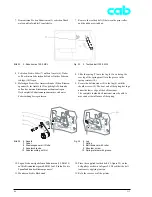
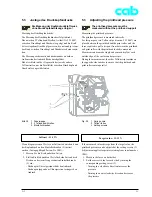
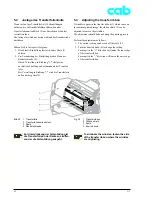
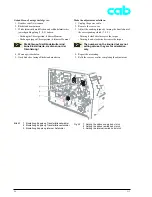
Bild 42
7 Einstellung Kupplung Transferfolienabwickler
8 Einstellung Kupplung Transferfolienaufwickler
9 Einstellung Kupplung interner Aufwickler
Fig. 42
7 Setting the ribbon supply hub clutch
8 Setting the ribbon rewind hub clutch
9 Setting the internal rewind hub clutch


