6
6
2
Installation
2.1
Unpacking
Check stacker for damage which may have occurred during transport.
Check delivery for completeness.
Contents of delivery:
•
Present sensor with trigger input
•
Scanner with retainer
•
Operator's Manual
•
User's Manual Colibri incl. CD
•
USB Cable Configuration Scanner
•
Test record with adjustment parameters
i
Notice!
Please keep the original packaging in case the printer must be returned.
!
Attention!
The device and printing materials will be damaged by moisture and wetness.
Set up label printer with code checker only in dry locations protected from splash water.
2.2
Mounting the Code Checker
!
Attention!
Disconnect the printer from the electrical outlet before mounting the code checker.
4
5
3
2
1
12
10
11
9
6
8
7
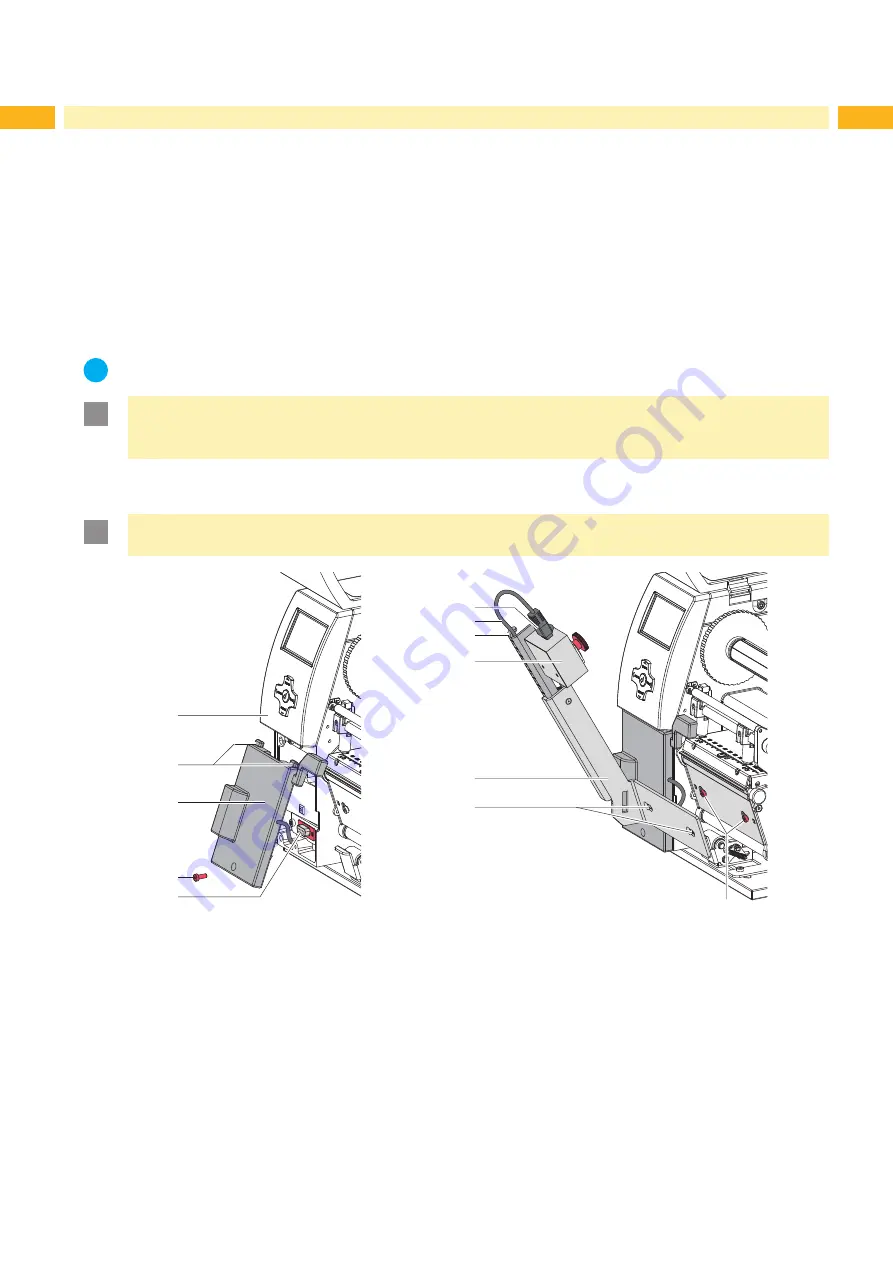
Figure 1
Mounting the code checker
1. Loosen screw (4) and remove the cover below the control panel (1).
2. Push the guides (2) of the present sensor (3) under the control panel (1) cover.
3. Press the present sensor against the printer. Make sure that the SUB-D 9 connector will be inserted in the
peripheral port (4) of the printer.
4. Insert and tighten screw (4).
5. Loosen screws (12) several turns.
6. Place retainer (10) with the holes (11) onto the screws (12) and slide it to the left completely.
7. Tighten screws (12).
8. Connect the plug (6) to the scanner (9).
9. Insert the cable (7) into the guides (8) of the retainer.


