8
9
3
Mounting
3.1
Positional Variants
!
Warning!
In case of loosening the Flanged joint, secure the printer with help of a second person.
ABC
123
ABC
123
ABC
123
ABC
123
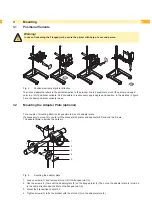
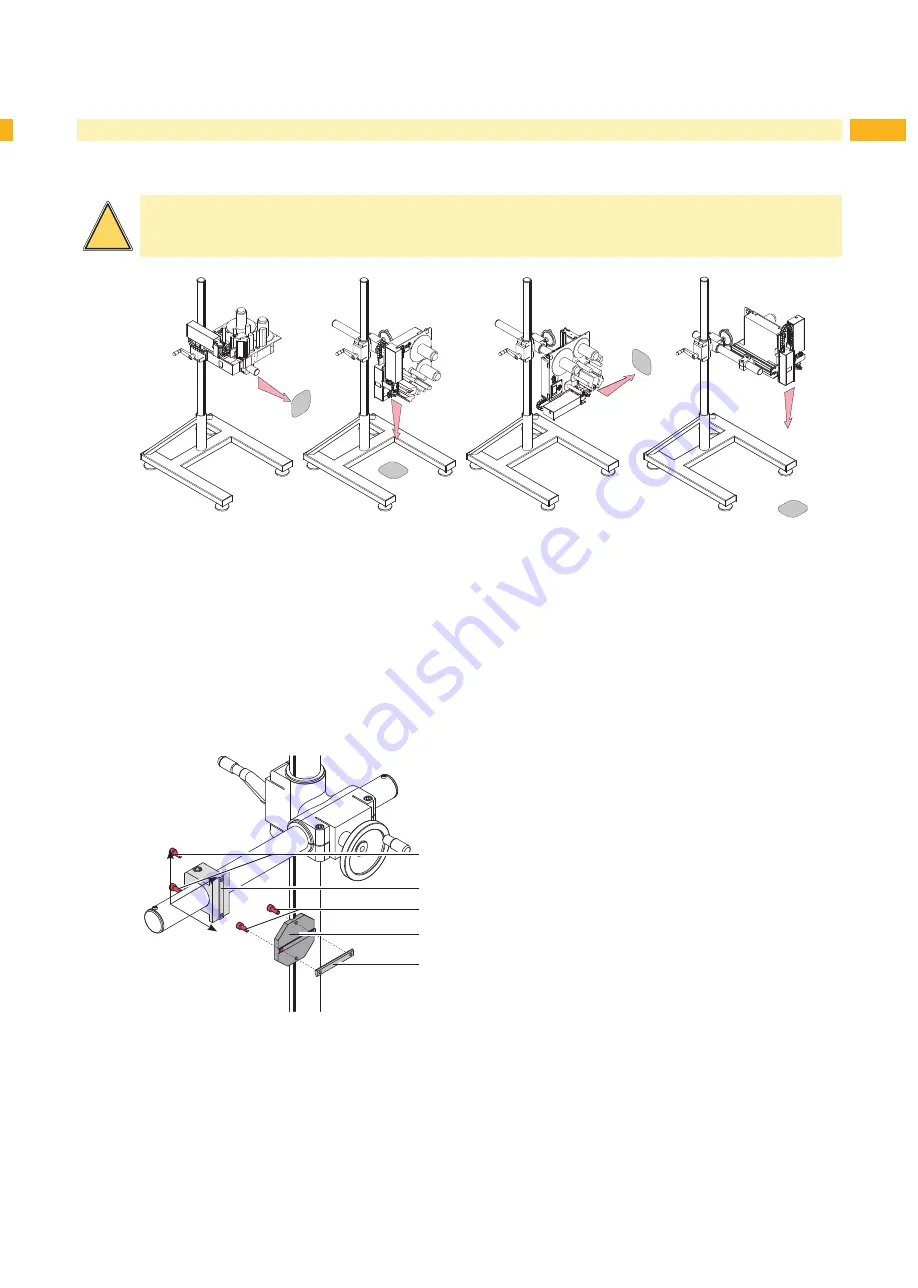
Fig. 4
Positional variants of printer direction
To print and apply the labels in the perfect direction to the product line is it possible to mount the printer and appli-
cator in a lot of positional variants. So it's possible to realize every apply degree and position. in the pictures in figure
4 are the basic positional variants to see.
3.2
Mounting the Adapter Plate (optional)
For a couple of mounting direction it's possible to mount a adapter plate.
It's necessary to mount it to could turn the bracket with printer and applicator 90°arround the Z- axle.
The adapter plate is include the delivery.
1
2
3
4
5
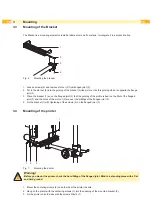
Fig. 5
mounting the adapter plate
1. Loosen screws (1) and remove slot nut (5) from flanged joint (2).
2. Use the screws (1) to mount the adapter plate (4) on the flanged joint (2) The nut on the adapter plate (4) must be
in the same direction like the fillet on the flanged joint (2).
3. Mount the bracket like chapter 3.3 .
4. Tighten screws (3) to fix the bracket with the slot nut (5) on the adapter plate (4).
z
y
x
Summary of Contents for Hermes+ 1602
Page 1: ...Floor Stand Operator s Manual 1602 Hermes ...
Page 12: ...12 12 ...


