background image

MP800 UHD Media Player Manual 

Page 

35

 of 

45


Rev. 100- 10/17/16 


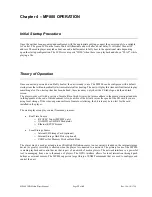
Use the remote control to locally start and stop the player. 


Press the STOP button to stop the currently playing file. 


Press the “MENU” button on the remote and then “FILE BROWSER” on the OSD to browse the files on the internal 
memory card. 


Look under VIDEO to see video files. Highlight a file name and press “Enter” to preview or press “Play” to start the file 
in full screen mode. Pressing ENTER will start the video in the upper right hand preview window. The file will play one 
time. In order to loop a file, it must be in a playlist.  


Look under HTML to launch the locally stored HTML files such as Menu boards and other signage layer content. 


Under SETUP, the network settings can be configured. This is where you find the unit’s IP address. You may also view 
network settings and firmware information on the INFORMATION page.  


The media player is compatible with H.265, MPEG2, and H.264. Quicktime and Flash files are not compatible.  


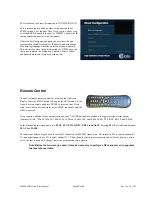
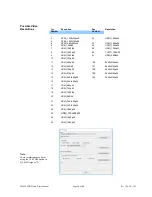
To change the unit video output resolution, press the TV MODE button on the remote control. Each time the button is 
pressed, it will advance to another resolution (480i, 720p50, 720p60, 1080i, 1080p, 4K, etc.).  


The Player Browser window can be set to 1024x768 for 4:3 monitors. For widescreen monitors use either 1366x768 or 
1920x1080. Remember that the Browser resolution is different than the player output resolution. The Browser window 
will be scaled to fit within the current player output resolution.  


Troubleshooting Tips: 


The MP800 has been configured at the factory.  After boot-up, if no video appears, please check the following: 


Is the monitor used capable of 4K? The MP800 may be set to a resolution too high for the monitor. 


Verify that the TV/Monitor is set to the correct input. 


Is the green LCD on? If not, please check the power connection. Also check the switch on any power strip 
into which the unit may be plugged.  Be patient as the unit starts from boot up, this may take almost 2 
minutes.  


Reboot the unit by disconnecting and reapplying the power connector. This will set the unit back to the 
default startup item. Please wait two minutes and then press menu on the remote control. Browse the video 
folder and press play on the desired playlist or HTML file.  


If the green LCD is ON, but there is no video, please check all the video cables and make sure that they are 
connected properly to the first distribution amplifier or to the correct input on the TV. Also check the RF 
input cable (MP800T model) and make sure that the threaded “F” connector is properly tightened. If all 
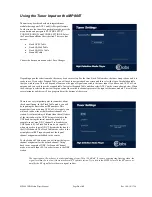
cables are properly connected, refer to the “Using the Tuner Input on the MP800” section in the operations 
portion of this manual for proper tuner configuration.  


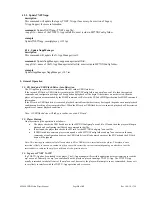
Does the LCD say PLAY or IDLE? If IDLE, then send the unit a playlist using QS Pro Designer 7X.  


For a Tuner Input unit, if there is video, but the picture is frozen on the screen or is “blocking/pixelating’ it 
is likely that the RF input cable is loose, or defective. Please tighten the RF input connector, or, if necessary, 
replace it. The signal level may be too low if there are several RF splitters inline. Try to locate the MP800 
close to the RF source. If this does not solve the problem, the RF signal may need to be amplified. 


MP800 Quick Facts 


Summary of Contents for MP800BL

Page 1: ...Page 1 of 45 Rev 100 10 17 16 AUDIO VIDEO APPARATUS XXXX MP800BL with HDR10 4K Ultra High Definition Media Player INSTRUCTION MANUAL Version 1 00 Please visit our web site at www celabs net for the l...

Page 2: ...s CCM2 Content Manager for Windows 18 CCM2 for Windows 20 Chapter 4 MP800 OPERATION 22 Initial Startup Procedure 22 Theory of Operation 22 OSD On Screen Display menu 23 Remote Control 25 Using the Tun...

Page 3: ...rd from being walked on or pinched particularly at plugs convenience receptacles and the point where the exit from the apparatus 11 Only use the attachments accessories specified by the manufacturer 1...

Page 4: ...ner MP800T model It has an extremely effective performance versus cost ratio and provides a great return on investment The MP800 is a commercial grade application specific graphics processor specifica...

Page 5: ...ection in this document for a description of the connector pin out HDMI VIDEO OUPUT 2 USB ETHERNET 10 100 1000 VGA COMPONENT VIDEO OUPUT COMPOSITE VIDEO R L AUDIO OUT DIGITAL AUDIO OUT RS 232 CONTROL...

Page 6: ...p 50 and 4Kp 60 In the blue button section you may use PLAY STOP FWD REV PREV and NEXT Pressing PLAY will alternate between PLAY and PAUSE The numerical buttons may be used to enter a RF channel on th...

Page 7: ...h Definition modulator to the Tuner Input Tighten the F connector securely The optimum RF level will be between 0 and 20dBmV Ensure the RF level at the input is greater than 20dBmV unit mutes 23dBmV T...

Page 8: ...most protocols can be accommodated The connections are Tip 5V Ring Signal Sleeve Signal Contact one of our sales professionals if you are interested in utilizing the IR OUT Mounting The media player...

Page 9: ...lication allows you to scan your network to discover installed players or you can manually add them Once the player is input the software may be used to check status set video resolution add or delete...

Page 10: ...ftware continued The first screen you see on QS Pro Designer 7X is Player Search Click OK to add the discovered players to the Media Player database The main screen with Player Status selected will sh...

Page 11: ...player playlist 4 Select the Playlist Tab and create a playlist by adding some of the content added to the Video Images Channels or Music Tabs You may select New Playlist to create an all new content...

Page 12: ...Click on the Playlist to load and select the playlist you just created You may also select a Layout to load if there is one available If you do not select a Layout the videos or other elements in the...

Page 13: ...00 Creating the Push Button configuration files with QS Pro Designer 7X Start QS Pro Designer 7X on a PC that resides on the same network as the target media player select the correct player click on...

Page 14: ...create a very media rich layout using the included tools The image to the right is showing the Layout creation screen The Zones in the left column are dragged into the Layout area Important Set the d...

Page 15: ...e will always be black at this level It is a placeholder for when we merge the Layout with a Video Playlist later Once the layout is created and saved click on the X to exit back to QS Pro Designer ma...

Page 16: ...to verify that the firewall is indeed off for QS Pro You can temporarily turn the firewall completely off to test if this resolves the file transfer issue Windows7 VISTA Operating System To turn firew...

Page 17: ...d here Disabling Checksum Offloading If you have a large number of download failures with QS Pro Designer during Load Play the procedure below may help Note that if the downloads are always failing yo...

Page 18: ...to player groups Assign descriptive information to each player Create video content packages Create content packages that group playlists and schedules together Easily add edit or remove playlists and...

Page 19: ...n the CCM2 system the players are preconfigured with the CCM2 server address Players can then be operated in any location that has internet access This arrangement does not require port forwarding on...

Page 20: ...ct our CE labs Sales department for more information and to schedule a demonstration In order to use the CCM2 system an application is loaded on the MP800 that will link to the control software using...

Page 21: ...added if you know their MAC address but care must be taken to enter the information accurately It is recommended to add the unit to the system once they have connected to the server at least one time...

Page 22: ...at high bit rates but please adhere to the media creation standards in the appendix at the end of this document Also be aware of the bit rate versus the speed of the SD card if you are using local sto...

Page 23: ...files in that playlist one time If the playlist was created with a loop command at the end the files will loop around and play again continuously The Video folder contains individual video files Pres...

Page 24: ...manent fixed address by un checking the USE DHCP box on this screen and updating the IP ADDRESS MASK and GATEWAY fields You must highlight Save Changes and press ENTER on the remote control for these...

Page 25: ...the MENU button to bring up the OSD menu Use the Arrow keys to navigate and press ENTER to select an item If you wish to exit the On Screen Display press MENU repeatedly until the OSD is removed If yo...

Page 26: ...the tuner module This will take several minutes and there will be a progress bar at the bottom of the screen There is one very important point to remember about the channel lineup In the Fixed Table m...

Page 27: ...o playlist browser or music file can selected for playback on player start up The item to start is specified in the configuration file on the external memory device The playback starts when the player...

Page 28: ...n LEDs The default is for the LEDs to be off and only light up when the button is pressed By setting the ledopt to a different number the behavior may be changed Delete the ledopt line from the file t...

Page 29: ...mmand EraseTNETXapp example EraseTNETXapp 4 2 2 StartUpItem description Sets the item to be played on player start up and upon insertion of the external memory device SD card or USB flash drive This m...

Page 30: ...ia files When the SD card or USB flash drive is re inserted playback will be restarted regardless of current playback conditions Note A USB flash drive will take precedence over an SD card 5 2 Player...

Page 31: ...mp7xx conf This file should contain the line UpdateTNETXapp celabsPlayer700_v117 tgz Note The file celabsPlayer700_v117 tgz may need to change to match the latest filename if newer software is releas...

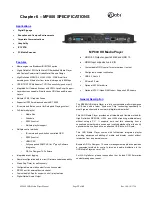
Page 32: ...er HDMI 2 0 Output supports 4K 60 and HDR 10 HDMI Input supports true 4K IN Customizable GPIO control for external input output Configurable content verification USB 2 0 Host x 2 SD card 2 0 slot Opti...

Page 33: ...ase model for streaming applications MP800T Includes ATSC QAM RF tuner module Contact sales 1 800 767 6189 for other models Technical Specification Status Display 14 digit LED IP Address System status...

Page 34: ...0 60 TVSTD_1080i60 9 HDMI_1080i60 61 HDMI_480i240 10 HDMI_720p60 11 HDMI_480p60 100 3840x2160p24 12 HDMI_480i60 101 3840x2160p25 13 HDMI_720p50 102 3840x2160p30 14 HDMI_576p50 103 3840x2160p50 15 HDMI...

Page 35: ...ed at the factory After boot up if no video appears please check the following Is the monitor used capable of 4K The MP800 may be set to a resolution too high for the monitor Verify that the TV Monito...

Page 36: ...pability of the installed SD memory card As a general rule you are safe up to 20 Mb S per second with a Class6 speed card At bit rates over 20 Mb S and up to 40 Mb S a Class10 speed or better SD card...

Page 37: ...sses lightning or ESD excess wear and tear and or defects resulting from unauthorized disassembly and or modification Cable Electronics Inc http www celabs net 3209 Wood Drive Garland TX 75041 469 429...

Page 38: ...r QS Pro 7X QS Pro Designer 7X Installation Procedure Step 1 Download the latest version from http www celabs net When prompted save the file Step 2 Find the file look in My Documents Downloads and ex...

Page 39: ...as the video being played and the layout assigned to be played By selecting the Player Control Tab and then clicking on File Manager the user can see and manipulate media that is loaded on the select...

Page 40: ...e a demonstration Our customer service department can assist in configuring your server if you wish to purchase CCM2 and host your own installation In order to use the CCM2 system an application is lo...

Page 41: ...The LED interface has a ground and a positive VCC that is driven by a transistor When activated there is 4VDC available to illuminate an LED for the button Normal condition is off and the 4VDC is asse...

Page 42: ...is specified below MP4 is acceptable Best Format Recommendation MP800 Video Audio Encoding Settings for HEVC h 265 Codec Video Settings File Format Container MKV Frame rate 23 97 or 29 97 Codec h 265...

Page 43: ...ched to a monitor you may notice the files being updated on the screen 5 After the process is complete around 2 minutes the media player will stop at a command prompt bash 3 000 6 Unplug the player an...

Page 44: ...ites especially when video is being played concurrently When navigating from a web page to another web page allow some time for the previous page to unload For large complicated pages both loading and...

Page 45: ...folder 5 Create the following file Control PlaylistVersion 2 0 List ENTRY1 VIDEO Video_File_1 Note Use the names of the files stored in the video folder ENTRY2 VIDEO Video_File_2 ENTRY3 VIDEO Video_Fi...

Reviews: