Easy Transfer Cable for Windows
7
3.3 Easy Transfer Cable Installation and Use
3.3.1 Starting the
Easy Computer Sync
Software
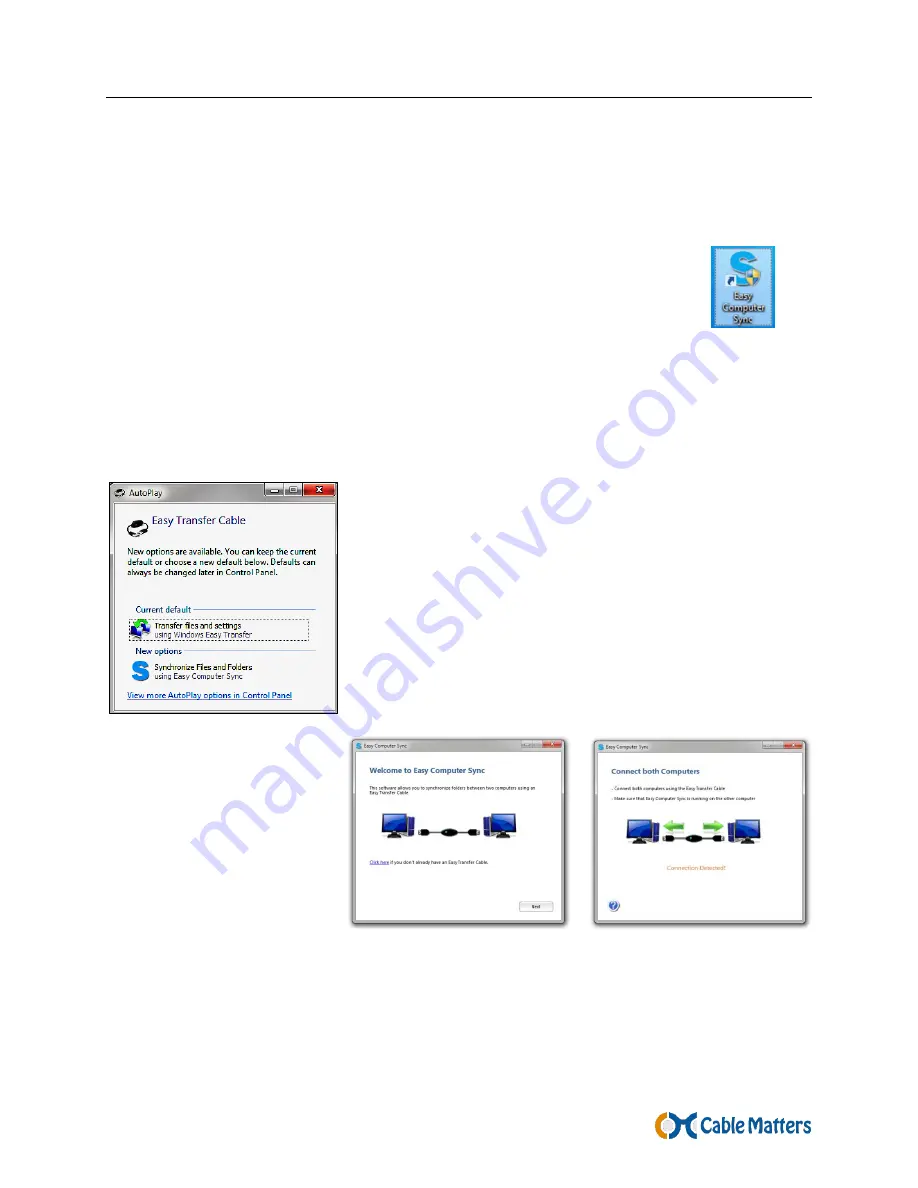
There are 3 ways to start the software on BOTH computers:
1. Double-click the
Easy Computer Sync
desktop icon on source and
target computers to start the program.
Click ‘Yes’ and connect the
cable.
2. Use the program from the Start Menu
, Click ‘Yes’ and connect the cable.
Windows XP, Vista: Start Menu > All Programs >
Easy Computer Sync
Windows 7, 8, 8.1, 10 Start Menu > Search for
Easy Computer Sync
3. Connect the
Easy Transfer Cable
to the USB ports of both computers:
The AutoPlay menu allows you to select either the
Windows Easy Transfer
or
Easy Computer Sync
software with the cable.
The preferences for AutoPlay can be configured from the
Control Panel.
Windows 8.1 or 10 will not launch the AutoPlay Menu since
Microsoft Windows Easy Transfer is being deprecated in
8.1 and replaced with OneDrive.
FINAL STEP:
Click ‘Next’ until you see
‘Connection Detected!’
XP and Vista Users: If your computer does not recognize the
Easy Transfer Cable
you may need updated Windows drivers. Download the Windows Easy Transfer
software from Microsoft and check that your computer has the latest updates.


