Chapter 4: Installation
4-6
SEHI100TX User’s Guide
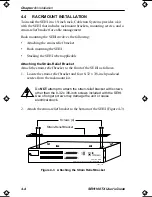
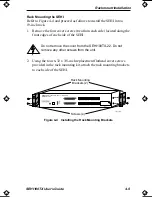
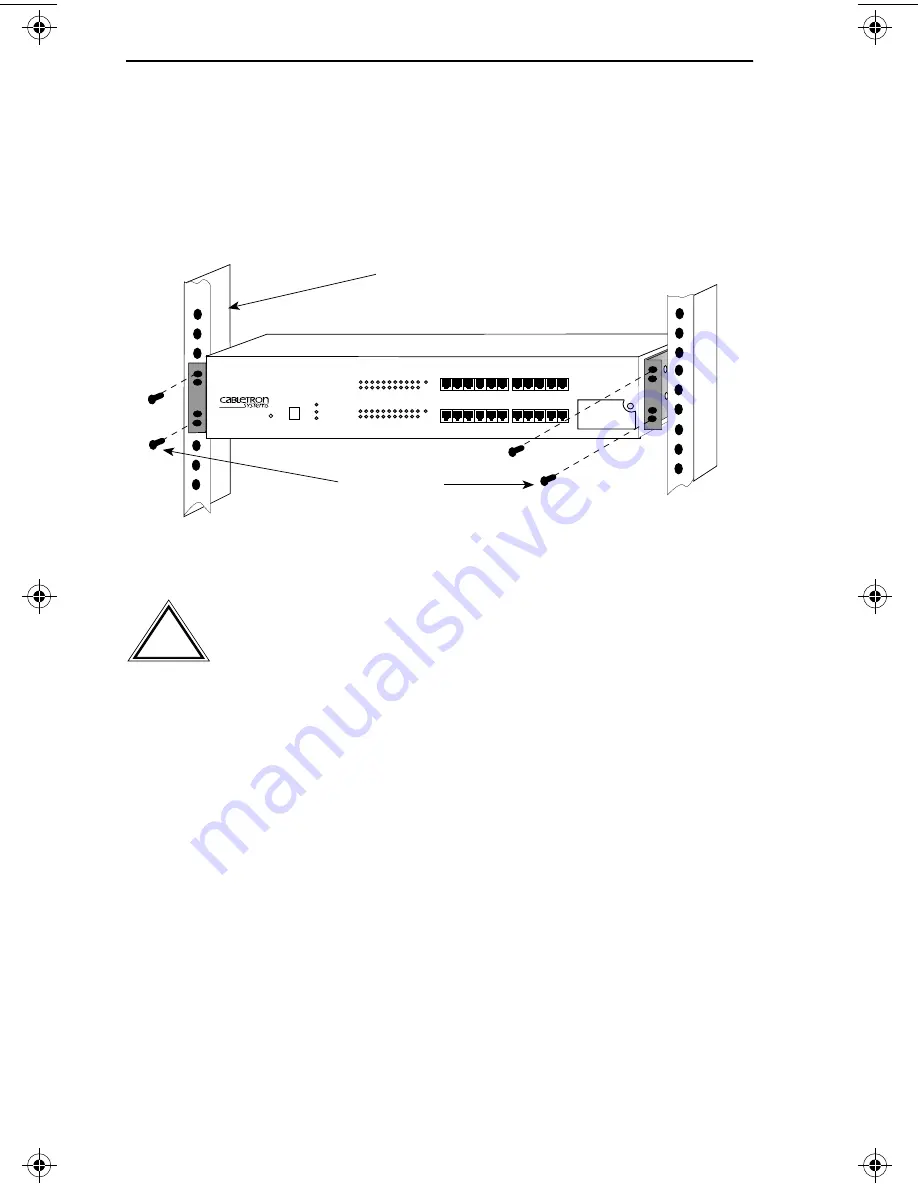
3. Ensure that the rack used will support the unit, and that the rack will
remain stable with the unit installed in it. Support the SEHI securely
from underneath, and align the mounting brackets of the SEHI chassis
with the screw holes in the equipment rack as shown in Figure 4-5.
Fasten the SEHI to the equipment rack securely.
Figure 4-5
Installing the SEHI in the Rack
Proceed to Section 4.5, Powering Up and Stacking the SEHI.
!
C AUT IO N
The cooling fans at the rear panel of the SEH must have
adequate clearance (two inches on either side and in the
rear) for unrestricted air flow. The temperature for the selected
location must be maintained between 5˚C and 40˚C, and
fluctuate less than 10˚C per hour.
PWR
CPU
CLN
HubSTACK
100BASE-TX HUB
WITH
LANVIEW®
SEHI
100TX-
22
22X 21X 20X 19X 18X 17X
11X 10X 9X 8X 7X 6X
16X 15X 14X 13X 12X
5X 4X 3X 2X 1X
E
1
A
RCV
LNK
RCV
LNK
22 21 20 19 18 17 16 15 14 13 12
11 10 9 8 7 6 5 4 3 2 1
EPIM
1
Screws (4)
19-Inch Rack
1511_06
SEHI Book Page 6 Wednesday, May 15, 1996 10:42 AM

