background image

11

7.3

 3. To detach the flash, rotate the 

locking wheel on the mounting 
foot to the right until it is 
loosened.

Turning  the  Flash  On

 1. Switch the On/Off Switch to ON. 

The flash starts charging.

 2. Check that the flash is ready.

 -  The flash-ready indicator blinks 

in red, indicating that the flash 
is ready for quick flash (see  
Section 12.4). 

 -  Once fully charged, the flash-

ready indicator stays red and the 
flash is ready to give full power 
output.

Summary of Contents for RF60X

Page 1: ...User Manual Wireless Flash RF60X...

Page 2: ...7 Getting Started 08 8 On camera Operation 19 Local Mode 9 Wireless Flash 21 Master and Slave Modes 10 Group Aliases 26 11 Advanced Operation 28 12 Personalizing the RF60X 44 13 Working with Cactus 5...

Page 3: ...rom its predecessor Exclusive Cooling mode to prevent RF60X from overheat cut off Quick full power recharge time at 1 9s Auto focus assist light in sync with other Cactus devices Automatic wireless HS...

Page 4: ...batteries and switch off the flash when it is not in use 3 Use only the batteries specified in this instruction manual 4 Do not permanently store the product in a high temperature environment i e unde...

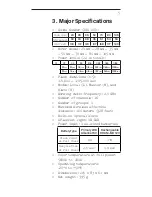
Page 5: ...64 0 7 1 128 0 7 Flash durations t 5 1 1 000 1 45 000 sec Modes Local L Master M and Slave S Working radio frequency 2 4 GHz Number of channels 16 Number of groups 4 Maximum wireless effective distanc...

Page 6: ...6 4 Package Contents X Flash RF60X Carrying Case FC 3 User Manual Flash Stand FS 2...

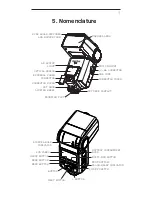
Page 7: ...TOR CONNECTOR COVER MOUNTING FOOT CONNECTOR COVER 3 5 mm CONNECTOR HOT SHOE CONTACT BOUNCE ANGLE INDICATOR LCD PANEL MODE BUTTON MENU BUTTON BUTTON NEXT BUTTON BUTTON ON OFF SWITCH TEST BUTTON FLASH R...

Page 8: ...artment door and slide it open in the direction shown by the arrow 7 1 GROUP PANEL OPERATING MODES CHANNEL BEEP INDICATOR OPTICAL SLAVE DELAY INDICATOR BATTERY LEVEL HIGH TEMPERATURE WARNING POWER LEV...

Page 9: ...a new set of AA batteries of the same brand and type When replacing batteries replace all four at the same time 2 AA sized alkaline Ni MH or lithium batteries can be used Use only one type of batteri...

Page 10: ...The indicator is not applicable to Ni MH battery 5 When the flash is not in use remove the batteries to prevent possible damage from battery corrosion Attaching the Flash to and detaching it from the...

Page 11: ...the Flash On 1 Switch the On Off Switch to ON The flash starts charging 2 Check that the flash is ready The flash ready indicator blinks in red indicating that the flash is ready for quick flash see...

Page 12: ...ing protection of the RF60X may stop the flash from firing after a number of full power flashes have been fired in short intervals The temperature warning signal will appear in the status bar of the L...

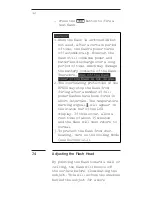
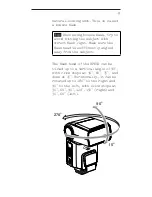
Page 13: ...light Make sure the flash head is sufficiently angled away from the subject The flash head of the RF60X can be tilted up to a vertical angle of 90 with click stops at 30 60 75 and down at 15 Horizonta...

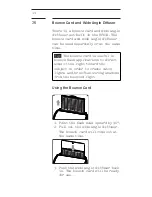
Page 14: ...he bounce card is useful in bounce flash applications to direct some of the light toward the subject in order to create catch lights and or soften strong shadows from the bounced light Using the Bounc...

Page 15: ...ack in The flash will illuminate at 18 mm coverage Choosing the Operating Mode There are three operating modes in the RF60X namely Local Master and Slave Upon switching on the RF60X press the button t...

Page 16: ...elect the RF channel Press to go back to the main screen The selected channel will be shown on the LCD panel To protect your setup from interferences by other Cactus devices assign all your RF60X to a...

Page 17: ...ack to the main screen or press the button to change the menu to the next item in the sequence Menu item and corresponding options Text shown on LCD Applicable modes L M S AF assist Continuous Mode Of...

Page 18: ...Flash Fn2 Full Charge Fn3 Insufficient Power Warning BEEP OFF Fn1 QCK FL Fn2 READY Fn3 WARN LCD Backlight 15 sec 1 min 5 min Continuous BK LGT 15 sec 1 min 5 min ON Sleep Timer Off 3 min 5 min 15 min...

Page 19: ...is shown on the right The selection indicator will be shown at either the power level or zoom level Press the button to switch the selection indicator in order to adjust a setting of an item Adjusting...

Page 20: ...8 0 3 1 2 0 7 1 4 0 7 1 8 0 7 1 16 0 7 1 32 0 7 1 64 0 7 1 128 0 7 Adjusting the Zoom Level To adjust the zoom level press until the selection indicator is pointing to the zoom value i e the right fig...

Page 21: ...RF60X units in Slave mode Setting up the RF60X Slave 1 Make sure that the RF60X units that you want to control through the Master flash are set to mode see Section 7 6 2 Set the units to the same RF...

Page 22: ...panel Only activated group s will be shown as A B C or D boxes Changing Parameters of the Master Flash 4 On the RF60X Master you can change the power level and zoom level of the Master flash itself a...

Page 23: ...lect the next group i e group B Each press of the Group button will select the next group in the following sequence Master A B C D 8 Adjust the power level of the Master flash or of a particular group...

Page 24: ...ce of Master A B C D will be chosen as the reference group 11 Adjust the power and zoom levels as you would for a single group The relative changes in both settings in the reference group however will...

Page 25: ...up Once turned off the RF60X Master will not fire but it will still command the RF60X Slaves changing their settings and firing them accordingly 14 To turn on a group again select the group see steps...

Page 26: ...group panel The group alias will display whenever the group is selected The group aliases available for selection are KEY FILL SPOT RIM HAIR LEFT RIGHT BACK FRONT 1 To set a group alias select the gro...

Page 27: ...teps 1 3 to set aliases in all the Cactus RF60X units To prevent confusion make sure that you have set the same alias for the same group in all RF60X units 5 The alias of each group will appear in Sla...

Page 28: ...frequency per second in Hz Power level Zoom level The number of flashes represents the number of flashes firing in a series caused by a single trigger event The flash frequency Hz represents the numbe...

Page 29: ...ecessary to use a longer shutter speed that exceeds the flash series duration in order to expose for ambient light Alternatively it may be necessary to use a shorter shutter speed and a slightly longe...

Page 30: ...highly reflective subject against a dark background 2 Multi flash is not supported at power level higher than 1 4 3 The Multi flash may be useful when combined with a camera set to bulb mode 11 1 1 Mu...

Page 31: ...nts to the frequency of flashes Hz i e the value after the hyphen 5 Press to increase or to decrease the flash frequency per second 6 To adjust the power level press until the selection indicator poin...

Page 32: ...d Both Master and Slave units are now in Multi Flash mode 3 On the RF60X Master follow the steps in 11 1 1 to adjust the number of flashes and flash frequency per second Hz The flash frequency will ap...

Page 33: ...4 On the RF60X Master Multi mode flashes can only be configured in the Master group The selection will apply to the RF60X Master and all RF60X Slaves in the active group s HSS Flash The HSS flash of...

Page 34: ...for the full duration between the first curtain opening and second curtain closing The contribution of HSS flash to the exposure of the image is therefore different than that of a normal flash 1 The...

Page 35: ...sh would do Instead an HSS flash will cause motion blur much like a continuous light source would In order to freeze motion using the HSS flash you need to use high shutter speeds 3 Increasing the shu...

Page 36: ...quired to be manually configured see Section 11 2 4 to sync beyond x sync speed Check the table below for the type of HSS support in each pairing option Master TX Slave RX HSSSupport V6 II RF60X Autom...

Page 37: ...Auto FP capability 1 Mount the TTL flash on the camera s hot shoe Assign the Master mode to one of the RF60X and Slave mode to the other RF60X units 2 Turn off the Automatic HSS function in all the RF...

Page 38: ...4 of the RF60X Master to 10 ms and then 15 ms 20 ms etc until the flash fully fills up the frame The optimum delay time that works with a high shutter speed should be within the range of 10 ms to 100...

Page 39: ...you see a dark band at the top of the image increase the delay time When the dark band appears at the bottom decrease the delay time Optical Trigger The optical trigger can act as an alternate trigger...

Page 40: ...button to select S1 FIRST or S2 MAIN in the selection area Press or to confirm 2 The optical slave indicator will show in the status bar of the LCD display whenever any one of the optical trigger mod...

Page 41: ...the effect 1 To set the delay timer press then press the button until DELAY is displayed and the selection indicator points to the value in ms 2 Use the or button to set the delay timer from 1 millise...

Page 42: ...us AF assist LED The power level of the AF assist light can be adjusted to best suit your working environment 1 To turn on and adjust the power of the AF assist light press and then press the button u...

Page 43: ...off the AF assist continuous mode 4 In Slave mode the RF60X will synchronize the AF assist command with the V6 II or V6 IIs in TX mode or the RF60X in Master mode No setup is required Note In AF assi...

Page 44: ...es The cooling mode will regulate the recycle time with reference to the temperature inside the flash body In a series of full power bursts the recycle time may become longer in later shots However ph...

Page 45: ...LCD backlight of the RF60X turns on whenever any button is pressed In order to conserve energy there is a timer setting that automatically turns off the backlight 1 To configure the backlight duration...

Page 46: ...period 1 To configure the sleep timer press and press a few times until the text area shows SLEEP Then use the or button to choose from OFF 3 min 5 min 15 min 30 min or 60 min 2 The option OFF will d...

Page 47: ...k flash option when speed is more important than the accuracy of power output Disable the quick flash option when accuracy is your primary concern 1 To enable or disable the quick flash option press a...

Page 48: ...any circumstance Fn1 QCK FL Quick Flash RF60X beeps when the flash is ready to emit light albeit not yet at the specified level Fn2 READY Full Charge RF60X beeps when the flash is ready to fire at th...

Page 49: ...from OFF Fn1 QCK FL Fn2 READY or Fn3 WARN 2 When choosing the options with the or button the abbreviation for each option will be shown in the text area 3 Press to confirm and configure other items or...

Page 50: ...X RF60 V5 EMITTER SENSOR V6 Series CAMERA Cactus V6 Series In Slave mode the RF60X can be commanded by the Cactus V6 series including V6 IIs V6 II and V6 In Master mode the RF60X can command V6 only 1...

Page 51: ...The V6 II TX will be able to trigger them all and set their power levels in either relative or absolute power mode Tip To support HSS of your camera system choose V6 II or V6 IIs to automatically sync...

Page 52: ...3 stop V6 II V6 IIs RF60X Automatic HSS for various camera systems RF60X RF60 V6 Triggering Slaves RX in 4 groups Changing the power level of Slaves RX in 4 groups Power levels adjustable from 1 128...

Page 53: ...Power The external power source provides faster recycling times and more flash counts per battery cycle Use the Cactus External Battery Pack EP 1 optional to extend the capability of the RF60X Recycle...

Page 54: ...seconds to 20 seconds first 4 Fire the flash using the button 5 Repeat steps 3 4 After a sequence of 5 flashes your capacitor will be formed and work as normal 16 USB Connection The USB port of the R...

Page 55: ...iver V6 IIs V6 II V6 4 Wireless Laser Trigger LV5 5 60cm Foldable Soft Box CB 60 CB 60S CB 60W 6 Fiberglass 40 Umbrella F 401 F 402 F 403 7 Collapsible 45 Umbrella C 451 C 452 C 453 8 Mini USB to USB...

Page 56: ...he flash to rest for at least 15 minutes 2 Flash power turns off by itself SYMPTOM POSSIBLE CAUSE SOLUTION LCD turns off Sleep timer is activated Press any button on the RF60X once to wake it up from...

Page 57: ...und radio interference Set all units to another channel or radio ID see Section 7 7 Change setup location as interference may come from other equipment in the surrounding area Master and Slave flashes...

Page 58: ...timer to the correct sync time see Section 11 4 6 Flash fires unexpectedly SYMPTOM POSSIBLE CAUSE SOLUTION Local or Master flash misfires Poor hot shoe connection Adjust tightness of hot shoe contact...

Page 59: ...found to comply with the limits for a Class B digital device pursuant to Part 15 of the FCC Rules These limits are designed to provide reasonable protection against harmful interference in a resident...

Page 60: ...R AUTHORITY TO OPERATE THE EQUIPMENT FCC ID VAAFLARF60X MADE IN CHINA This device complies with part 15 of the FCC Rules Operation is subject to the following two conditions 1 this device may not caus...

Page 61: ...thout permission any company firm or user shall not alter the frequency increase the power or change the characteristics and functions of the original design of the certified lower power frequency ele...

Page 62: ...the Wireless Flash is used in conjunction with compatible camera and flash equipment as to which items Harvest One Limited shall have no responsibility This limited warranty covers all defects encoun...

Page 63: ...HAS BEEN ADVISED OF THE POSSIBILITY OF SUCH DAMAGES IN NO EVENT SHALL THERE BE RECOVERY OF ANY KIND AGAINST HARVEST ONE LIMITED GREATER IN AMOUNT THAN THE PURCHASE PRICE OF THE CACTUS WIRELESS FLASH...

Page 64: ...www cactus image com...

Reviews: