background image


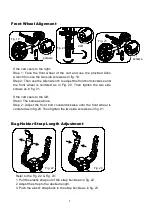
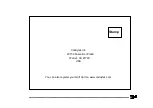
Front Wheel Alignment     


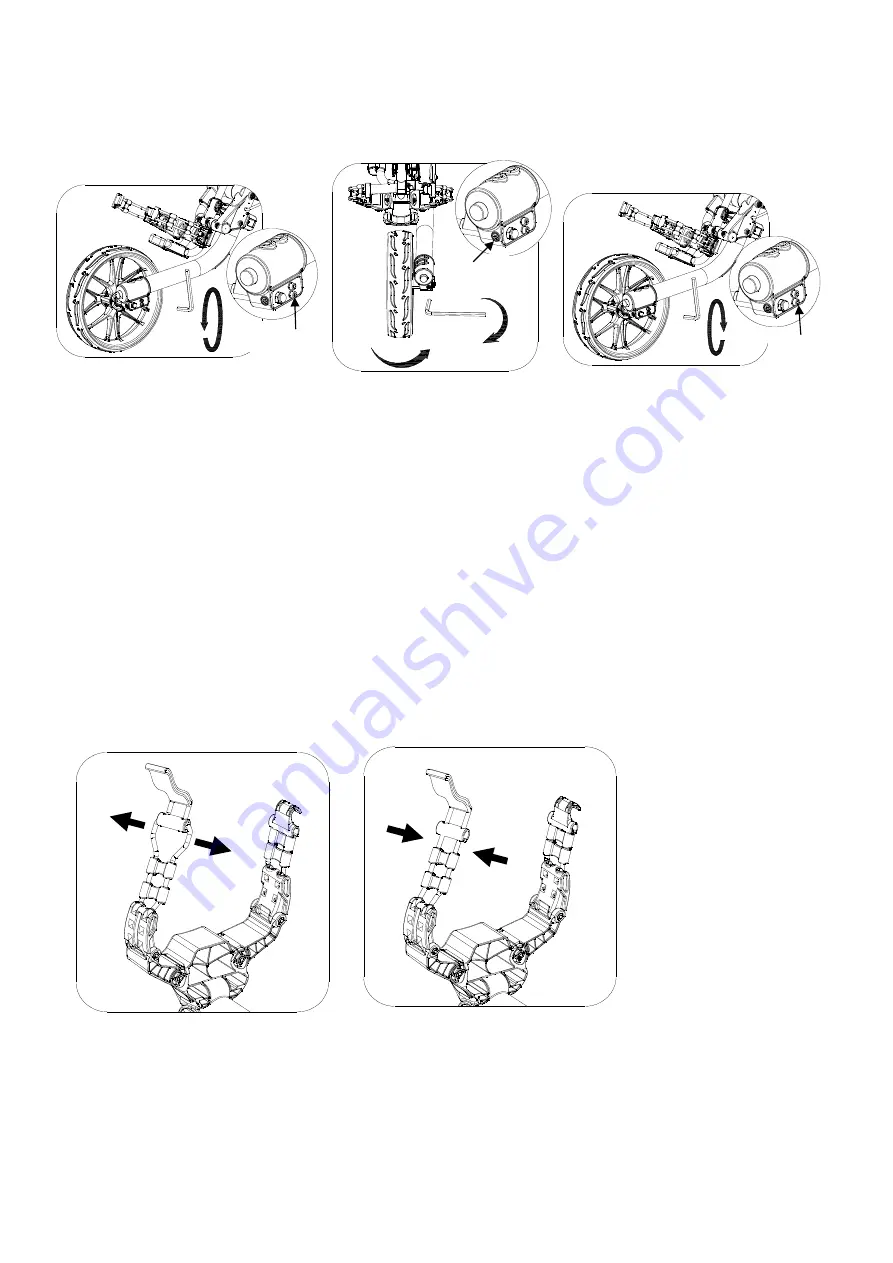
Bag Holder Strap Length Adjustment 


If the cart veers to the right: 
Step  1:  Face  the  front  wheel  of  the  cart  and  use  the  provided  Allen 
wrench to loose the two side screws as in fig. 19. 
Step 2: Then use the Allen wrench to adjust the front bolt clockwise until 
the  front  wheel  is  centered  as  in  Fig.  20.  Then  tighten  the  two  side 
screws as in fig. 21. 
 
If the cart veers to the left: 
Step1: The same as above. 
Step  2:  Adjust  the  front  bolt  counterclockwise  until  the  front  wheel  is 
centered as in fig.20. Then tighten the two side screws as in fig. 21. 

Refer to the Fig. 22 & Fig. 23: 
1. Pull the elastic strap out of the strap buckle as in fig. 22 
2. Adjust the strap to the desired length. 
3. Push the elastic strap back to the strap buckle as in fig. 23 

Fig. 20 

Fig. 19 

Fig. 22 

Fig. 

21


Fig. 23 

bolt 


screws


screws


Summary of Contents for EZ-Fold

Page 1: ...EZ Fold 3 Wheel Golf Push Cart Model CaddyLite EZ User Manual Ver 1...

Page 2: ...CaddyTek Inc 20153 Paseo Del Prado Walnut CA 91789 USA www caddytek com...

Page 3: ...tions carefully AVOID INJURY by keeping clear of moving parts while adjusting folding or unfolding this cart ALWAYS make sure the cart is fully extended and locked before use ALWAYS make sure the cart...

Page 4: ...ame G Upper bag holder bracket assembly H Handle height adjusting knob assembly I Main frame J Front connection Rod J1 Main connection Rod K Leg frame bracket L 2 holes right leg frame L1 2 holes left...

Page 5: ...rame from the holding slot if necessary Release the wheel locking buckle insert the wheel axel into the wheel holder completely and then tighten the locking buckle The cart is fully extended as shown...

Page 6: ...sting knob is fully tighten Slightly lift up the handle as Fig 7 then press the folding button and push the handle downward as shown in Fig 8 Fig 9 to fold the cart till the main frame clicks into the...

Page 7: ...k on the right leg frame as in Fig 17 Use the brake Install the drink holder Press the brake pedal to brake and push again to release as Fig 18 Fig 13 Fig 12 Fig 14 Fig 18 Slot on holder Fixed block o...

Page 8: ...ed as in Fig 20 Then tighten the two side screws as in fig 21 If the cart veers to the left Step1 The same as above Step 2 Adjust the front bolt counterclockwise until the front wheel is centered as i...

Page 9: ...warranty does not apply to claim of damage to items used in connection with CaddyTek Inc products In the case of deterioration due to normal use we will repair the item for a normal charge CaddyTek In...

Page 10: ..._____________________________________ City ______________ State ____________ ZIP ______________ Tel ____________ E Mail____________________ Date of Purchase ______________Name of Store Dealer ________...

Page 11: ...Caddytek Inc 20153 Paseo Del Prado Walnut CA 91789 USA You can also register your Golf Cart on www caddytek com Stamp...

Reviews: