background image

3

DEMETRA

EN

MANUAL SIMBOLOGY

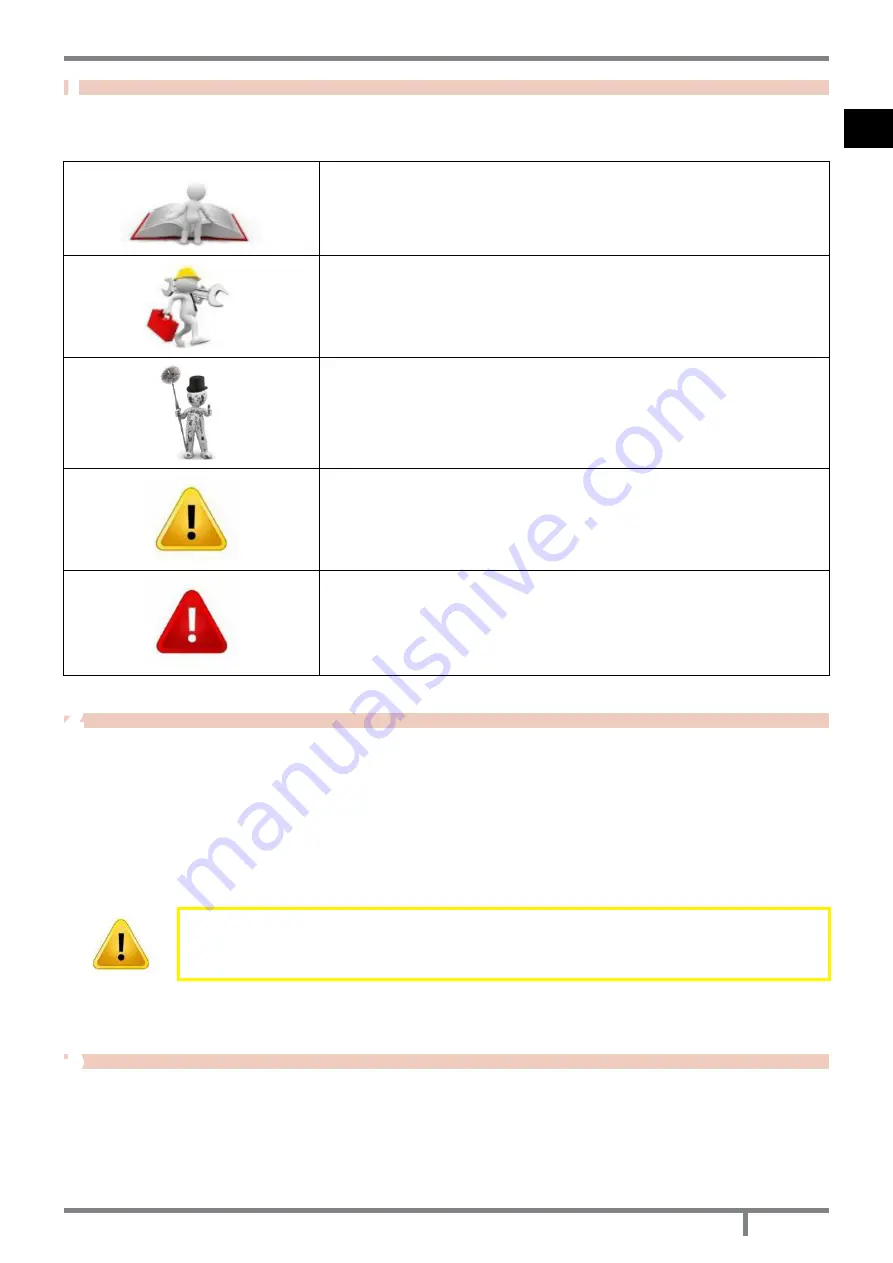
•  The icons with the stylized figures indicates whom the subject dealt in the paragraph is addressed to (between 

the User and/or the Authorized Technician and/or the Specialized Stove-repairer).

•  WARNING symbols indicates an important note.

USER

AUTHORISED TECHNICIAN

(ONLY to interpret or the Stove-manufacturer or the Authorized 

Technician of Technical Assistance Service approved by the Stove-

manufacturer)

SPECIALIZED STOVE-REPAIRER

CAUTION:

READ CAREFULLY THE NOTE

CAUTION:

DANGER OR IRREVERSIBLE DAMAGE POSSIBILITY

DEAR CUSTOMER

•  Our  products  are  designed  and  manufactured  in  compliance  with  standards  EN  13240  for  wood  stoves, 

EN 14785 for pellet stoves, EN 13229 for fire places, EN 12815 for wood cooker stoves, C.P.R. 305/2011 for 

manufacturing  products,  Re  n.1935/2004  for  materials  and  objects  which  are  in  contact  with  foods,  Dir. 

2006/95/CEE for low tension, Dir.2004/108/EC for Electromagnetic compatibility.

•  Read carefully the instruction contained in this manual to obtain the best efficiency.

•  This instruction manual is an integral part of the product: make sure it is delivered with the appliance also in 

case of sold to others. In case of loss please ask a copy to your local Technical Assistance Service. 

•  All  local  regulations,  including  those  referring  to  national  European  standards,  must  be  respected  during 

appliance installation.

In Italy biomass system installation below 35 kW must comply with MD 37/08. Every qualified 

installer  who  own  these  requirements,  has  to  issue  the  certificate  of  conformity  for  the 

installed system (“system” means: stove + c air inlet).

•  According to (EU) No. 305/2011 regulation, the “ Declaration of Performance” is available online at the web 

sites www.cadelsrl.com / www.free-point.it.

CAUTIONS

•  All the pictures carried in this manual are only for indicative and explanatory purpose and could therefore 

slightly differ from your appliance.

•  The referring appliance is those you purchased.

•  In case of doubts or difficulties in the comprehension or for problems not described in this manual, please 

promptly contact your distributor or installer.

•  It is forbidden to modify the appliance without authorization. 

Summary of Contents for DEMETRA

Page 1: ... 2014 CADEL srl All rights reserved tutti i diritti riservati en THERMOSTOVES installation use and maintenance manual demetra ...

Page 2: ... AND CHECKS BEFORE CONNECTING THE RANGE 22 10 12 FEEDWATER CHARACTERISTICS 22 10 13 FILLING THE SYSTEM 23 10 14 CONNECTING THE SAFETY HEAT EXCHANGER OPTIONAL 23 10 15 POWERING OF BOILER 23 10 16 GENERAL INSTALLATION 23 10 17 LEVELLING 25 10 18 ELECTRIC CONNECTION 25 11 USE 25 11 1 ATTENTION 25 11 2 INTRODUCTION 25 11 3 POSITION COMMANDS 26 11 4 MAIN CONTROL PANEL 27 11 5 SMOKE BYPASS 27 11 6 GENER...

Page 3: ... in this manual to obtain the best efficiency This instruction manual is an integral part of the product make sure it is delivered with the appliance also in case of sold to others In case of loss please ask a copy to your local Technical Assistance Service All local regulations including those referring to national European standards must be respected during appliance installation In Italy biomas...

Page 4: ...per overheating of the equipment use of fuels not conforming to the types and quantities indicated in the instructions provided Further damage caused by incorrect user interventions in an attempt to fix the initial fault Worsening of the damage due to the continued use of the equipment by the user once the defect has been noticed In the presence of a boiler any corrosions incrustations or breaks c...

Page 5: ...board boxes according to RESY standards recyclable expanded polystyrene inserts and wooden pallets All packaging materials can be re used for a similar use or eventually discharged as waste assimilable to the municipal solid ones in accordance with current regulations After having removed the packaging please assure you about the integrity of the product Packaging are not toys and could cause suff...

Page 6: ...es if exists any restrictive regulation which regards the combustible air inlet the fumes exhaust system the chimney flue and the chimney pot The company declines any responsibility regarding the bad running of the stove if it is due to the use of a no correctly dimensioned chimney flue which does not respect current regulations 8 2 CHIMNEY FLUE The chimney flue or chimney is of great importance f...

Page 7: ...is installed or otherwise in the adjacent room and it must be provided with a solid and condensation collection chamber under the entrance accessible through the sealed metal gate The inner section of the chimney flue can be round the best one or square and the jointed sides must have a minimum radius of 20 mm The section dimension must be minimum Ø160 mm and maximum Ø180 mm Made the efficiency of...

Page 8: ...In case of doubts please follow the most restrictive regulations Have your chimney flue and chimney pot checked and cleaned by an expert chimney sweep at least once a week The chimney sweep has to release a written declaration about the security of the system Not cleaning compromise safety 8 6 CHIMNEY POT Fig 4 Anti wind chimney pots The chimney pot is important for the correct running of the heat...

Page 9: ...mponents LEGEND Fig 5 page 9 1 Chimney pot 2 Fume outlet 3 Chimney flue 4 Termal insulation 5 External wall 6 Chimney union 7 Fume pipe 8 Heat generator 9 Inspection door 10 Damper 8 8 EXTERNAL AIR INLET Fig 6 Direct air inflow Fig 7 Indirect air inflow ...

Page 10: ...ded by UNI 10683 2012 The connection between the appliance and the chimney flue should be short in order to favor the draught and to avoid condensation in the pipes The fume conduit should be equivalent or longer than the outlet joint ones Some stove models are endowed with a lateral and or back exhaust Check that the unused exhaust is sealed with the plug given with standard equipment SYSTEM TYPE...

Page 11: ... to Ø120 mm 3 Inspection plug 4 Minimum safety distance 0 5 mt 5 Damper Chimney flue installation Ø160 mm with an enlarged drilling for pipe transit Fig 9 Example 2 LEGEND Fig 9 page 11 1 Insulating material 2 Inspection plug 3 Chimney inspection entrance 4 Minimum safety distance 0 5 mt 5 Inclination 3 6 Level section 1 mt 7 Damper ...

Page 12: ...es an easy cleaning without disassembling the pipes We recommend to check with your chimney flue manufacturer the safety distances which must be respected and the type of insulating material The aforesaid regulations are valid also for holes made on the wall EN 13501 EN 13063 EN 1856 EN 1806 EN 15827 9 FUEL 9 1 FUEL The allowed fuel is firewood and its derivatives lignite blocks compressed sawdust...

Page 13: ...oard Here following some information about the quality of different type of woods TYPE OF WOOD QUALITY PERFORMANCE Oak Excellent 100 Hornbeam Excellent 100 Ash Very good 92 Maple Very good 91 Birch Good 89 Elm Good 84 Beech Good 80 Willow Sufficient 71 Spruce Sufficient 70 Red deal Fair 67 Larch Fair 66 Lime Worst 57 Poplar Worst 50 Small pieces of wood are easily inflammable and so increase the p...

Page 14: ...on must enable en easy access to the electric connection plug It is forbidden to install the stove in bedrooms bathrooms and in rooms used for storing combustible materials and in one room flats In any case the stove must not be installed in rooms where it can get in touch with water or water splashes because this can cause burn hazards and short circuit To install more appliances the external air...

Page 15: ...15 DEMETRA EN Fig 12 Demetra thermostove signs 10 3 OVERALL DIMENSIONS Fig 13 Overall dimensions LEGEND Fig 13 page 15 1 90 cm 2 87 cm 3 60 cm ...

Page 16: ... Fig 14 EC label Never modify the data shown in the identification plate 10 5 ON ISSUE ACCESSORIES Accessory type A see Fig 15 page 16 adjustable height grill raiser Fig 15 Height grill Accessory F see Fig 16 page 17 rear right fume outlet ...

Page 17: ...x 10 6 ASSEMBLING Demetra ranges must be installed in accordance with the provisions of the laws in force by professional skilled personel only The range can be supported on the floor If it is necessary to isolate it from the flooring high humidity etc construct a suitably scaled base It is essential to provide the range room with air intakes according to the current regulations in force consideri...

Page 18: ...o the boiler It is very important for your safety to respect the minimal safety distance of the stove from flammable materials in its neighbourood see GENERAL INSTALLATION page 23 10 7 CONNECTION DIAGRAM CIRCULATION DEVICE THERMOSTAT Fig 18 Wiring scheme 10 8 WIRING DIAGRAM CIRCULATION DEVICE THERMOSTAT Fig 19 Wiring scheme ...

Page 19: ... water outlet exchanger 1 2 6 Cold water inlet excanger 1 2 7 Probe holder for thermal release valve 1 2 10 10 HYDRAULIC CONNECTION DIAGRAMS Diagrams are for reference only For a correct installation comply with the local national and europeean relevant regulations in force It s advisable to install a water treating device at the water inlet to reduce its calcareous residuum because it can cause t...

Page 20: ...r assembly layout is forbidden Hydraulic connection diagrams for Demetra use only for heating Fig 21 Connection 1 LEGEND Fig 21 page 20 VEA Open expansion tank IR Heating system AI System supply SI Flue damper VR Check valve PI System pump RI System return SC System drain TS Safety pipe ...

Page 21: ...nection 2 LEGEND Fig 22 page 21 VEA Open expansion tank IR Heating system AI System supply SI Flue damper VR Check valve PI System pump RI System return SC Drain EAF Cold water inlet UAC Hod water outlet B Boiler PB Boiler pump AB Boiler supply RB Boiler return TS Safety pipe ...

Page 22: ...rect operation of the pumps valves etc 2 Ensure that the chimney flue does not have chocked section that there is a good draft and that the flue is made in compliance with the laws in force It is advisable to install a draft regulator to limit the suction of the flue to 16 Pa in order to avoid unexpected increases in power Joints should be checked in the existing flues 3 Verify the air entrance on...

Page 23: ...ECTING THE SAFETY HEAT EXCHANGER OPTIONAL Solid fuel burning systems must be installed with the safety devices provided for in the relevant regulations in force see HYDRAULIC CONNECTION DIAGRAMS page 19 The boilers are therefore fitted with safety heat exchangers The safety exchanger is connected to the water and drainage systems by means of a thermal release valve VST with its temperature sensor ...

Page 24: ...pieces of furniture with a minimum air flow at the sides and at the back in order to allow an appliance cooling and a good distribution of heat in the environment see Fig 24 page 23 For fire regulations distances from flammable or sensible to heat materials must be respected sofas pieces of furniture wood coatings etc as described in Fig 24 page 23 If highly flammable materials curtains carpets et...

Page 25: ...xperience and knowledge except in case of supervision or instruction about the use of the appliance by people responsible for their safety Childreen must be constantly overseen in order to assure that they do not play with the appliance During its running the stove reaches high temperatures keep away childreen and animals and for your safety please use appropriate fireproof devices such as heat pr...

Page 26: ...6 Position commands LEGEND Fig 26 page 26 1 Boiler thermometer 2 Oven thermometer 3 Furnace opening handle 4 Oven opening handle 5 Secondary air inspection 6 Oven cleaning duct 7 Further secondary air entrance 8 Ash extractions door 9 Main control panel inspection door air regulator pump thermostat 10 Smoke bypass for ignition 11 Internal mobile buffel ...

Page 27: ...e to the flue duct helping the starting of the flame and the heating of the flue self After the starting turn the knob back to position A see ADJUSTMENT page 28 11 6 GENERAL CHECKS Check that the system is full of water That the safety heat exchanger is connected to the water system through the valve see Fig 23 page 22 only for VF version That the electrical connections have been made That the chi...

Page 28: ...re that the thermal coocker works efficiently it is important to regulate correctly There fore the range is equiped with devices to select the 3 main functions phases ignition heating cooking normal heating oven baking high temperature Fig 30 Ignition LEGEND Fig 30 page 28 1 Ignition 2 Deflector in the normal position 3 POS A ...

Page 29: ...ings on the cooking plane and put the internal deflector on right position POS A B see Fig 30 page 28 and Fig 31 page 29 Turn to maximum the thermostatic air regulator see Fig 27 page 27 Open the furnace door pos 3 and introduce on the grid some paper and a small quantity of dry thin wood then light it on When the fire is on complete the loading of the furnace trying to put wood logs not too tight...

Page 30: ...king and oven backing Verify the internal deflector is in right positions see Fig 32 page 29 In this position the smokes turn is better exploited for the oven heating and mean while it will be lower the thermal axchange to boiler s water and to cooking plate The oven temperature may be increased or decreased by the logs size or by elevating the fire room grid To increase or obtain a better combust...

Page 31: ... the chimney is subjected to a lack in draught thus impeding a correct fume expulsion Fill the heart with few wood logs and keep air register valves opened completely 11 12 CREOSOTE DANGER The use of humid and or bad quality wood for example resinous wood cause creation of creosote along the chimney flue obstructing fume passages The creosote is flammable and if amassed over the time it must be re...

Page 32: ...ized Retailer Before any movement let the fire inside the combustion chamber extinguish till the total cooling and always disconnect the plug from the socket if there are 12 2 BURNING POT AND ASH TRAY CLEANING For a good combustion before of every stove ignition remove the ash which has settled in the burning pot The abundant ash obstructes the primary air flow which is fundamental for a good comb...

Page 33: ...Clean the oven inner after every cooking by using a soft cloth with hot water or appropriate products Do not ever use a steel wool as they could irreparably damage the surfaces 12 9 COOKTOP CLEANING The cast iron plate has an oily protection on th surface which wears out over the time by the use This could cause dark or rusty spots on the plate surface To contrast this problem during log period of...

Page 34: ...nlet to slow down the combustion as much as possible and wait for the range turn in off Verify after wards the conditions of the chimeny 12 12 GASKET REPLACEMENT In case of deterioration of fire door gaskets and oven door gaskets it is necessary to replace them by an autorized technician in order to guarantee the good running of the stove 12 13 HEART BREAK Probable cast iron or refractory heart br...

Page 35: ...persists contact and expert stove repairer who will check the chimney flue efficiency Ambient without air recycling Create immediately a ventilation grid Creation of condensation Large chimney flue section Reduce the chimney flue section with thermal insulater pipes No insulated chimney flue Cover the chimney flue with insluating material Too slow combustion Open air registers in order to increase...

Page 36: ...rease the fire and fume output temperature Bad quality fuel Use fuel described in FUEL page 12 Cooker overheating Too much wood in the heart red coloured plate or oven over 300 C Close all registers and open the oven door in order to have a faster cooling The water does not reach the required temperature Bad quality fuel Use well seasoned wood Humidity in the cinder box and or under the range Thes...

Page 37: ... Max 16 Pa FUME OUTLET DIAMETER 140 mm DAMPER REQUIRED NO FUEL WOOD WOOD HUMIDITY 12 HEATING VOLUME 18 20 C Coeff 0 045 kW Max 518 m3 BURNING POT VOLUME 46 5 dm3 BURNING POT OPENING 4 8 dm2 BURNING POT OPENING DIMENSIONS LxH 180 x 268 mm OVEN DIMENSIONS LxPxH 350 x 400 x 315 mm ASH TRAY CAPACITY 10 4 dm3 BURNING POT GRID SHAKER NO ADJUSTABLE PRIMARY AIR YES ADJUSTABLE SECONDARY AIR NO FAN NO SUPPL...

Page 38: ...NOTE ...

Page 39: ...NOTE ...

Page 40: ...ta Lucia di Piave TV ITALY tel 39 0438 738669 fax 39 0438 73343 www cadelsrl com Partner of pellet stoves wood stoves wood cooking stoves thermostoves pellet fireplace inserts pelletkachels houtkachels houtkeukens thermokachel open haard pellets Rev 01 2014 ...

Reviews: