21
vEGA - sIRE
3
pLUs - DoGE
3
pLUs - sFERA
3
- sFERA
3
pLUs - pRINCE
3
- pRINCE
3
pLUs - GLoBE - tREND - ELIsE
3
pLUs
EN
11.6
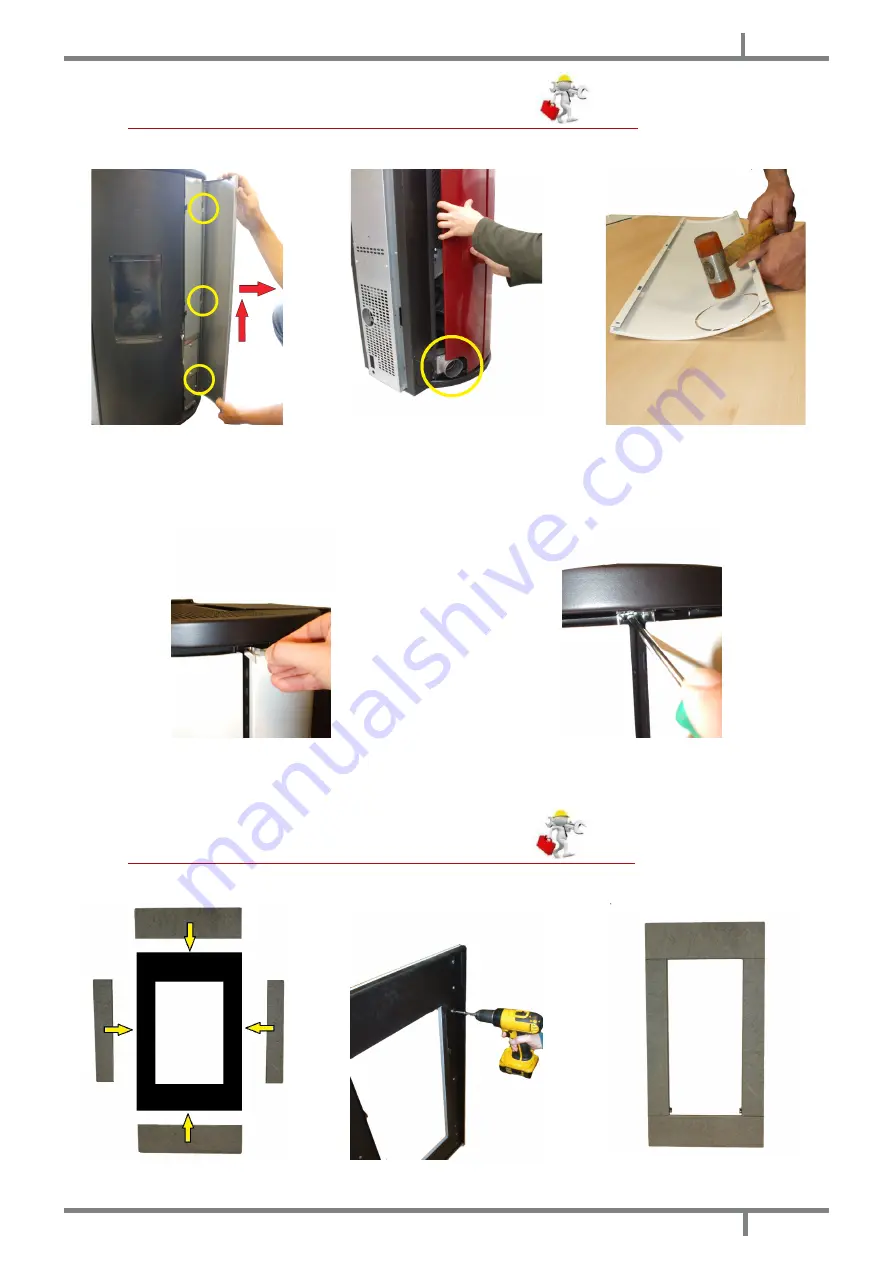
pANELs AssEMBLY (sFERA
3
/ sFERA
3
pLUs MoDELs)
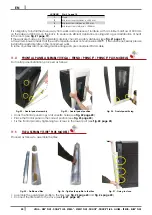
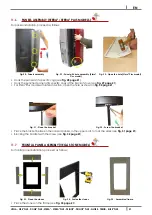
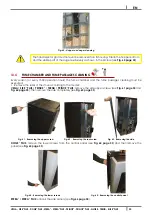
For panels installation, proceed as follows:
Fig. 28 - Panels assembly
Fig. 29 - Panel with hole assembly (Sfera
3
Plus model)
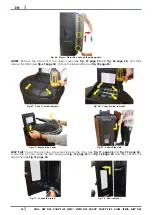
Fig. 30 - Open the hole (Sfera
3
Plus model)
• Hook the panels at its specific cogs (see
).
• Hook the punched panel at its specific cogs at the back of stove (see
).
• For Sfera
3
Plus model with lateral duction, open the hole as shown in
.
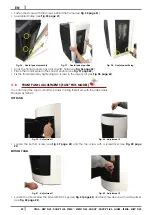
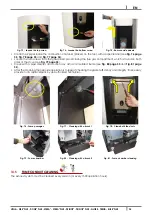
Fig. 31 - Place the bracket
Fig. 32 - Screw the bracket
• Place the bracket between the colored panels, in the upper part, to lock the sides (see
).
• Blocking the bracket with the screw (see
11.7
FRoNtAL pANEL AssEMBLY (vEGA stoNE MoDEL)
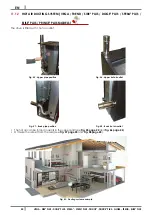
For frontal panel installation, proceed as follows:
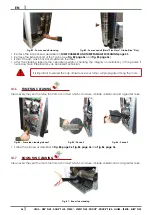
Fig. 33 - Place the stones
Fig. 34 - Fasten the stones
Fig. 35 - Assembled frame
• Place the stones on the frame (see
).
Summary of Contents for DOGE3 PLUS
Page 47: ...NOTE ...


