
75
VENUS - GIOIA
EN
Childreen must be constantly overseen in order to assure that they do not play with the
appliance.
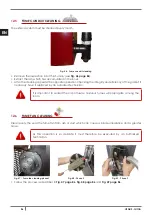
The stove is provided with a hand rejector: this rejector can be removed exclusively by
the stove manufacturer or by the Technical Assistance Service.
During its running, the stove reaches high temperatures: keep away childreen and
animals and for your safety please use appropriate fireproof devices, such as heat-
protecting gloves.
10.2
INTRODUCTION
To have the best performance with the lowest consumption please follow the here descripted instructions.
•
The lightning of the pellets occurs very easily if the installation is correct and if the chimney flue is efficient.
• Switch on the stove at Power 1 for at least 2 hours in order to enable the materials which make up the
boiler and the fireplace to adjust the inner springing stress.
•
Oily plant waste and lacquers can cause smells and smoke during the first working hours: it is advisable
to ventilate the room because they could be noxious to people and animals.
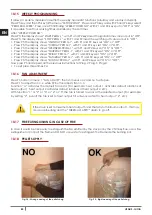
•
By using the stove the varnish inside the combustion chamber could be subjected to alterations. This
occurrence can be attributed to different reasons: an excessive stove overheating, the presence of
chemical agents in bad quality pellets, bad chimney draught, etc. Therefore varnish endurance in the
combustion chamber cannot be guarantee.
Set values from 1 to 5 are defined by the manufacturer and they can be changed only
by an authorized technician.
Do not use flammable liquids during the ignition (alcool, petrol, oil, etc...).
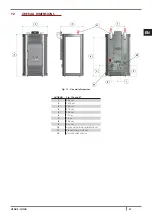
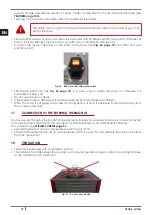
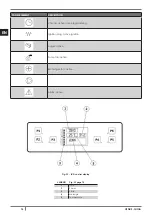
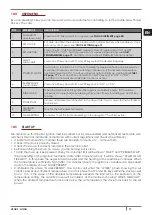
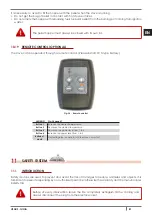
10.3
CONTROL PANEL
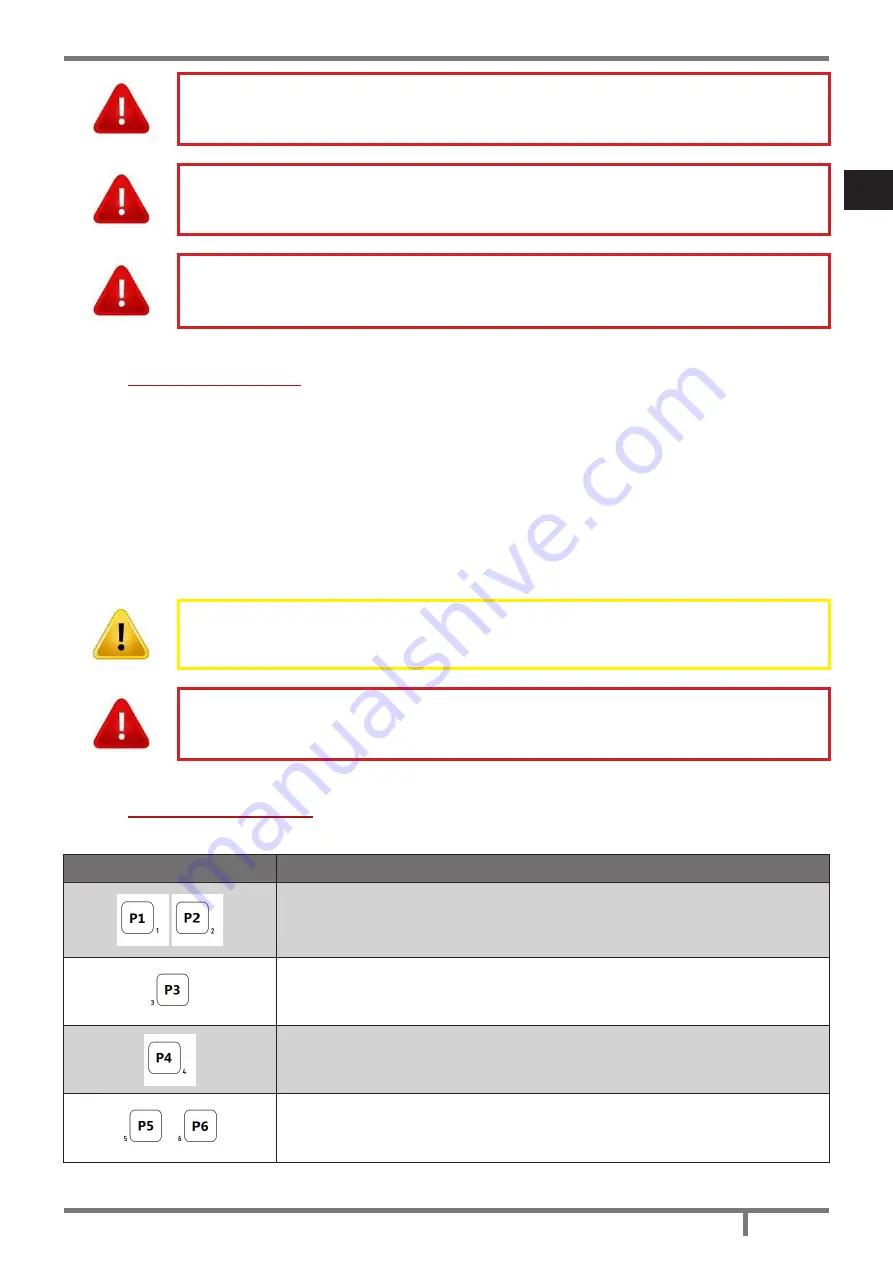
PANEL ELEMENT
DESCRIPTION
P1 and P2: when in set temperature mode, they are useful to increase or decrease
the thermostat value from min. 6°C to max 40°C. Keeping pressed P2 key it is
possible to see the fume temperature at the exhaust. Both have programming
functions.
P3: it enables to enter set temperature and User and Technician parameters
menu.
P4: switching on and off, alarm reset and exit from programming.
P5 and P6: increase and decrease the calorific power from 1 to 5:
Summary of Contents for VENUS
Page 2: ......
Page 49: ...49 VENUS GIOIA IT 14 3 RICAMBI Fig 60 Ricambi...
Page 52: ...52 VENUS GIOIA IT 14 4 DICHIARAZIONE DI CONFORMIT Fig 61 Dichiarazione di Conformit...
Page 98: ...98 VENUS GIOIA EN 14 3 SPARE PARTS Fig 60 Spare parts...
Page 101: ...101 VENUS GIOIA EN 14 5 DECLARATION OF CONFORMITY Fig 61 Declaration of Conformity...
Page 148: ...148 VENUS GIOIA FR 14 3 PI CES D TACH ES Fig 60 Pi ces d tach es...
Page 151: ...151 VENUS GIOIA FR 14 5 D CLARATION DE CONFORMIT Fig 61 D claration de Conformit...
Page 197: ...197 VENUS GIOIA ES 14 3 REPUESTOS Fig 60 Repuestos...
Page 200: ...200 VENUS GIOIA ES 14 5 DECLARACI N DE CONFORMEDAD Fig 61 Declaraci n de conformedad...
Page 247: ...247 VENUS GIOIA NL 14 3 RESERVEONDERDELEN Fig 60 Reserveinderdelen...
Page 250: ...250 VENUS GIOIA NL 14 5 CONFORMITEITSVERKLARING Fig 61 Conformiteitsverklaring...
Page 297: ...297 VENUS GIOIA PT 14 3 PE AS SOBRESSALENTES Fig 60 Pe as sobressalentes...
Page 300: ...300 VENUS GIOIA PT 14 5 DECLARA O DE CONFORMIDADE Fig 61 Declara o de conformidade...
Page 302: ...302 VENUS GIOIA EL 1 MANUAL...
Page 305: ...305 VENUS GIOIA EL 7 2 Fig 2 LEGEND Fig 2 305 1 2 3 4 5 3 5 mt Fig 2 305 1 2 3 u 4...
Page 307: ...307 VENUS GIOIA EL Fig 4 7 4 350 3 5 meters 7 5 7 6 Fig 5 Fig 5 307 Fig 3 306...
Page 308: ...308 VENUS GIOIA EL 7 7 Fig 6 LEGEND Fig 6 308 1 2 3 4 5 6 7 8 9 10...
Page 312: ...312 VENUS GIOIA EL 7 11 Fig 10 1 LEGEND Fig 10 312 1 2 100 80 mm 3 4 0 5 mt 120 mm Fig 11 2...
Page 319: ...319 VENUS GIOIA EL Fig 23 Fig 24 2 Fig 23 319 Fig 24 319 Fig 25 Fig 25 319 9 6 350...
Page 323: ...323 VENUS GIOIA EL 10 10 1 10 2 1 2 pellet 1 5...
Page 333: ...333 VENUS GIOIA EL 12 12 1 12 2 2 Fig 37 Fig 38 Fig 39 Fig 37 333 Fig 38 333 Fig 39 333...
Page 335: ...335 VENUS GIOIA EL 12 4 4 8 Fig 44 Fig 45 2 Fig 44 335 Fig 45 335 12 5 Fig 46...
Page 339: ...339 VENUS GIOIA EL 12 13 12 14 700 C...
Page 341: ...341 VENUS GIOIA EL AL 5 NO IGNITION Pellet pellets AL 6 NO PELLET AL 7 THERMAL SAFETY...
Page 342: ...342 VENUS GIOIA EL AL 8 FAILURE DEPRESS pellets 304 AL 9 OPEN DOOR...
Page 343: ...343 VENUS GIOIA EL 13 2 4A 250V pellet ACTIVE ALARM...
Page 345: ...345 VENUS GIOIA EL WORK MODULATI...
Page 346: ...346 VENUS GIOIA EL 14 14 1 WIRING SCHEME Fig 58 Wiring scheme 14 2 Fig 59 347...
Page 347: ...347 VENUS GIOIA EL Fig 59 Fig 60 348 3 5 8 7 10 9 6 1 4 3 3 2...
Page 348: ...348 VENUS GIOIA EL 14 3 Fig 60...
Page 351: ...351 VENUS GIOIA EL 14 5 Fig 61...


