22
WALL - SMALL - STYLE
EN
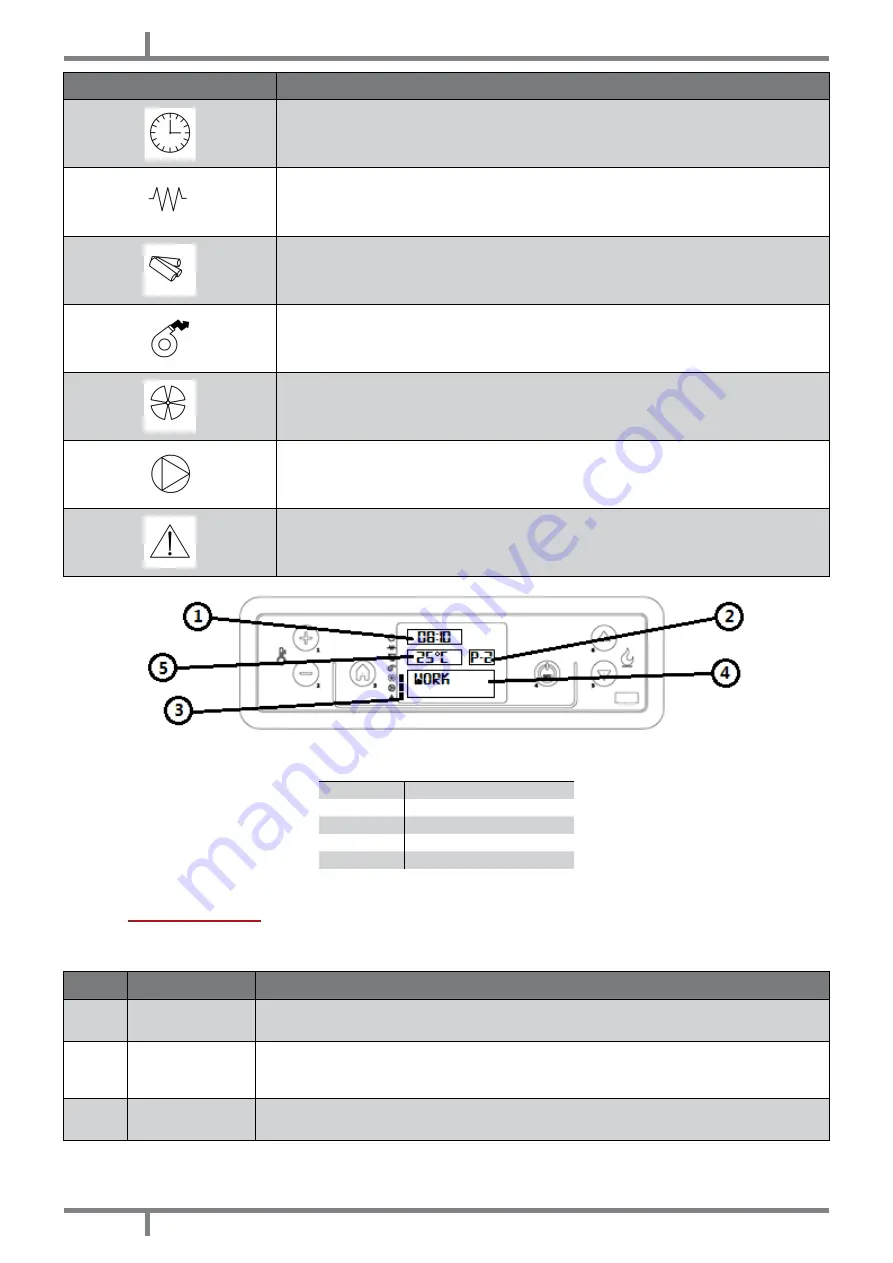
PANEL ELEMENT
DESCRIPTION
Chrono: active time programming.
Ignition plug: active ignition.
Auger: active.
Fume fan: active.
Exchanger fan: active.
-
Alarm: active.
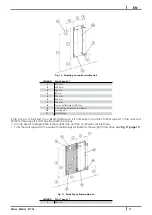
Fig. 31 - LCD control display
LEGEND
1
Time
2
Power
3
State
4
Message
5
Temperature
12.3
USER MENU
By once pressing P3 key you can hace access to user parameter controlling. To let them slide press P5 and P6
keys. They are:
POS.
REFERENCE
DESCRIPTION
1
SET CLOCK
Set date and time. The board is provided with a lithium battery which enables a clock
autonomy of 3/5 years. See
.
2
SET CHRONO
Press once P3: "CHRONO ENABLE" appears. Press P3 again and with P1 and P2 put in "OFF"
or "ON". For daily, week-end or weekly programming, see
CAUTION: do not active if STAND-BY function is active!
3
SELECT
LANGUAGE
Press once P3 key and with P1 and P2 keys select the desired language.


