


cadetheat.com Tel: 855.CADET.US PO Box 1675 Vancouver, WA 98668-1675
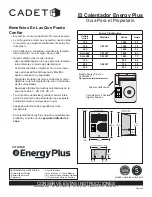
Beneficios En Las Que Puede
Confiar
CONSERVE ESTAS INSTRUCCIONES
El Calentador Energy Plus
Guía Para el Propietario
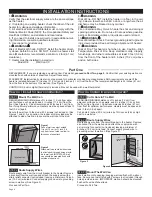
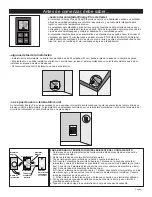
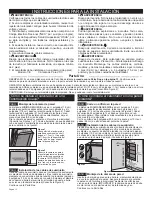
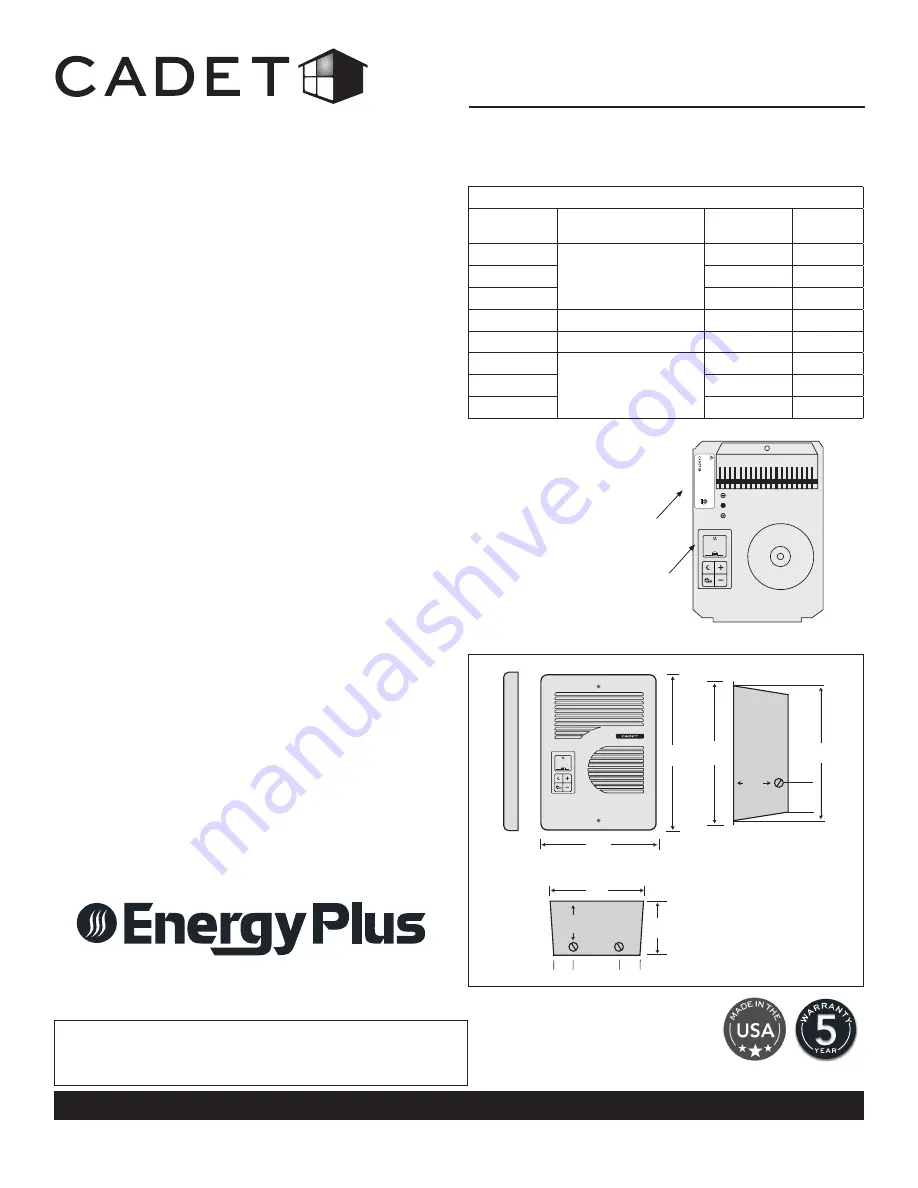
5
/
8
"
1.6cm
9"
22.9cm
Costado
Rejilla Frente
Cámara de
pared costado
Cámara de pared inferior
12"
30.5cm
10"
25.4cm
11
1
/
8
"
28.3cm
3¼"
8.3cm
1¼"
3.2cm
1¾"
4.5cm
1¼"
3.2cm
3"
7.6cm
4"
10.2cm
7
7
/
8
"
20cm
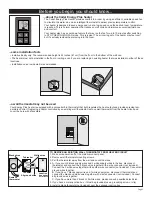
73
Model
:
Vo
lts:
Wa
tts:
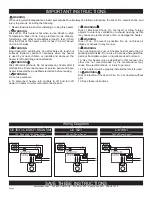
WA
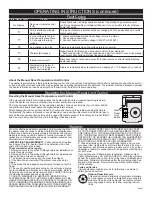
RNING! T
O
AVOID ELECTRICA
L
SHOC
K
Disconnect power at circuit breaker before servicing.
Do not operate without
grill
.
cadetheat.com
Va
ncouver
, W
A
Mfg Date:
Before pushing
RESET
button see
Owner
’s
Guid
e
for display fault
codes and othe
r
troubleshooting
information.
3108579
conform
s
to UL
STD
2021
072xxx
73
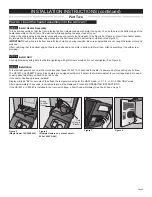
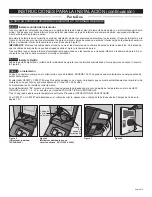
HERRAMIENTAS NECESARIAS:
• Destornillador Phillips
• Destornillador plano
• Pelacables
• Cuchillo Multiuso
• (4) Tornillos de 1½” para Madera
• (2) Conectores de Alambre Aislados
• (1) Conector de Alivio de Tensión
•
Económico, consume hasta el 30% menos energía
• Le entrega sólo el calor que necesita, cuando usted
lo requiera, y se ajusta automáticamente para ahor-
rarle dinero
•
Usted define su comodidad—mantiene la tempera
-
tura ambiente con un margen de un grado
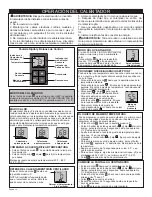
• Nuestro diseño más creativo incluye:
Gran pantalla digital en la que aparece la tempera-
tura ambiente y el modo de calentamiento
Controles sencillos e intuitivos con un solo toque
Las opciones de Noche/Ausencia y Máx/Mín
aportan más ahorro y seguridad
Mejora la circulación del aire, brinda mayor como-
didad fuera de la temporada fría con un ventilador
de tres velocidades
Reemplaza fácilmente muchos calentadores de la
serie Com-Pak: C, CB, CM, CS o X
• Ya no tendrá que adivinar gracias al sensor inteli-
gente de suministro de alimentación que se ajusta
automáticamente al voltaje de su hogar
• Apagado automático de seguridad por alta
temperatura
• Su calentador Energy Plus ha sido completamente
probado y cuenta con una
garantía limitada de 5
años
Energy Plus Modelos
Voltaje
Línea
Modelos
Vatios
Amps
120
CE163T
1000
8.3
208
1500
7.2
240
1600
6.7
Sólo 240
CE162T
1600
6.7
Sólo 208
CE168T
1600
7.7
120
CE083T
500
4.2
208
750
3.6
240
800
3.3
probado para las normas UL
Página 9
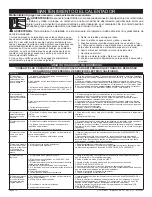
Modelo Energy Plus con
Controlador
No requieren termostato mural
Controlador
con
Pantalla
Digital
y Botones
Etiqueta Calificación
COM-PAK


