7
WARRANTY
For more effective and safer operation and to prolong the
life of the heater, read the Owner’s Guide and follow the
instructions. Failure to properly maintain the heater will
void any warranty and may cause the heater to function
improperly.
LIMITED FIVE YEAR WARRANTY:
Cadet will repair or
replace any Hot One (RCP) heater found to be defective
within five years after the date of purchase.
These warranties do not apply:
1. Damage occurs to the product through improper
installation or incorrect supply voltage;
2. Damage occurs to the product through improper
maintenance, misuse, abuse, accident, or alteration;
3. The use of unauthorized accessories or unauthorized
components constitutes an alteration and voids all
warranties. Refer to Cadet website or call customer
service at 855.223.3887 or 360.693.2505 for list of
authorized accessories and components.
4. Cadet’s warranty is limited to repair or replacement.
5. In the event Cadet elects to replace any part of your
Cadet product, the replacement parts are subject to
the same warranties as the product. The installation
of replacement parts does not modify or extend the
underlying warranties. Replacement or repair of
any Cadet product or part does not create any new
warranties.
If you believe your Cadet product is defective, please
contact Cadet during the warranty period, for instructions
on how to have the repair or replacement processed.
Parts and Service
Visit
for information on
where to obtain parts and service.
Maintenance As Needed, or every six months minimum.
1. Allow the heater to cool, then disconnect the
power cord from power supply. To disconnect
heater, turn control to “OFF”, then remove
plug from receptacle.
2.
Remove front diffuser grill by removing the
four screws (one from each corner).
3. Wash grill with hot soapy water and dry, or
use air compressor to blow debris from grill
louvers.
4. While holding fan (to avoid damage or
bending), use an air compressor, hair dryer
or vacuum on blow cycle to blow debris
through the outer cabinet louvers and finned
elements.
5. Vacuum or blow air inside fan area without
touching the elements.
6.
Carefully wipe off the fan blade without
damaging or bending it.
7.
Replace diffuser grill and secure with screws.
Any service other than cleaning should be performed by an authorized
service representative.
To register your product, visit
cadetheat.com/product-registration
MAINTAINING YOUR HEATER
Reduce-Reuse-Recycle
This product is made primarily of recyclable materials. You can reduce your carbon footprint by recycling
this product at the end of its useful life. Contact your local recycling support center for further recycling
instructions.
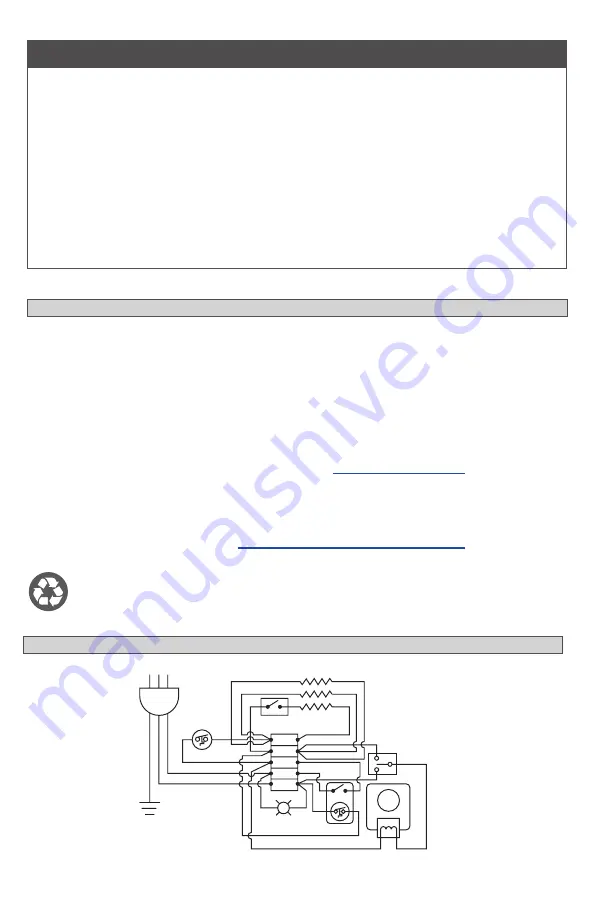
INTERNAL HEATER WIRING DIAGRAMS
GROUND
GREEN
BLACK
WHITE
MANUAL RESET
LIMIT
ELEMENTS
TERMINAL BLOCK
MULTI WATT HI/LOW SWITCH
FAN MOTOR
THERMOSTAT
DOUBLE POLE
PILOT
LIGHT
FAN ON/AUTO
SWITCH
CORD
SET


