background image

Doc150313-01 

Installation and maintenance manual 


www.cadexair.com 

1010, Boulevard Lionel Boulet 

1-800-461-0668 


Varennes, Québec, Canada J3X 1P7


overhang of 12 inches (305mm) in front of the cooking 
equipment  or  according  to  the  homologation  stickers 
affixed on the kitchen exhaust hood. 

Validate with the kitchen exhaust hood shop drawings 
for  dimensions  to  install  the  kitchen  exhaust  hood  at 
the  right  place  (hood  orientation,  hood  position  in 
cooking island, etc.). 

When the kitchen exhaust hood is on the floor, place a 
protection material under the hood to avoid damages 
to the stainless steel. 

Weight validation 

Perform  validation  of  the  weight  of  each  kitchen 
exhaust  hood  according  to  the  hoods  weight  table  to 
make  sure  your  anchorage  and  methodology  are 
appropriate to the weight of the component. 

Lifting, suspension and levelling 

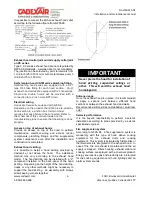
Fix  the  anchor  points  to  the  building’s  structure 
according to the position of the kitchen exhaust hood 
mounting  brackets  and  install  7/16  inches  (11mm) 
threaded  rods  in  the  anchor  points  according  to  the 
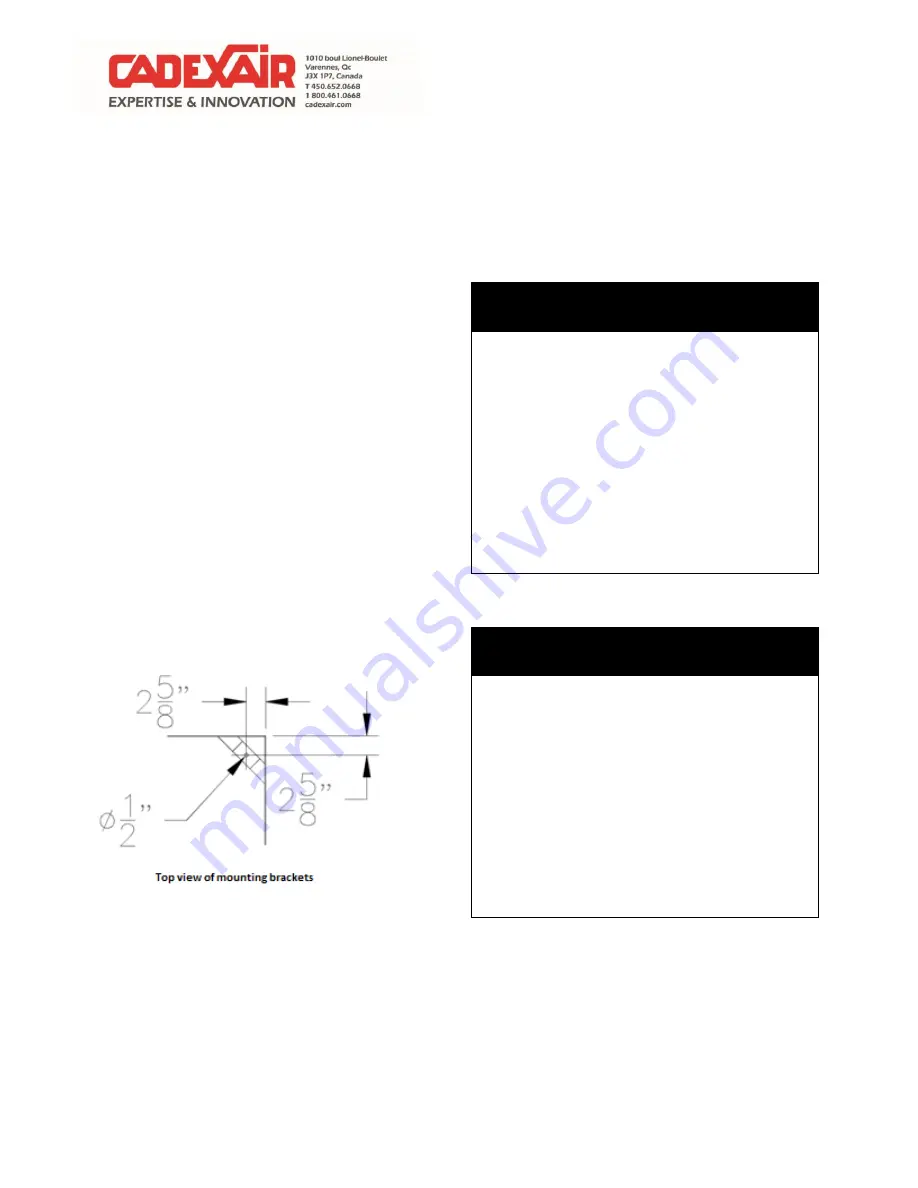
positions  of  the  brackets.    See  below  for  the  typical 
positioning  of  exhaust  hood  mounting  brackets 

without

  spacer  for  the  combustible  material 

clearance. 


Adjust  the  length  of  threaded  rods  to  respect  the 
kitchen exhaust hood height installation. 

Lift the kitchen exhaust hood and fix the hood with the 
threaded  rods.    All  of  the  kitchen  exhaust  hood 
mounting  brackets  must  be  held  by  a  threaded  rod.  
Adjust  the  height  of  the  hood  via  the  threaded  rods 

bolts  installed  in  the  mounting  brackets  to  level  the 
kitchen exhaust hood. 

When  lifting  an  island  exhaust  hood  with  assembly 
joints, we suggest proceeding to the assembly of the 
sections  on  the  ground  and  then  lifting  the  whole 
assembly  of  the  exhaust  kitchen  hoods.    Refer  to 
annex 2 for assembly. 

IMPORTANT 

Maintain  the  kitchen  exhaust  hood 
relatively  levelled  when  lifting  to  avoid 
flexion  and  torsion  of  the  hood.    We 
highly recommend to use a lifting device 
such as Genie Lift. 
 
During  installation  of  multiple  kitchen 
exhaust  hood, we  highly  recommend  to 
use a laser level device.   Each mounting 
bracket must be used for the suspension 
of the kitchen exhaust hood. 

Connection of the kitchen exhaust hood collar 


IMPORTANT 

According to the NFPA96 code, the duct 
must  be  at  minimum  made  from  16 
gauge  steel  or  18  caliber  stainless  steel.  
The  duct  must  be  welded  entirely  and 
waterproof. 
 
Sometimes  there  are  openings  made  in 
factory  on  the  kitchen  exhaust  hood.  
Always  make  sure  that  these  openings 
are not obstructed for future installation 
of components on site. 


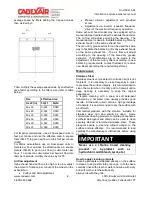
The  connection  of  the  exhaust  collar  must  be  made 
with  a  full  and  continuous  welding.    While  welding, 
protect  the  stainless  steel  surfaces  to  avoid 
contamination. 
 

Summary of Contents for CA Series

Page 1: ...User Manual CA Series Version V1 0...

Page 2: ...ds IMPORTANT ATTENTION DANGER A commercial kitchen hood must always be installed by professionals according to the local construction codes in force A commercial kitchen hood ventilation system can ha...

Page 3: ...f the kitchen exhaust hood collar 5 Exhaust hood collar joint and air supply collar joint on PE series 6 Self cleaning hood CA1M series plumbing fitting 6 Electrical wiring 6 Access on top of exhaust...

Page 4: ...exhaust system 9 Inspection and maintenance of the exhaust hood fire suppression system 9 Tips and tricks 10 Problems and solutions 11 ANNEX 1 Exhaust hood weight evaluation table 14 ANNEX 2 Assembly...

Page 5: ...e exhaust kitchen hood to the sun and to a temperature above 35 Celsius These conditions can affect the adherence of the protective film glue protecting the exhaust kitchen hood and may damage the sta...

Page 6: ...haust hood height installation Lift the kitchen exhaust hood and fix the hood with the threaded rods All of the kitchen exhaust hood mounting brackets must be held by a threaded rod Adjust the height...

Page 7: ...he installation and construction is completed Exhaust hood skirting It is possible to install a hood skirting provided by Cadexair or not above the hood The installation method may vary according to t...

Page 8: ...s adding the 5 speed values then divided by 5 Then multiply the average speed value by an effective area factor according to the filters size refer to table below Size Effective Area H x W in SQ FT SQ...

Page 9: ...be used the same way to facilitate the balancing of many exhaust hoods on the same exhaust fan The air flow will adjust according to the opening of the Geo Vary grease extractor If modifications are t...

Page 10: ...ractor Weekly maintenance Remove baffle filters and clean or soak with a hot water and degreaser solution Empty all grease cups located under modular extraction baffles Monthly maintenance Remove and...

Page 11: ...ial kitchen operates usually out of standard working hours evenings and week end It is recommended to have in inventory replacements exhaust and air supply fan motor belts Furthermore for critical com...

Page 12: ...Verify if the magnetic started is powered on the primary side if not verify the power system of the disconnect and the fuse on the distribution panel contact an electrician if needed If the magnetic s...

Page 13: ...ED Clean as fast as possible the suppression liquid Call the company in charge of you fire suppression system maintenance to put the system back in operation If the system is equipped with a rearming...

Page 14: ...50313 01 Installation and maintenance manual www cadexair com 13 1010 Boulevard Lionel Boulet 1 800 461 0668 Varennes Qu bec Canada J3X 1P7 water valves and change them if necessary then contact Cadex...

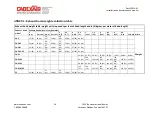
Page 15: ...1 7 6 1 85 6 5 2 7 2 15 7 5 2 3 8 2 45 8 5 2 6 9 2 75 9 5 2 9 10 3 05 Width CA S 27 12 30 14 33 15 36 16 39 18 42 19 45 20 48 22 Weight CA S PE 50 23 55 25 60 27 65 29 70 32 75 34 80 36 85 39 CA S M...

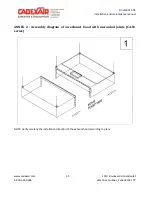
Page 16: ...dexair com 15 1010 Boulevard Lionel Boulet 1 800 461 0668 Varennes Qu bec Canada J3X 1P7 ANNEX 2 Assembly diagram of an exhaust hood with mecanical joints CA W series NOTE Verify carefully the install...

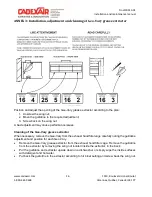
Page 17: ...t may cause performance issues Cleaning of the Geo Vary grease extractor When necessary remove the Geo Vary from the exhaust hood filter cage carefully noting the guillotine adjustment and position fo...

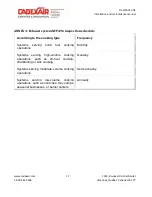
Page 18: ...ule According to the cooking type Frequency Systems serving solid fuel cooking operations Monthly Systems serving high volume cooking operations such as 24 hour cooking charbroiling or wok cooking Qua...

Reviews: