Using CAE LucinaAR
36
©2020 CAE 905K472552 v1.1
CAE
LucinaAR
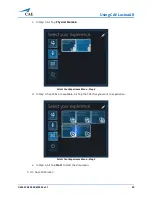
d. In Step 4, Air Tap
Start
to start the simulation.
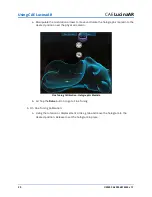
e. A Red circle will appear. Gaze at the floor and Air Tap to anchor the hologram in place.
The holographic bed will now appear.
f. Manipulate the move and rotate arrows to move and rotate the holographic bed to
the desired position over the physical manikin.
Fine Tuning Calibration - Holographic Bed
g. When the holographic bed is in place, Air Tap
Done
to start the simulation.
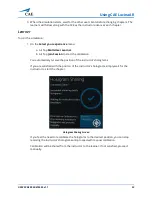
h. Lift your hand, palm facing you to open the In Experience Chapter controls.
In Experience Chapter Controls
i. Air Tap
Next
to go to the first chapter. Here, you will be able to view the holographic
manikin.
Summary of Contents for LucinaAR
Page 1: ...User Guide CAELucinaAR Your worldwide training partner of choice with HoloLens 2...
Page 5: ...2020 CAE 905K472552 v1 1 iii Contents Care and Cleaning 55...
Page 6: ...Contents iv 2020 CAE 905K472552 v1 1 CAELucinaAR THIS PAGE INTENTIONALLY LEFT BLANK...
Page 12: ...Helpful Links 6 2020 CAE 905K472552 v1 1 CAELucinaAR THIS PAGE INTENTIONALY LEFT BLANK...
Page 46: ...Using CAE LucinaAR 40 2020 CAE 905K472552 v1 1 CAELucinaAR THIS PAGE INTENTIONALLY LEFT BLANK...
Page 60: ...Troubleshooting 54 2020 CAE 905K472552 v1 1 CAELucinaAR THIS PAGE INTENTIONALLY LEFT BLANK...


