12
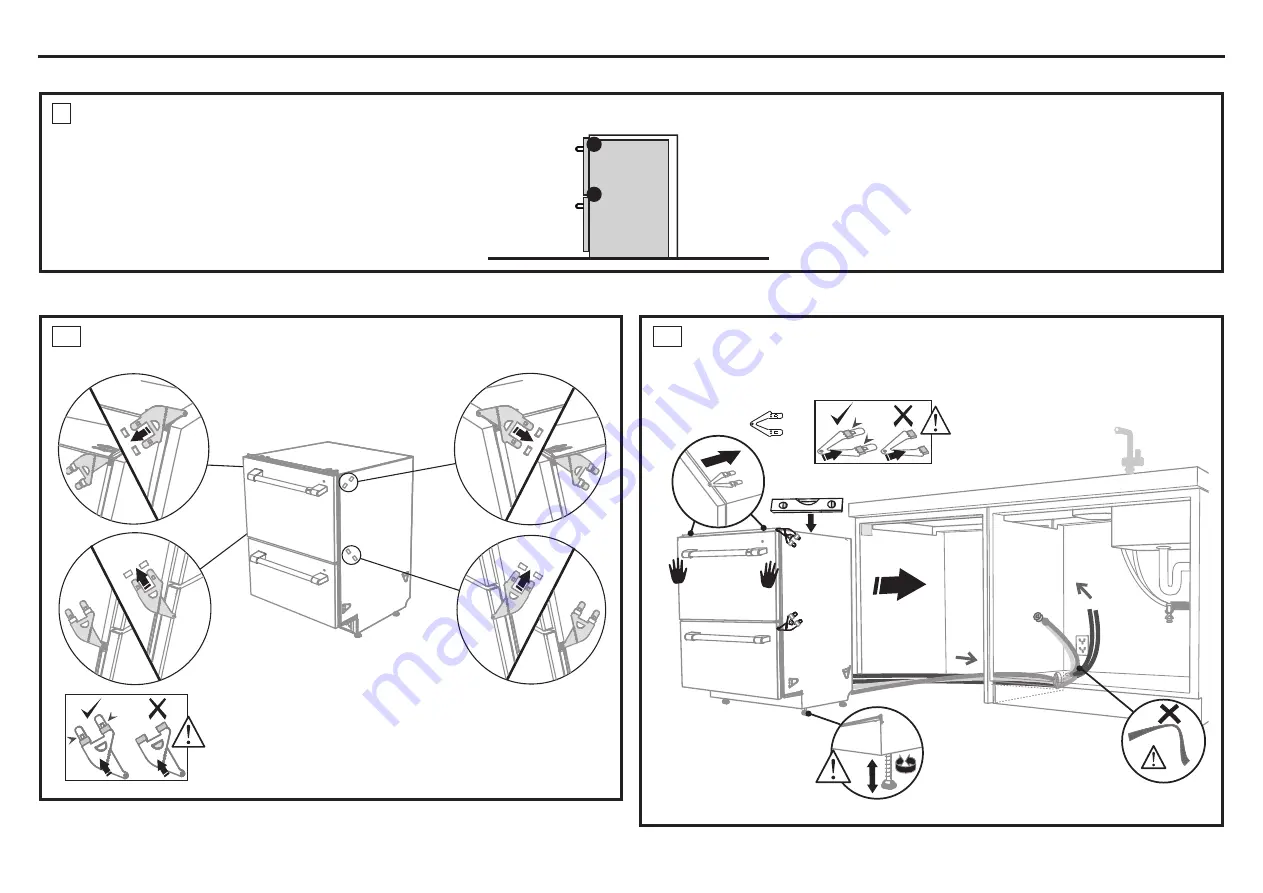
Clip all four side mounting brackets
into their slots using a flat-bladed
screwdriver. Ensure they’re securely
fitted before sliding product into cavity.
The mounting slots are in pairs, one on
each side diagonally across the product.
A
bracket must match
A
slot and
B
bracket
must match
B
slot.
When fitting brackets, ensure the
ends are not pushed down into the
chassis.
A
A
A
B
B
B
A
B
(x2)
As you push product
in, pull through hoses
and cord, ensuring
they don’t get kinked
or twisted.
Optional - Attach the
two top mounting
brackets
Initially level the product
When fitting brackets,
ensure the ends are not
pushed down into the
chassis.
You can raise or lower the
product by twisting the
feet. Then take care when
pushing the product into
the cavity that you do not
bend the feet.
Installation Instructions
A2
PULL HOSES THROUGH AND PUSH UNIT INTO THE
CAVITY
A1
ATTACH SIDE MOUNTING BRACKETS
CHOOSE WHICH INSTALLATION METHOD (A) OR (B) IS MOST SUITABLE FOR YOUR CABINETRY
A
RECOMMENDED METHOD (A) - SECURE WITHOUT DRAWER REMOVAL (FRAMELESS CABINETRY ONLY)
OPTION A - RECOMMENDED
Summary of Contents for CDD420P2TS1
Page 22: ...22 Notes...
Page 23: ...23 Notes...
Page 24: ...24 Printed in Thailand 31 4000257 Rev 0 11 21 GEA 518862...


