background image

36

49-2001001   Rev. 1

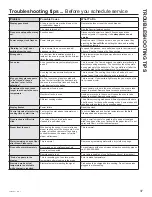
Problem

Possible Cause

What To Do

Oven does not work or 
appears not to work.

Plug on range is not completely inserted in 
the electrical outlet.

Make sure electrical plug is plugged into a live, properly 
grounded outlet.

A fuse in your home may be blown or the 
circuit breaker tripped.

Replace the fuse or reset the circuit breaker.

Oven controls improperly set.

See the Using the Oven section.

Oven is in Sabbath Mode.

9HULI\WKDWWKHRYHQLVQRWLQ6DEEDWK0RGH6HHWKH6SHFLDO

Features section.

“Crackling” or “popping” 
sound.

This is the sound of the metal heating 
and cooling during both the cooking and 
cleaning functions.

This is normal. 

Why is my range making a 
"clicking" noise when using 
my oven?

Your range cycles the heating elements by 
turning relays on and off to maintain the 
oven temperature.

This is normal.

Clock and timer do not 
work.

A fuse in your home may be blown or the 
circuit breaker tripped.

Replace the fuse or reset the circuit breaker.

Plug on range is not completely inserted in 
the electrical outlet.

Make sure electrical plug is plugged into a live, properly 
grounded outlet.

Oven controls improperly set.

See the Using the kitchen timer section.

Oven door is crooked.

The door is out of position.

Because the oven door is removable, it sometimes gets out of 
position during installation. To straighten the door, re-install the 
door. See the "Lift-Off Oven Door" instructions in the "Care and 
Cleaning" section.

Oven light does not work.

Light bulb is loose or defective.

Tighten or replace bulb.

Pad operating light is broken.

Call for service.

Oven will not self-clean.

The temperature is too high to set a 
self-clean operation.

Allow the oven to cool and reset the controls.

Oven controls improperly set.

See the Cleaning the Oven section.

The probe is plugged into the outlet in the 
oven.

Remove the probe from the oven. 

Oven will not steam clean.

Display flashes HOT.

Allow the oven to cool to room temperature and reset the 
controls.

Oven controls improperly set.

See the Using Steam Clean section.

Oven door is not closed.

Make sure you close the door to start steam clean cycle.

Excessive smoking during 
clean cycle.

Excessive soil or grease.

Press the 

Cancel/Off

 pad. Open the windows to rid the room 

of smoke. Wait until the 

LOCKED

 light goes off. Wipe up the 

excess soil and reset the clean cycle.

Excessive smoking during 
broiling.

Food too close to burner element.

Lower the rack position of the food.

Oven door will not open 
after a clean cycle.

Oven too hot.

Allow the oven to cool below locking temperature.

Oven not clean after a clean 
cycle.

Oven controls improperly set.

See the Cleaning the Oven section.

Oven was heavily soiled.

Clean up heavy spillovers before starting the clean cycle. 
Heavily soiled ovens may need to self-clean again or for a 
longer period of time.

"LOCK DOOR" flashes in 
the display.

The self-clean cycle has been selected but 
the door is not closed.

Close the oven door.

DOOR LOCK light is on 
when you want to cook.

The oven door is locked because the 
temperature inside the oven has not 
dropped below the locking temperature.

Press the 

Cancel/Off

 pad. Allow the oven to cool.

“F— and a number or letter” 
flash in the display.

You have a function error code.

Press the 

Cancel/Off

 pad. Allow the oven to cool for one hour. 

Put the oven back into operation.

If the function code repeats.

Disconnect all power to the oven for at least 30 seconds and 
then reconnect power. If the function error code repeats, visit 

cafeappliances.com/service

.

Troubleshooting tips ...

 Before you schedule service

TROUBLESHOOTING TIPS

Summary of Contents for CHS90XM

Page 1: ...Models CHS900M and CHS90XM Contents Safety Information 3 Using the Range Surface Units 7 Cookware for Induction Cooktop 9 Precision Cooking 11 Oven Controls 18 Settings 19 Sabbath Mode 21 Oven Racks...

Page 2: ...u will too Among other things registration of your appliance ensures that we can deliver important product information and warranty details when you need them Register your Caf appliance now online He...

Page 3: ...8VH WKLV DSSOLDQFH RQO IRU LWV LQWHQGHG SXUSRVH DV described in this Owner s Manual H VXUH RXU DSSOLDQFH LV SURSHUO LQVWDOOHG DQG grounded by a qualified installer in accordance with the provided ins...

Page 4: ...burns WARNING COOKTOP SAFETY INSTRUCTIONS 1HYHU OHDYH WKH VXUIDFH XQLWV XQDWWHQGHG RLORYHUV cause smoking and greasy spillovers that may catch on fire 1HYHU OHDYH RLO XQDWWHQGHG ZKLOH IU LQJ I DOORZH...

Page 5: ...a potential burn fire or shock hazard Turn the oven off immediately and have the heating element replaced by a qualified service technician HHS WKH RYHQ YHQW XQREVWUXFWHG HHS WKH RYHQ IUHH IURP JUHDVH...

Page 6: ...o part 15 of the FCC Rules These limits are designed to a provide reasonable protection against harmful interference in a residential installation This equipment generates uses and can radiate radio f...

Page 7: ...nate graphic details Using the Warming Zone WARNING FOOD POISON HAZARD Bacteria may grow in food at temperatures below 140 F Always start with hot food Do not use warm setting to heat cold food Do not...

Page 8: ...Burners feature is only intended for cookware that completely spans both burners To Turn On Hold the Sync Burners pad for about half a second to connect the two elements Operate either element as des...

Page 9: ...cookware to touch the surrounding metal cooktop trim For best performance match the pan size to the element size Using a smaller pot on a larger burner will generate less power at any given setting Co...

Page 10: ...ed INCORRECT CORRECT Pan bottom rests on cooktop trim or does not rest completely on the cooktop surface Heavy handle tilts pan Pan is partially magnetic on the bottom Pan is completely magnetic on th...

Page 11: ...l be lower than the temperature of the cookware Hestan Cue Cookware All burners except the warming zone NOTE only one burner may operate in precision cook mode at a time Controls cookware temperature...

Page 12: ...on entering App Control mode Local Control After activating your device on your selected burner use glide touch control to set temperature The set temperature will be shown in the display To use Hesta...

Page 13: ...temperature is increasing When it reaches the desired set temperature the word PREHEATING will disappear TO COOKTOP 10 35 AM OVEN Bake Broil Convection Precision Cooking More Smart Home GET CONNECTED...

Page 14: ...e which type of cookware you wish to use To use the Precision Cooktop Sensor choose CONVENTIONAL 6 Follow steps 6 8 from page 13 to complete TO COOKTOP 10 35 AM OVEN Bake Broil Convection Precision Co...

Page 15: ...ype of cookware you wish to use To use Hestan Cue cookware or Precision Probe choose BLUETOOTH COOKWARE PROBE 7 When your paired cookware or probe is detected you will be prompted to activate it This...

Page 16: ...IVATED Unable to detect active Bluetooth cookware or Precision Cooking probe COOKTOP 10 35 AM TO OVEN Use burner controls or mobile app to to set the Precision Cooking temperature OFF OFF OFF OFF Warm...

Page 17: ...ss in Temp F Bacon 375 Beef ground 350 Beef patties 0 5 0 875 375 1 1 5 350 Beef steak rare 0 5 0 875 400 1 1 5 375 Beef steak medium rare 0 5 0 875 400 1 1 5 375 Beef steak medium 0 5 0 875 375 1 1 5...

Page 18: ...option allows the user to save their favorite cycles for easy access in the future After selecting a cooking mode and setting the temperature and any timers press the to save it as a favorite for futu...

Page 19: ...Oven To be able to start the oven remotely once connected to Wi Fi press Remote Enable on the main menu or access Wi Fi Remote Enable in the settings menu and turn Remote Enable on The oven can now b...

Page 20: ...another To remove a Bluetooth device 1 Touch the device name 2 Touch FORGET THIS DEVICE Display This screen shows the options for brightness clock off and energy saver Clock off will remove the clock...

Page 21: ...have programmed the temperature and time press Start The next screen will display the settings that you programmed for your Sabbath Bake Adjusting the Temperature During a Sabbath Bake If the tempera...

Page 22: ...emove the rack from the oven remove debris in the side tracks with a paper towel shake the graphite lubricant and place 4 small drops on the two bottom tracks of the left and right sides Open and clos...

Page 23: ...g horizontally and selecting the desired temperature If you wish to cook at an alternate temperature press the temperature in the middle of the screen and a number pad will appear so the desired tempe...

Page 24: ...ture probe supplied with your oven The target temperature for the probe is automatically set based on selections made for each food Always check foods using a secondary food thermometer as probe place...

Page 25: ...ooking temperature 2 Insert the probe into the food see Proper Probe Placement 3 Once the oven is preheated place the food in the oven and connect the probe to the probe outlet making sure it is fully...

Page 26: ...performance when broiling center food below the broil heater Boneless chicken breasts Broil Low Bake 3 0RYH IRRG GRZQ IRU PRUH GRQHQHVV OHVV VHDULQJ DQG XS IRU JUHDWHU VHDULQJ EURZQLQJ ZKHQ EURLOLQJ R...

Page 27: ...uring cooking Arrange food in a single layer on the pan do not overload the pan Always check internal food temperature to confirm minimum safe temperatures have been reached Minimum safe food temperat...

Page 28: ...tomato sauces and basting liquids containing acids may cause discoloration and should be wiped up immediately Let hot surfaces cool then clean and rinse Painted Surfaces and Black Stainless Steel Pai...

Page 29: ...his will decrease the steam clean performance At the end of the Steam Clean cycle soak up the remaining water and wipe the moisture softened soil from the oven walls and door Self Clean Mode Read Self...

Page 30: ...l or non scratch cleaning pad for Ceramic Cooktops to clean the entire cooktop surface 5 Use a dry cloth or paper towel to remove all cleaning residue No need to rinse NOTE It is very important that y...

Page 31: ...op 3 Be careful not to place aluminum baking sheets or aluminum frozen entr e containers on a hot cooktop surface It will leave shinny dots or markings on the cooktop surface These markings are perman...

Page 32: ...HZ YROW KDORJHQ EXOE QRW WR H FHHG watts Replace the bulb with the same type of bulb that was removed Be sure the replacement bulb is rated 120 volts or 130 volts NOT 12 volts 2 Using gloves or a dry...

Page 33: ...eat for right side 3 Fully open the door If the door will not fully open the indentation is not seated correctly in the bottom edge of the slot 4 Push the hinge locks up against the front frame of the...

Page 34: ...until it is completely detached from the oven Replacing the Storage Drawer 1 Move ball bearing slide to the front of both the rail guides 2 Rest the left drawer rail inside the inner left rail guide...

Page 35: ...op 6HH WKH ODVV VXUIDFH SRWHQWLDO IRU SHUPDQHQW GDPDJH VHFWLRQ LQ WKH Cleaning the glass cooktop section Pitting or indentation of the cooktop Hot sugar mixture spilled on the cooktop Call a qualified...

Page 36: ...cool and reset the controls Oven controls improperly set See the Cleaning the Oven section The probe is plugged into the outlet in the oven Remove the probe from the oven Oven will not steam clean Dis...

Page 37: ...olor Sometimes the oven takes longer to preheat to the same temperature Cookware or food in oven The cookware or food in the oven will cause the oven to take longer to preheat Remove items to reduce p...

Page 38: ...the precision cooking mode and if problem persists under the same conditions but is not consistent in other use cases contact the unit manufacturer Unable to reach set temperature in Precision Cookin...

Page 39: ...49 2001001 Rev 1 39 Notes...

Page 40: ...40 49 2001001 Rev 1 Notes...

Page 41: ...49 2001001 Rev 1 41 Notes...

Page 42: ...IRU LED lamps IIHFWLYH DQXDU FRVPHWLF GDPDJH WR WKH glass cooktop such as but not limited to chips scratches or baked on residue not reported within 90 days of installation IIHFWLYH DQXDU damage to th...

Page 43: ...ic Cooktops Ceramic Cooktop Cleaner Ceramic Cooktop Scraper LW LW LQFOXGHV FUHDP DQG FRRNWRS VFUDSHU 7KH ODUJH EURLOHU SDQ GRHV QRW ILW LQ UDQJHV 7KH EURLOHU SDQ GRHV QRW ILW LQ ZDOO RYHQV GURS LQV RU...

Page 44: ...warranty and learn about special discounts that are available while your warranty is still in effect You can purchase it on line anytime Caf Service will still be there after your warranty expires In...

Reviews: