166
Tutorial 8 – Working with video
Working with markers
Working with markers
When syncing up audio events to film cues or video, it is common to use markers. Markers are a
powerful feature in SONAR that helps to simplify the task of identifying major events in a song or
video. They can be used to clarify where a verse or chorus begins in a rock tune or, in the case of
film scoring, they can be used to identify hit points (points in the film where you want a musical event
to synchronize with a visual event). Before we get started on this next exercise, return to the
Video
Properties
dialog box and click the
Video Settings
tab. Set
Start Time
to
1:01:000
,
Trim-in Time
to
00:00:00:00
and
Trim-out Time
to
00:00:44:23
.
Let’s say we want our music to start at the beginning of the video right when the sun comes out. This
occurs about 4 seconds into the movie. Taking a closer look, this happens at 4 seconds and 10
frames into the clip, which, expressed in SMPTE time code, is 00:00:04:10.
There are several ways to add markers in SONAR:
• Place the
Now Time
at the location where you would like a marker, then select
Project > Insert
Marker
or press M.
• Click the
Insert Marker
button in the Control Bar’s Markers module.
• Click the
Add Marker
button in the Markers view.
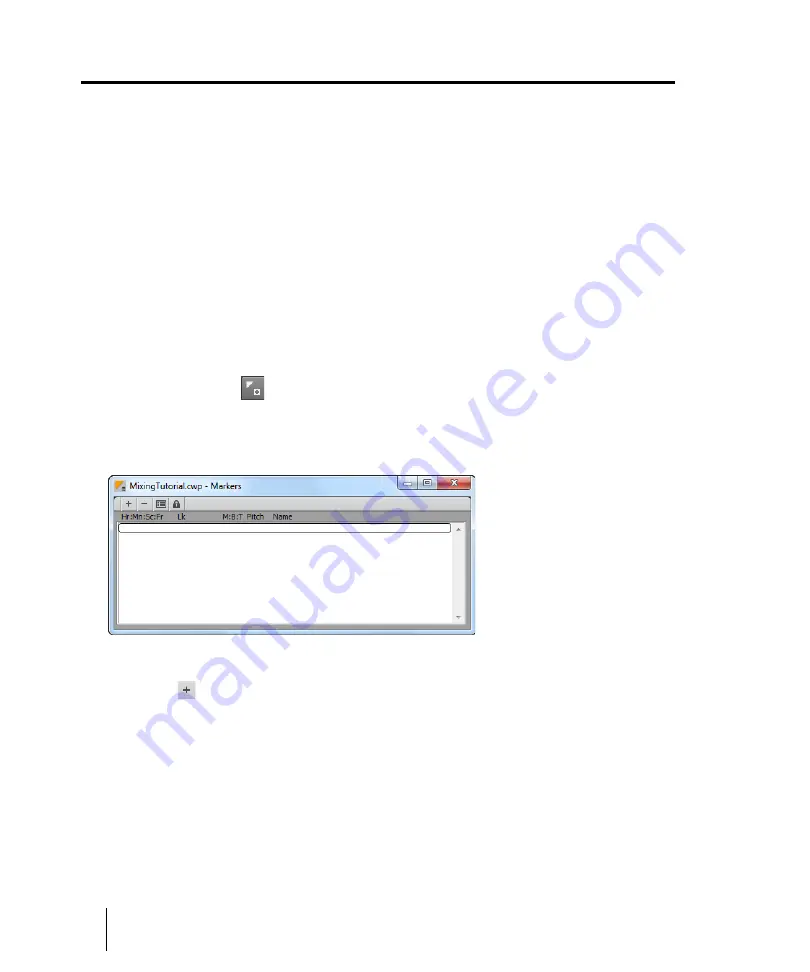
Let’s open the Markers view by selecting
Views > Markers
.
The Markers view is very handy when working with events in a film. The first thing we want to do is
add a new marker to the project, indicating the start of the project. To do this, click the
Insert
Markers
button
to open the
Marker
dialog box.
Summary of Contents for sonar x3
Page 1: ...SONAR X3 Reference Guide...
Page 4: ...4 Getting started...
Page 112: ...112 Tutorial 1 Creating playing and saving projects Saving project files...
Page 124: ...124 Tutorial 3 Recording vocals and musical instruments...
Page 132: ...132 Tutorial 4 Playing and recording software instruments...
Page 142: ...142 Tutorial 5 Working with music notation...
Page 150: ...150 Tutorial 6 Editing your music...
Page 160: ...160 Tutorial 7 Mixing and adding effects...
Page 170: ...170 Tutorial 8 Working with video Exporting your video...
Page 570: ...570 Control Bar overview...
Page 696: ...696 AudioSnap Producer and Studio only Algorithms and rendering...
Page 720: ...720 Working with loops and Groove Clips Importing Project5 patterns...
Page 820: ...820 Drum maps and the Drum Grid pane The Drum Grid pane...
Page 848: ...848 Editing audio Audio effects audio plug ins...
Page 878: ...878 Software instruments Stand alone synths...
Page 1042: ...1042 ProChannel Producer and Studio only...
Page 1088: ...1088 Sharing your songs on SoundCloud Troubleshooting...
Page 1140: ...1140 Automation Recording automation data from an external controller...
Page 1178: ...1178 Multi touch...
Page 1228: ...1228 Notation and lyrics Working with lyrics...
Page 1282: ...1282 Synchronizing your gear MIDI Machine Control MMC...
Page 1358: ...1358 External devices Working with StudioWare...
Page 1362: ...1362 Using CAL Sample CAL files...
Page 1386: ...1386 Troubleshooting Known issues...
Page 1394: ...1394 Hardware setup Set up to record digital audio...
Page 1400: ...1400 MIDI files...
Page 1422: ...1422 Initialization files Initialization file format...
Page 1463: ...1463 Misc enhancements New features in SONAR X3...
Page 1470: ...1470 Comparison...
Page 1518: ...1518 Included plug ins Instruments...
Page 1532: ...1532 Cyclone Using Cyclone...
Page 1694: ...1694 Beginner s guide to Cakewalk software Audio hardware sound cards and drivers...
Page 1854: ...1854 Preferences dialog Customization Nudge Figure 518 The Nudge section...
Page 1856: ...1856 Preferences dialog Customization Snap to Grid Figure 519 The Snap to Grid section...
Page 1920: ...1920 Snap Scale Settings dialog...
Page 2042: ...2042 View reference Surround panner...


