background image

4

Installation / 

Assemb

ly

Cal Flame Side Burners

LTR50001082, Rev. B

www.calspas.com

Installation / Assembly

Most cities and counties require permits for exterior construction and 

electrical circuits. In addition, some communities have codes requiring 

residential barriers such as fencing and/or self-closing gates on prop-

erty to prevent unsupervised access to the property by children under 

the age of five. Your dealer can provide information on which permits 

may be required and how to obtain them prior to the delivery of your 

equipment.
We recommend the installation, adjustment and service of your new 

side burner be performed by LMS qualified installers and service tech

-

nicians to ensure proper operation and prevent accidents.
When planning your Cal Flame side burner location, access to gas lines 

should be considered. The location with the shortest  gas line run is 

recommended.
When determining a suitable location, consider factors such as expo-

sure to wind, proximity to traffic paths, and windows that open into 

the home.

Cabinet Cut-out Dimensions

Your Cal Flame side burner is de

-

signed  for  easy  installation  into  a 

non-combustible  enclosure.  The 

supporting  deck  or  counter  must 

be flat and level. When determin

-

ing  the  final  location  of  your  side 

burner, adequate cross ventilation 

must  be  present  to  prevent  gas 

from being trapped in the event of 

a leak. 
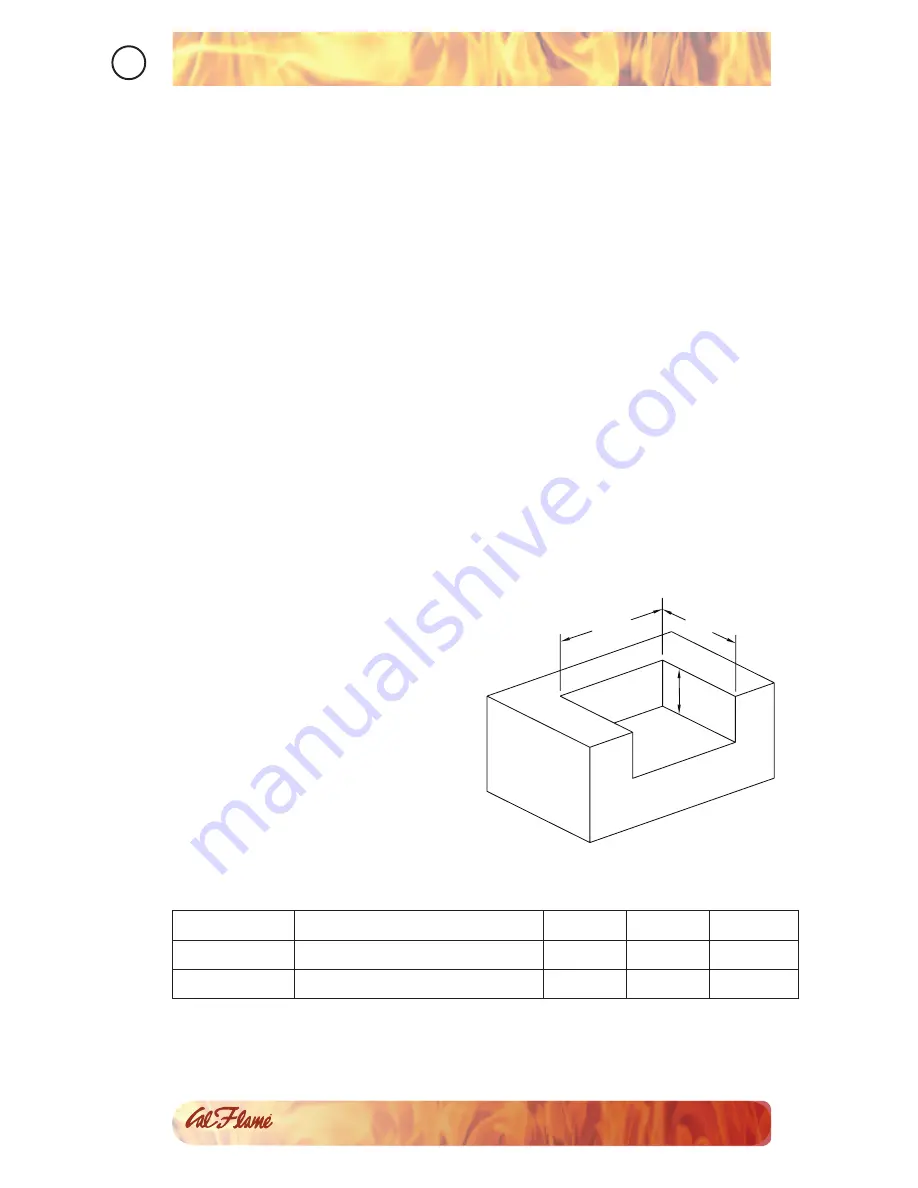
The drawing at right shows the dif-

ferent types of cabinet cut-out di-

mensions for slide-in side burners. 

Model

Description

Width

Depth Height

BBQ08954P Deluxe Side by Side Burner

25 ¼”

12 ½”

7 ¼”

BBQ08899P Deluxe Double Side Burner

12 ¼”

22”

7 ¼”

WIDTH

DEPTH

HEIGHT

Summary of Contents for BBQ08852P

Page 1: ......

Page 2: ...de Burner with a Grill 10 Using Your Side Burner Lighting the Side Burner 12 Basic Side Burner Operation 14 Cleaning and Maintenance Stainless Steel Care and Cleaning 15 Covering Your Side Burner 18 A...

Page 3: ...ea surrounding your new side burner should be kept clean and free from flammable liquids and other combustible materials such as mops rags or brooms as well as solvents cleaning fluids and gasoline Do...

Page 4: ...nd pans boil overs will cause smoking and greasy boil overs may ignite Always use the proper size pan Select utensils with flat bottoms large enough to cover the burner The use of under sized utensils...

Page 5: ...gas and airflow to the burner ports This creates a dangerous condition that can result in a fire behind the valve pan el Inspect and clean the burners periodically and follow the guide lines in the C...

Page 6: ...on and prevent accidents When planning your Cal Flame side burner location access to gas lines should be considered The location with the shortest gas line run is recommended When determining a suitab...

Page 7: ...lt your Cal Flame dealer for information on converting your side burner Owners must not convert their side burners themselves At tempting to convert the side burner from LP to NG may result in serious...

Page 8: ...sure all the control knobs are in the OFF position 2 Turn on the gas 3 Apply the leak testing solution by spraying it on joints of the gas 4 delivery system Blowing bubbles in the soap solution indic...

Page 9: ...WARNING Attempting to operate the side burner unit without the gas regulator installed could cause an explosion and possible death Cylinder Specification Any LP gas supply cylinder used with this sid...

Page 10: ...ach opening shall have a total free area of not less than one square inch per pound 7 1 cm kg of stored fuel capacity and not less than a total free area of 10 square inches 64 5 cm Ventilation openin...

Page 11: ...during any pressure testing of the gas supply piping system at test pressures equal to or less than 0 5 psi 3 5 kPa The side burner and its individual shutoff valve must be disconnected from the gas...

Page 12: ...ealant Use only sealant that is approved for use on LP gas Install the pipe tee assembly to the grill intake pipe Tighten as 2 sembly and align the branch opening of the tee with the hole of the cabin...

Page 13: ...the grill Use gas rated tape seal on all connections Open barbecue door Install hose with regulator on propane tank Then connect the other end to T adapter Make sure to use gas rated tape seal when in...

Page 14: ...side burner Do not heat sealed containers such as cans or jars on side burners Explosion may result resulting in injury or death Any sealed con tainer such as a pressure cooker must have a properly op...

Page 15: ...closed or the back burner with its cover installed Electronically Lighting the Side Burners Open the hood 1 Keep your face as far away from the burners as possible 2 Rapidly rotate the burner knob co...

Page 16: ...nds turn the control knobs to the OFF position Wait five minutes until the gas clears before attempting to light it again If the burner does not light after several attempts see Trouble 7 shooting Gui...

Page 17: ...your stainless steel Although stainless steel will discolor and accumulate grime with regular use it can keep its original shine with periodic cleaning We strongly recommend using a surface protectan...

Page 18: ...stainless steel Mild dish detergent such as Dawn Formula 409 Fantastik Sheila Shine exterior ONLY WD 40 exterior ONLY We have had best success with Sheila Shine but WD 40 works very well too Sheila Sh...

Page 19: ...nd rub with the grain over the surface of the appliance Using a clean terry cloth or paper towel polish the appliance by rubbing with the grain until excess liquid is removed and the surface shines It...

Page 20: ...significant rust or corrosion use a Scotch Brite scrubber Both of these products will act as a surface protectant and help resist smudges stains and rust Caution Although nitric acid also called aqua...

Page 21: ...is free of any debris dust or grease If there is no spark at all replace the electrode or igniter wire Note Turn off the gas at the source while troubleshoot ing Problem Obstruction in the gas line S...

Page 22: ...is next to but does not touch the brass burner It should be pointing straight up and free of grease to allow proper sparking The ignition wire should be connected firmly to the valve ignition device a...

Page 23: ...contains orifices to convert five main burners two small rear infrared burners one large infrared burner and two side burners You will not need all of the parts in the kit Before you begin make certa...

Page 24: ...urner Model Cover Part Number Cover Size BBQ08852P Standard Single Flat Side Burner CVRSBR050 G 11 x 17 x 5 BBQ08953P Standard Side By Side Burner CVRSBR052 G 24 x 19 x 6 BBQ08899P Deluxe Double Side...

Page 25: ...service contact the selling dealer In the event the consumer is unable to obtain satisfactory customer service from the selling dealer or service agent written notification must be given to the LMS Cu...

Page 26: ...is retroactive and applies to all side burners and hardware manufactured from 2000 and hereafter Examples of common acts invalidating this warranty include but are not limited to Scratches caused by...

Page 27: ...mer Service For customer service contact the authorized selling dealer immedi ately If you need additional information or assistance please contact the LMS Customer Relations Department at 1462 E Nint...

Page 28: ...service please contact your authorized dealer immediately If you need additional information and or assistance please contact Customer Service Department 1462 East Ninth Street Pomona CA 91766 Toll F...

Reviews: